> ## Documentation Index
> Fetch the complete documentation index at: https://docs.galileo.ai/llms.txt
> Use this file to discover all available pages before exploring further.
# Run Experiments in Playgrounds
> Learn about running experiments in the Galileo console using playgrounds and datasets
This section will guide you through the process of running experiments in the Galileo Console.
## Experiment walkthrough
Follow these steps to test and improve your AI projects using [Galileo's Console UI](https://app.galileo.ai).
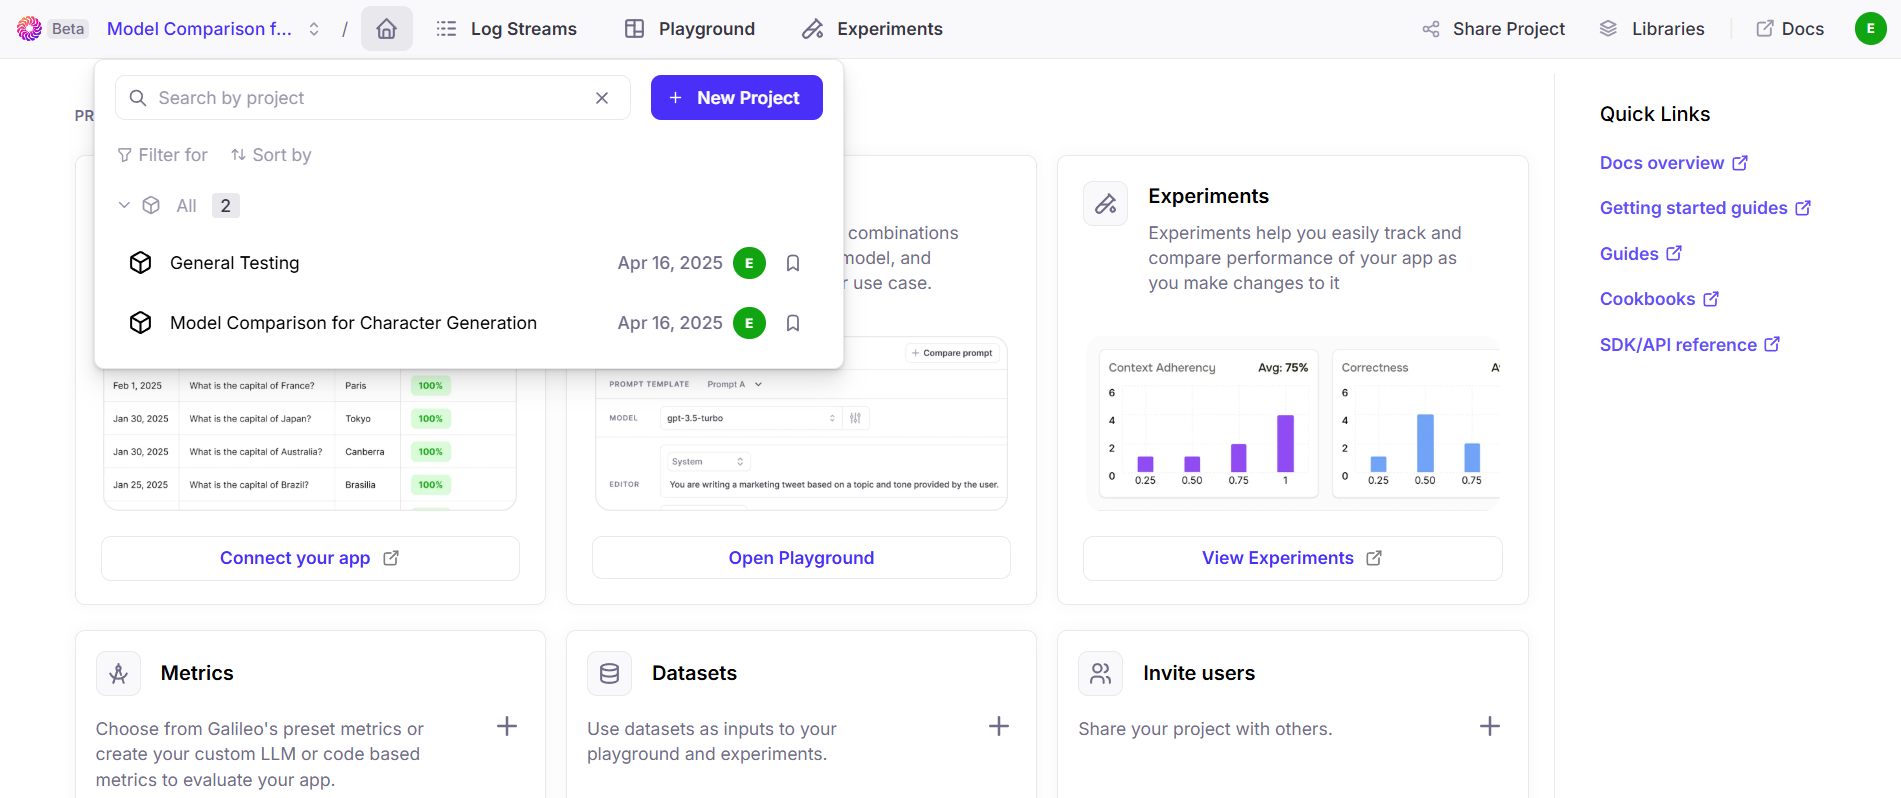
In the [Galileo Console](https://app.galileo.ai), use the **drop down menu in the top-left** to select the project you would like to experiment with. Or, create a new project.
Then, click the **"Open Playground"** button to access the Galileo Console.
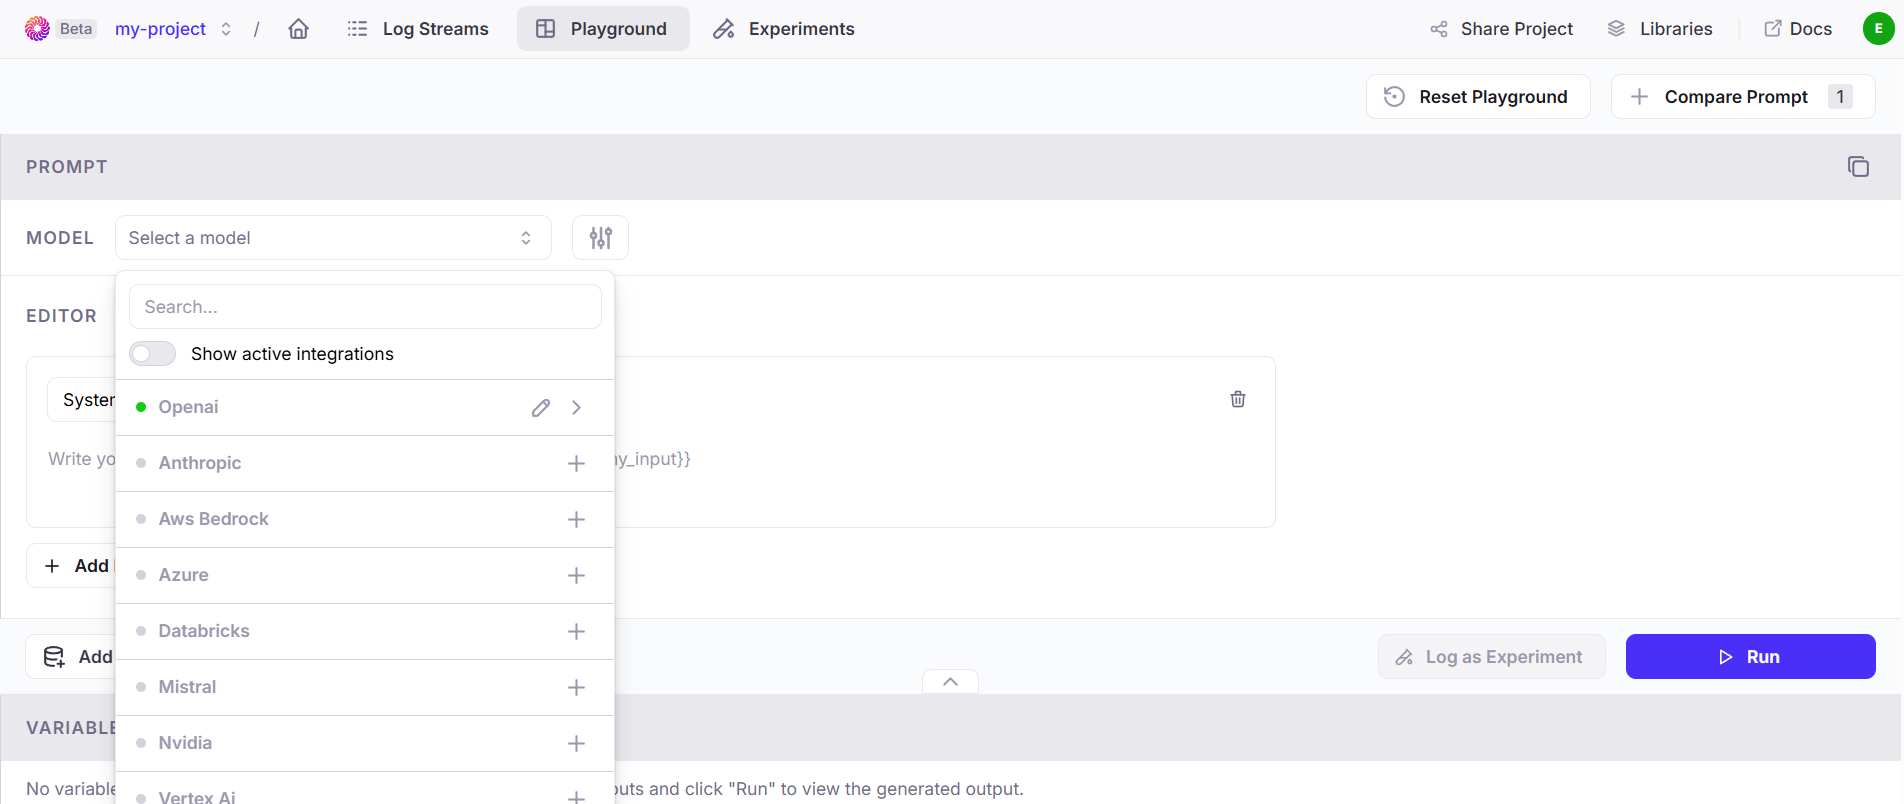
 In the Galileo Console, **select a model** using the "Model" drop down menu.
Some models require that you **enter your corresponding API key**. Visit their respective API platforms to obtain your keys, then add it using the [integrations page](https://app.galileo.ai/settings/integrations) in the Galileo Console.
In the Galileo Console, **select a model** using the "Model" drop down menu.
Some models require that you **enter your corresponding API key**. Visit their respective API platforms to obtain your keys, then add it using the [integrations page](https://app.galileo.ai/settings/integrations) in the Galileo Console.
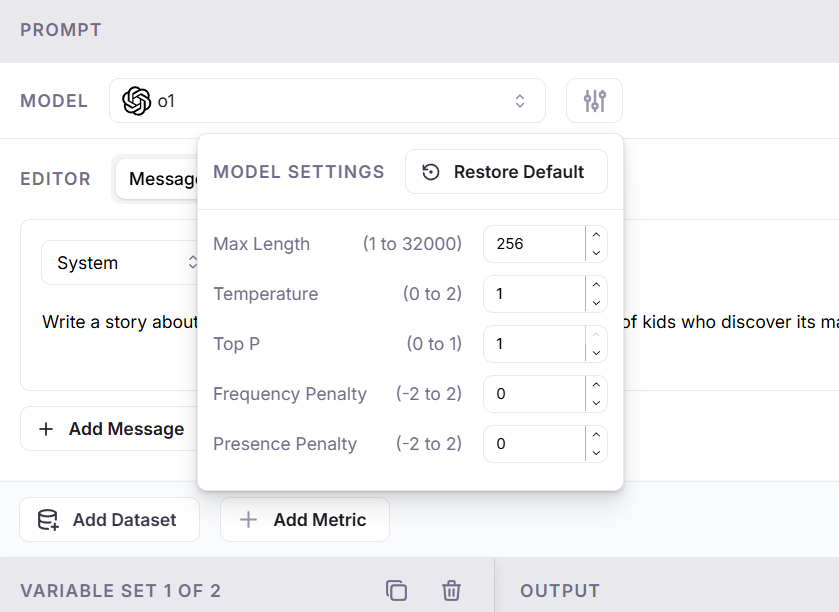
 Click the settings icon **to the right of your model name** to adjust its behavior:
* **Max Length:** Sets the maximum number of tokens the model can generate in its output.
* **Temperature:** Controls randomness in output—higher values make responses more creative, lower values make them more focused and deterministic.
* **Top P:** Limits sampling to the most likely tokens whose cumulative probability is within this threshold (a form of nucleus sampling).
* **Frequency Penalty:** Reduces the likelihood of the model repeating the same tokens by penalizing frequent ones.
* **Presence Penalty:** Discourages the model from mentioning tokens that have already appeared, promoting new content.
Click the settings icon **to the right of your model name** to adjust its behavior:
* **Max Length:** Sets the maximum number of tokens the model can generate in its output.
* **Temperature:** Controls randomness in output—higher values make responses more creative, lower values make them more focused and deterministic.
* **Top P:** Limits sampling to the most likely tokens whose cumulative probability is within this threshold (a form of nucleus sampling).
* **Frequency Penalty:** Reduces the likelihood of the model repeating the same tokens by penalizing frequent ones.
* **Presence Penalty:** Discourages the model from mentioning tokens that have already appeared, promoting new content.
 There are **two ways** to set the prompt data for your experiment:
* **Option 1**: Add prompts and variables through the console UI. Ideal for quick tests.
* **Option 2**: Use datasets from past experiments or create new ones. Ideal for real, fully-configured experiments.
### Add prompt and variables
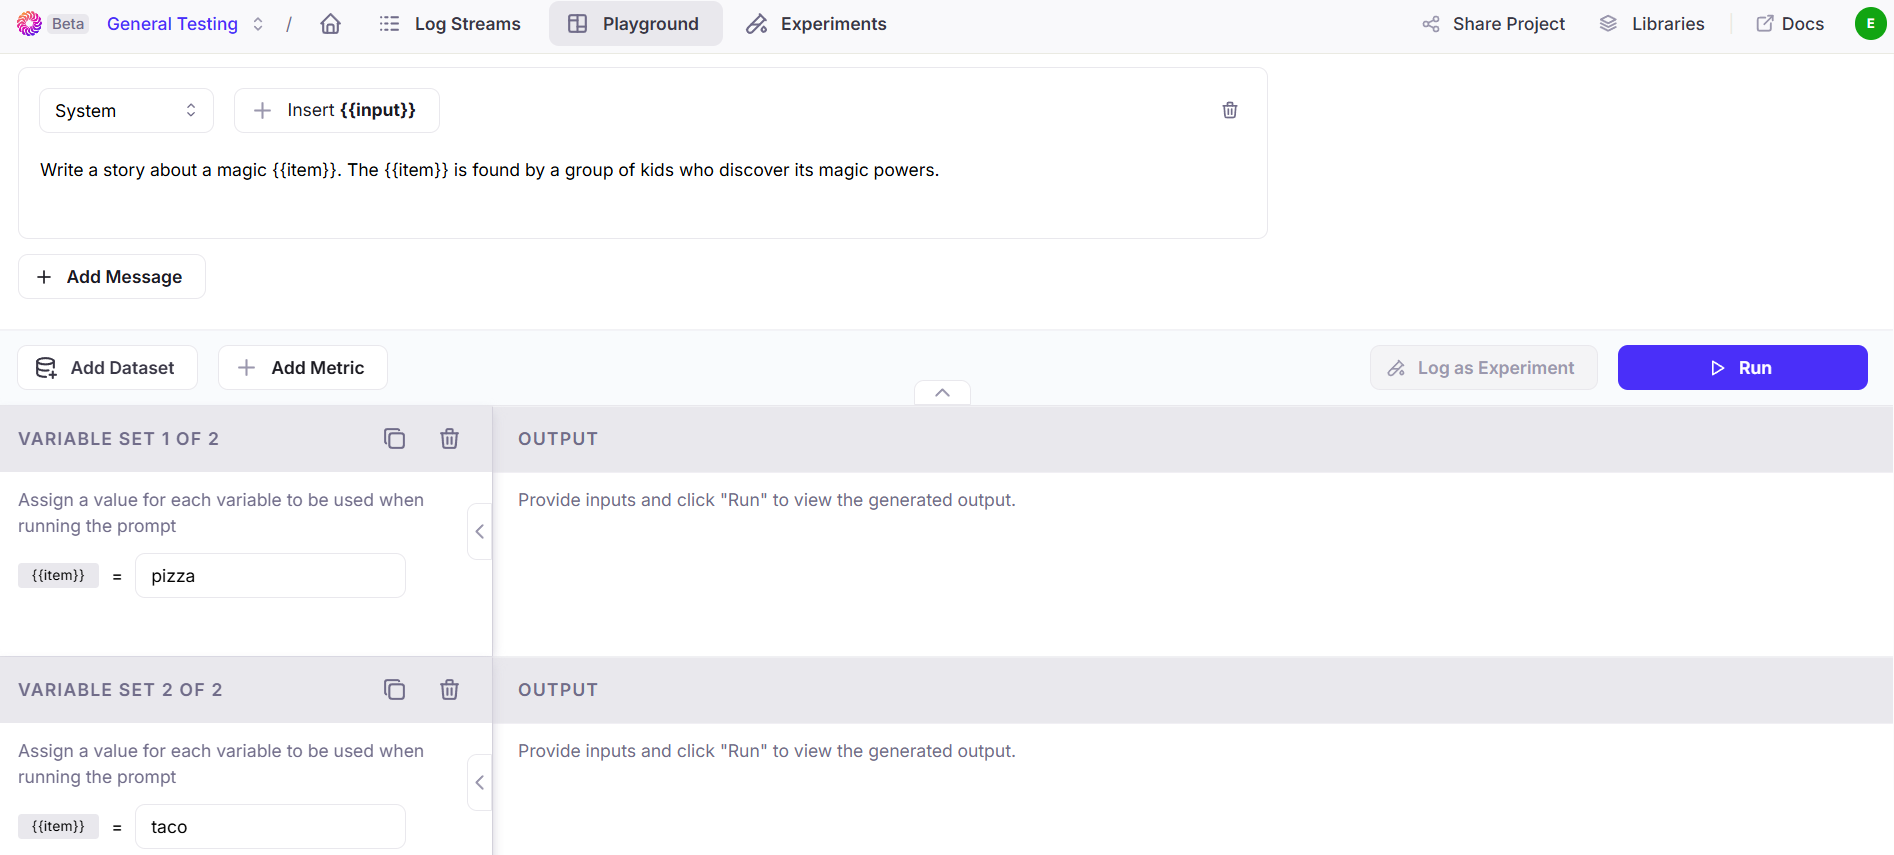
In the Editor section, **add your prompt**.
In your prompt, you can use **variable names with curly brackets** (e.g. `{{variable_name}}`). Add new variable options with the **new tab icon** next to "Variable Set" and fill them in with different values to be used in place of your variable.
You can also use **nested variables** by entering JSON formatted key-value pairs into the "Variable Set" text input field. Then, refer to their values with either `{{key}}` or `{{input.key}}`
```json theme={null}
{
"pepperoni": "pepperoni pizza",
"anchovy": "pizza with anchovies"
}
```
In this example, both `{{pepperoni}}` and `{{input.pepperoni}}` will result in "pepperoni pizza" being used in the prompt. This approach is great for testing how changing individual words in a prompt structure affects outputs.
Add new messages beyond the initial prompt with the "+ Add Message" button **below the prompt field**. New messages can be from the user or the model ("system").
There are **two ways** to set the prompt data for your experiment:
* **Option 1**: Add prompts and variables through the console UI. Ideal for quick tests.
* **Option 2**: Use datasets from past experiments or create new ones. Ideal for real, fully-configured experiments.
### Add prompt and variables
In the Editor section, **add your prompt**.
In your prompt, you can use **variable names with curly brackets** (e.g. `{{variable_name}}`). Add new variable options with the **new tab icon** next to "Variable Set" and fill them in with different values to be used in place of your variable.
You can also use **nested variables** by entering JSON formatted key-value pairs into the "Variable Set" text input field. Then, refer to their values with either `{{key}}` or `{{input.key}}`
```json theme={null}
{
"pepperoni": "pepperoni pizza",
"anchovy": "pizza with anchovies"
}
```
In this example, both `{{pepperoni}}` and `{{input.pepperoni}}` will result in "pepperoni pizza" being used in the prompt. This approach is great for testing how changing individual words in a prompt structure affects outputs.
Add new messages beyond the initial prompt with the "+ Add Message" button **below the prompt field**. New messages can be from the user or the model ("system").
 ### Add dataset
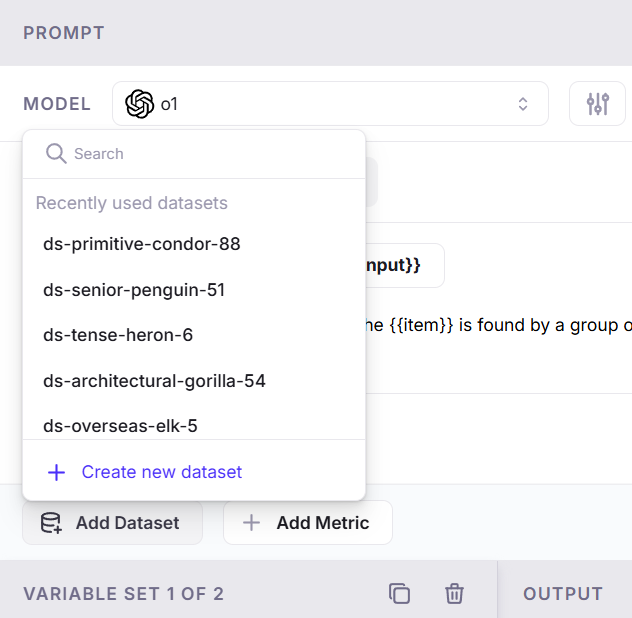
Click the "Add Dataset" button to **choose a dataset** to be used by your model.
The datasets listed are from your past experiments. You can also [add your own](/sdk-api/experiments/datasets) by clicking "Create new dataset".
[Learn more about datasets →](/sdk-api/experiments/datasets)
### Add dataset
Click the "Add Dataset" button to **choose a dataset** to be used by your model.
The datasets listed are from your past experiments. You can also [add your own](/sdk-api/experiments/datasets) by clicking "Create new dataset".
[Learn more about datasets →](/sdk-api/experiments/datasets)
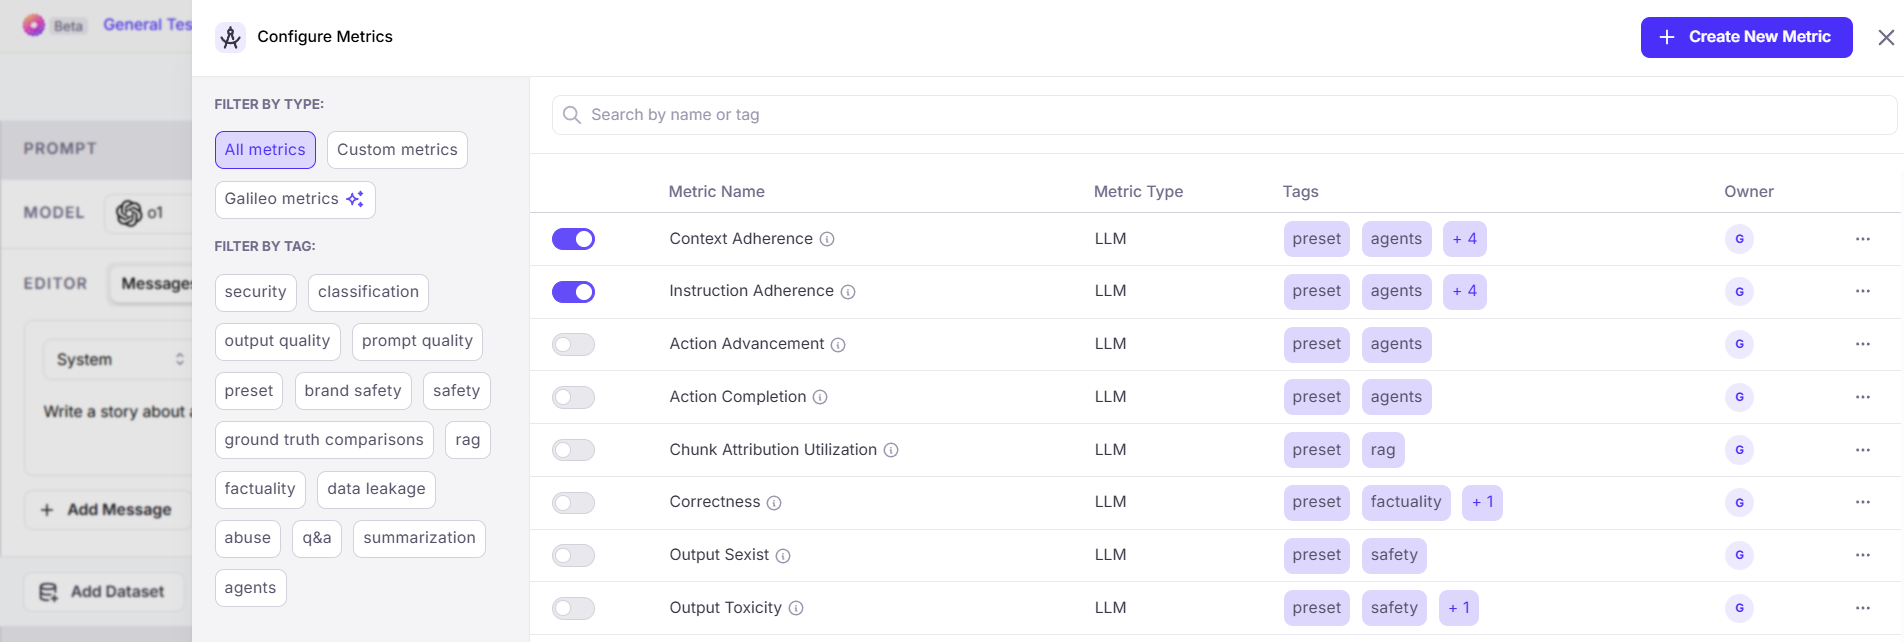
 Click the "+ Add Metric" button to **choose metrics** by which your experiment's outputs are measured.
Filter and select from the preset metrics, or add your own by clicking "+ Create New Metric" in the top-right.
Scores are produced for each selected metric after running an experiment.
[Learn more about metrics →](/concepts/metrics/overview)
Click the "+ Add Metric" button to **choose metrics** by which your experiment's outputs are measured.
Filter and select from the preset metrics, or add your own by clicking "+ Create New Metric" in the top-right.
Scores are produced for each selected metric after running an experiment.
[Learn more about metrics →](/concepts/metrics/overview)
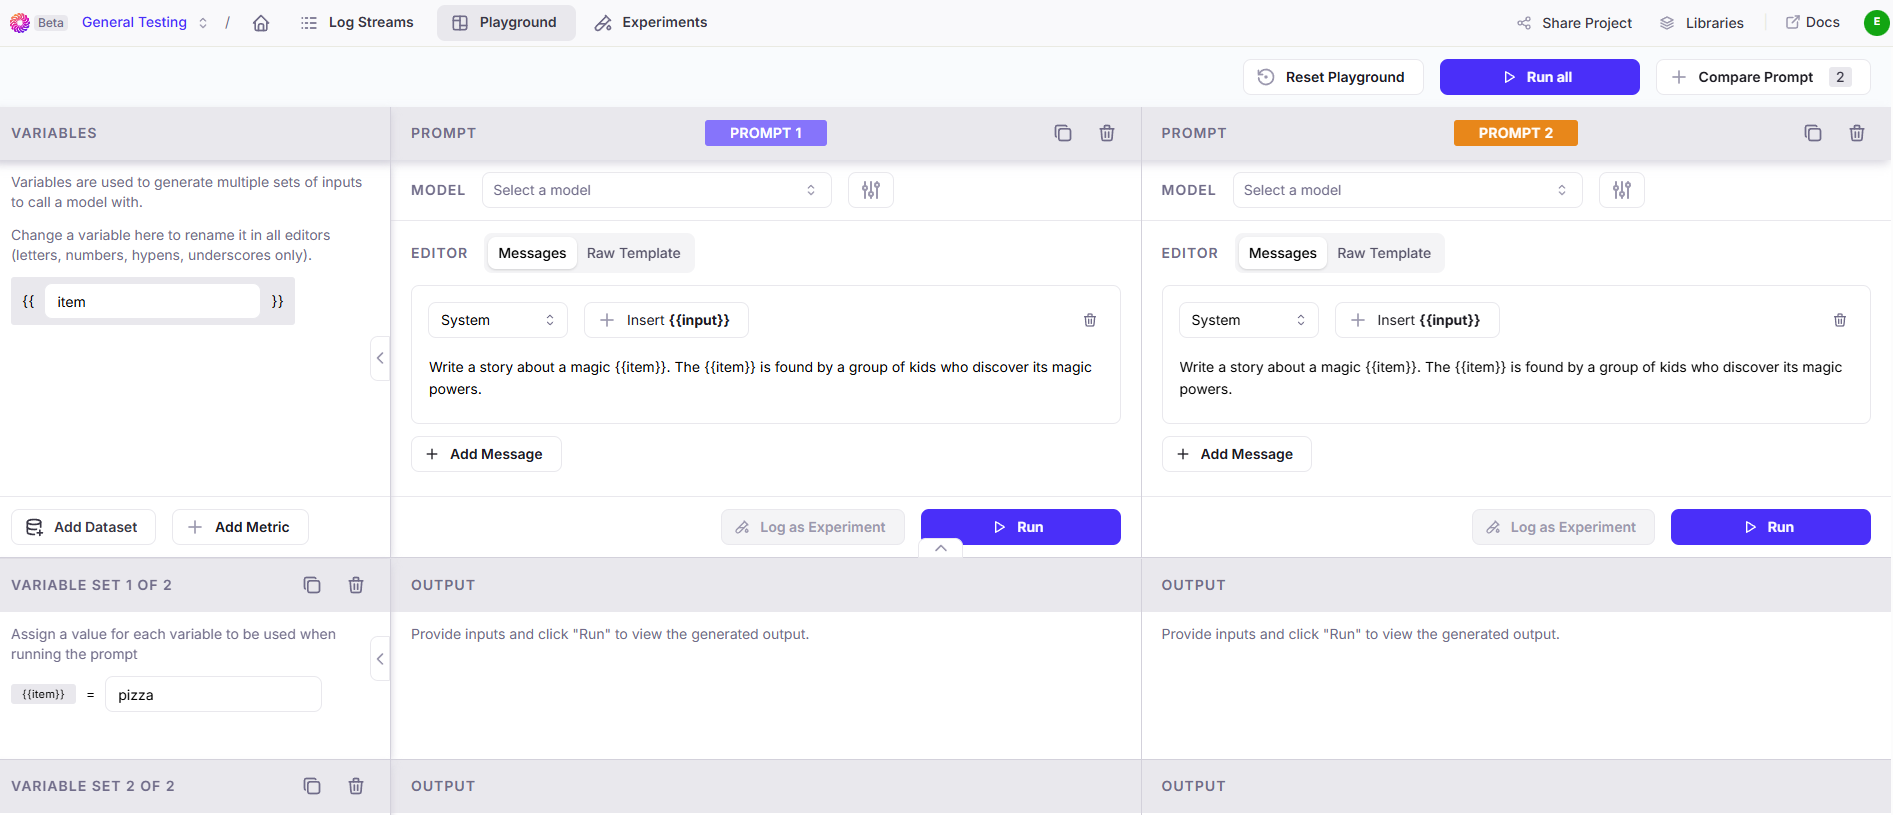
 Add **additional prompt sections** with the "+ Compare Prompt" button in the top-right.
Each new prompt section can have its own distinct configuration of:
* Model
* Model settings
* Prompt
* Message conversation
Add new prompt sections and **customize their settings** as needed for your experiment.
Add **additional prompt sections** with the "+ Compare Prompt" button in the top-right.
Each new prompt section can have its own distinct configuration of:
* Model
* Model settings
* Prompt
* Message conversation
Add new prompt sections and **customize their settings** as needed for your experiment.
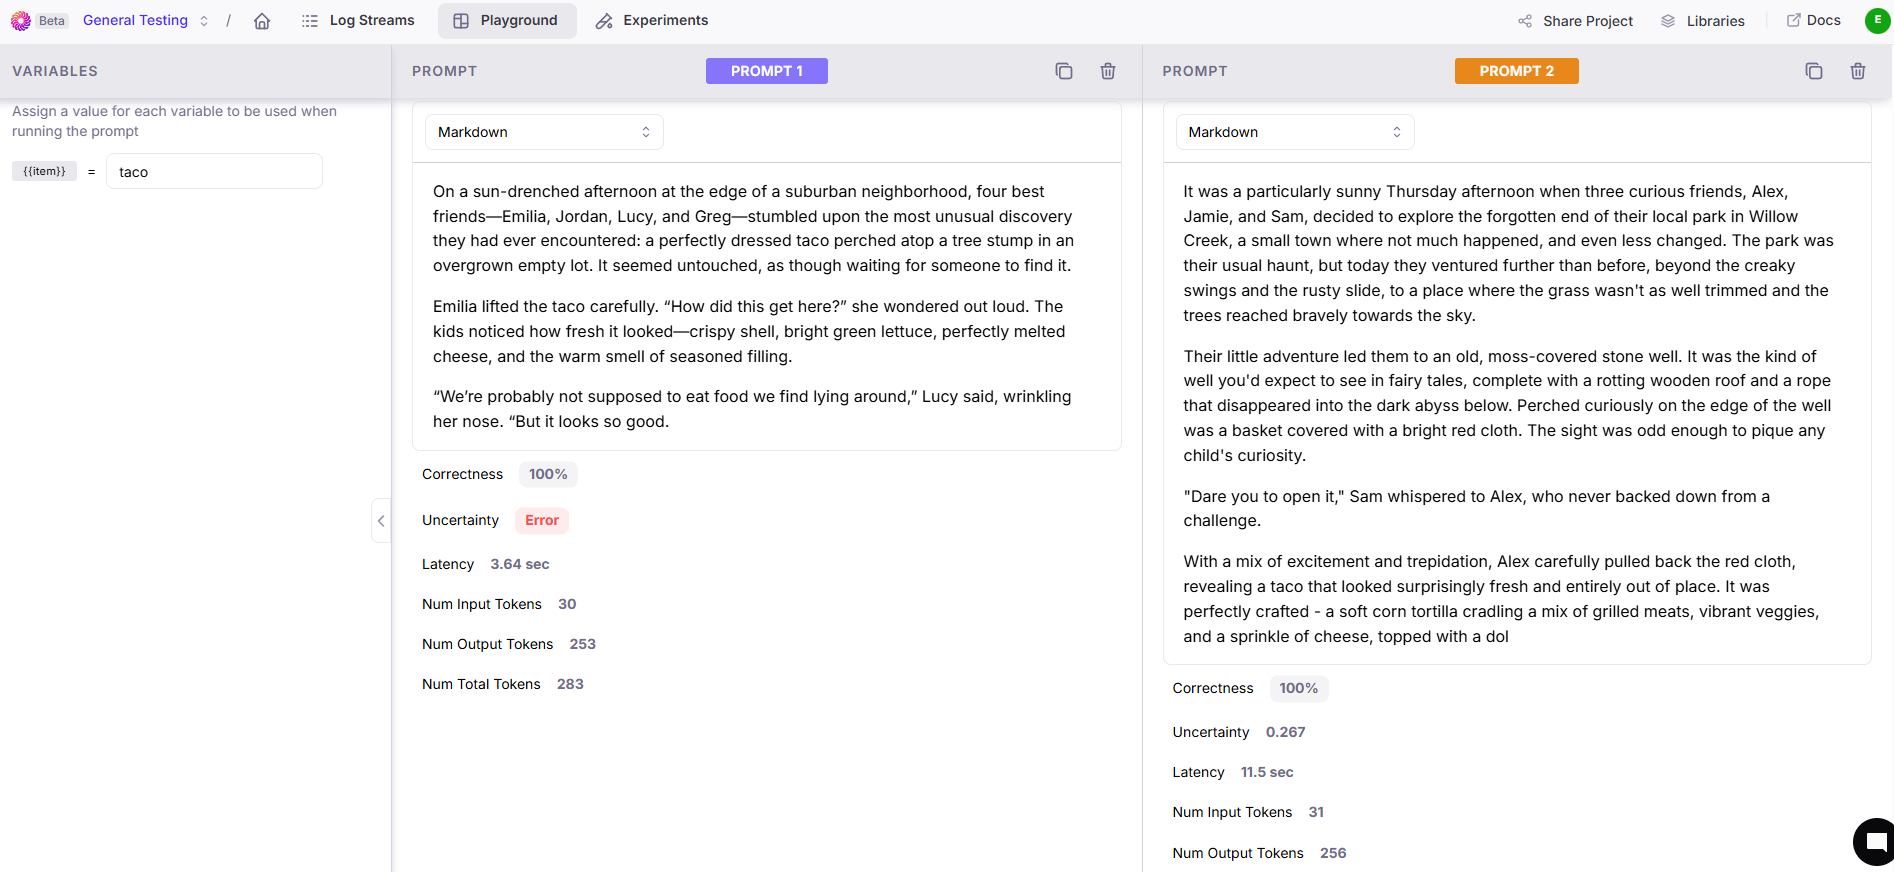
 Click the **"Run All" button in the top-right** to run your experiments, generate outputs, and calculate evaluations based on your chosen metrics.
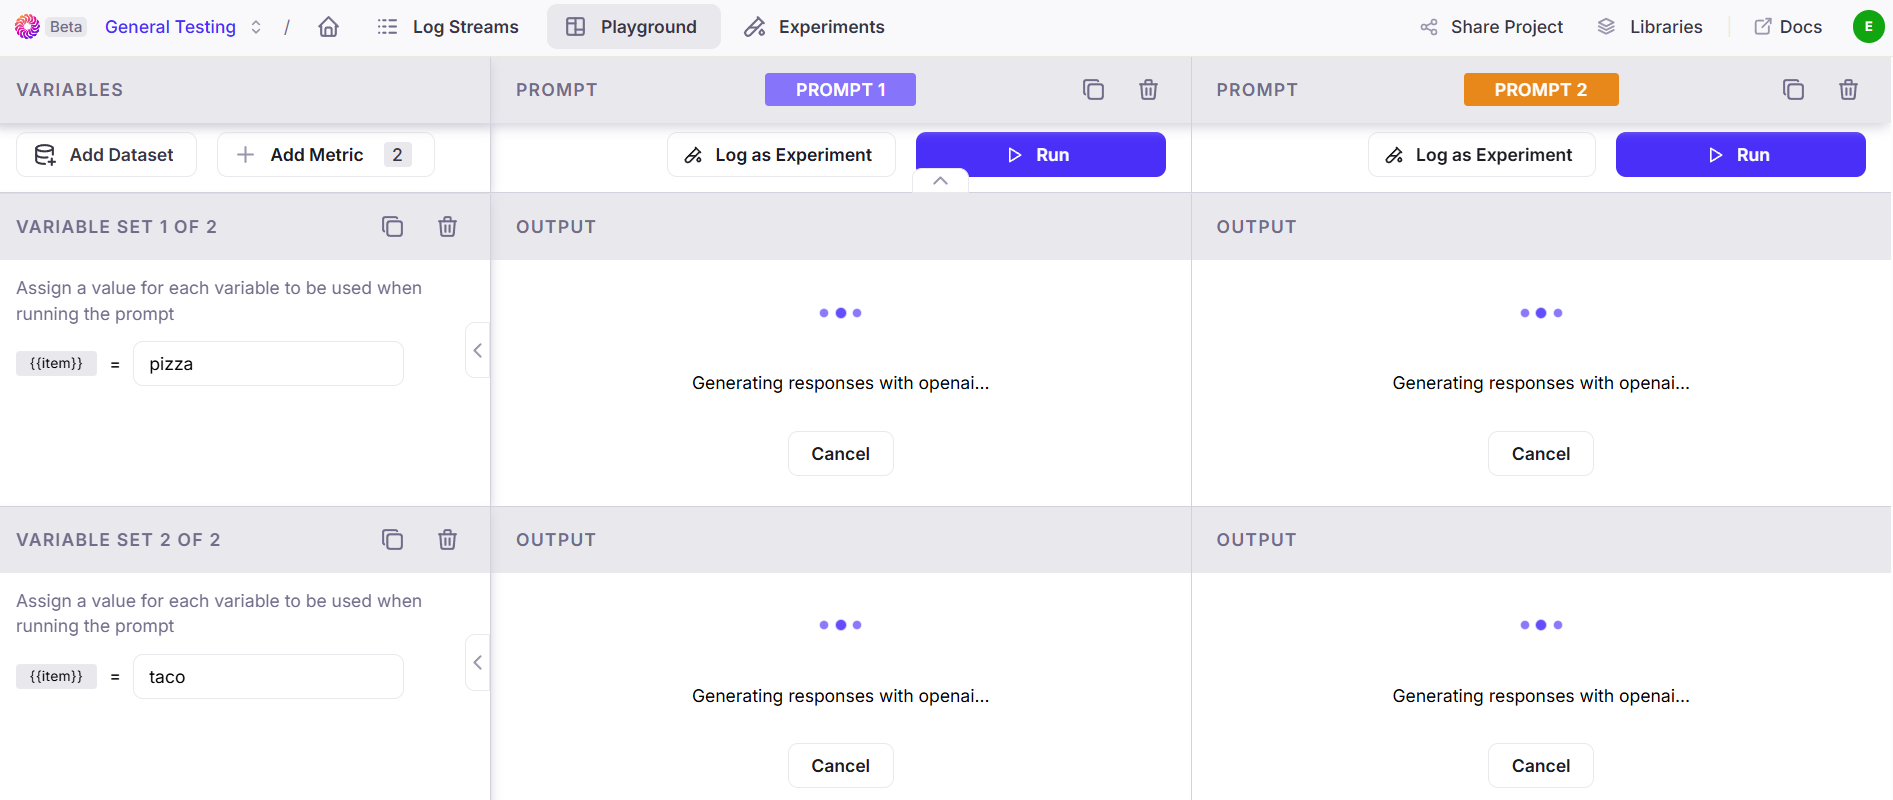 After the experiment has completed, **scroll down** to view their outputs and evaluations.
The more distinct prompts and variable sets you used, the more results there will be.
After the experiment has completed, **scroll down** to view their outputs and evaluations.
The more distinct prompts and variable sets you used, the more results there will be.
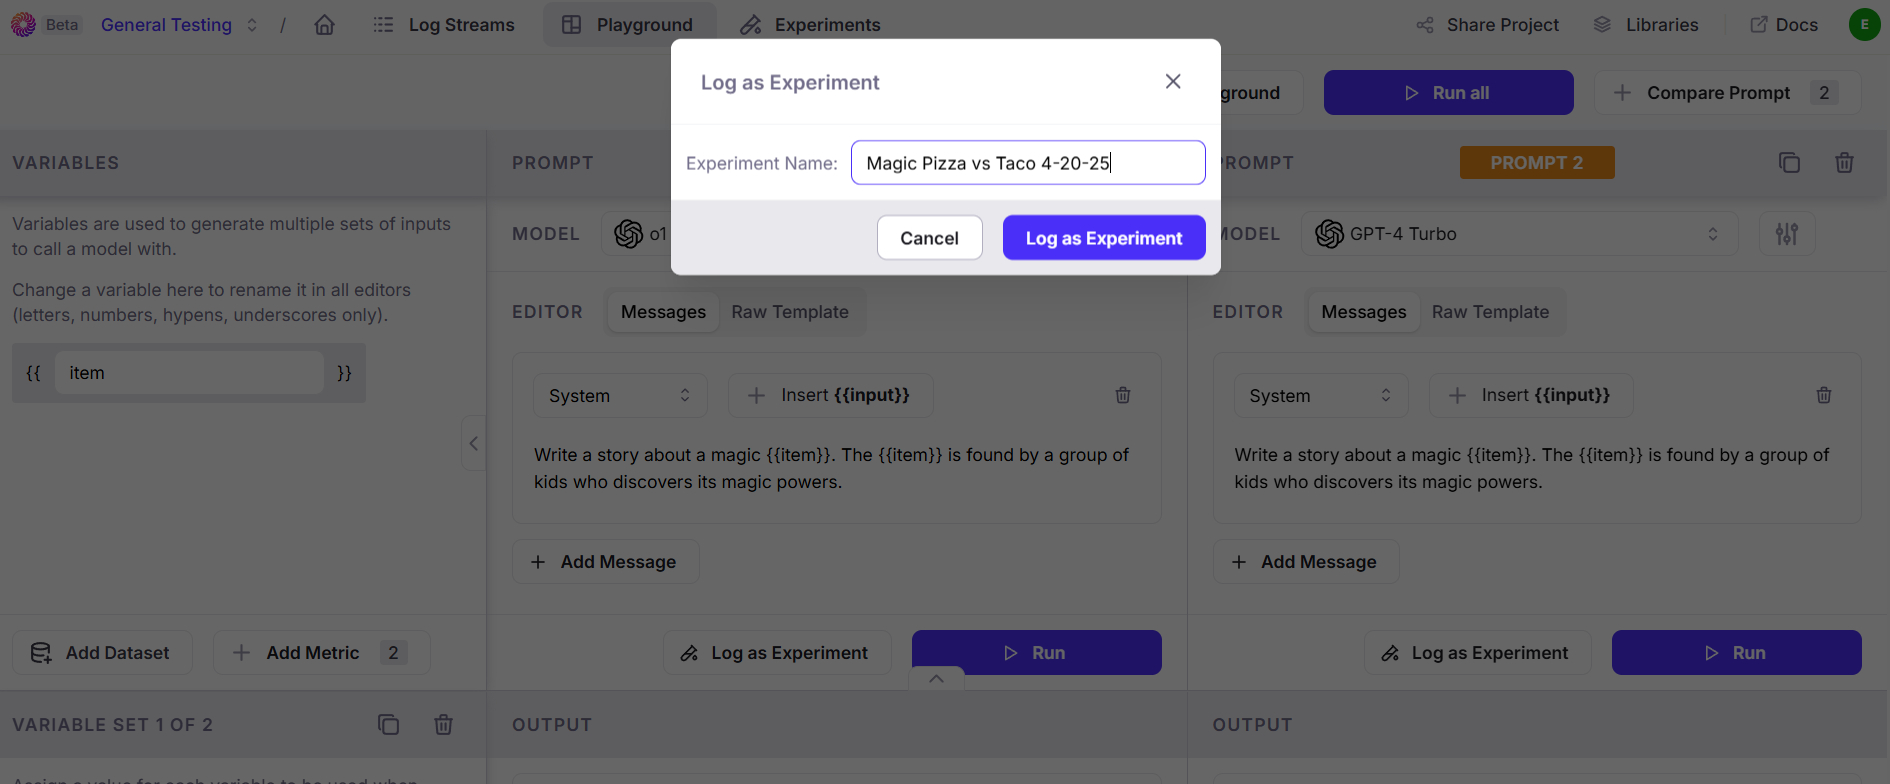
 Click the "Log as Experiment" button above the outputs to **record all the details of the experiment**.
Use a **descriptive name** for your experiment so that it's easy to keep track of your progress.
[Learn more about logging →](/sdk-api/logging/logging-basics)
Click the "Log as Experiment" button above the outputs to **record all the details of the experiment**.
Use a **descriptive name** for your experiment so that it's easy to keep track of your progress.
[Learn more about logging →](/sdk-api/logging/logging-basics)
 That's it! Now, further customize and configure your experiment to meet your testing goals. Log your experiment results, and create new projects to try out different configurations.
If you encounter any errors, visit our [Common Errors guide](/references/faqs/errors).
## Experiment settings and options
That's it! Now, further customize and configure your experiment to meet your testing goals. Log your experiment results, and create new projects to try out different configurations.
If you encounter any errors, visit our [Common Errors guide](/references/faqs/errors).
## Experiment settings and options
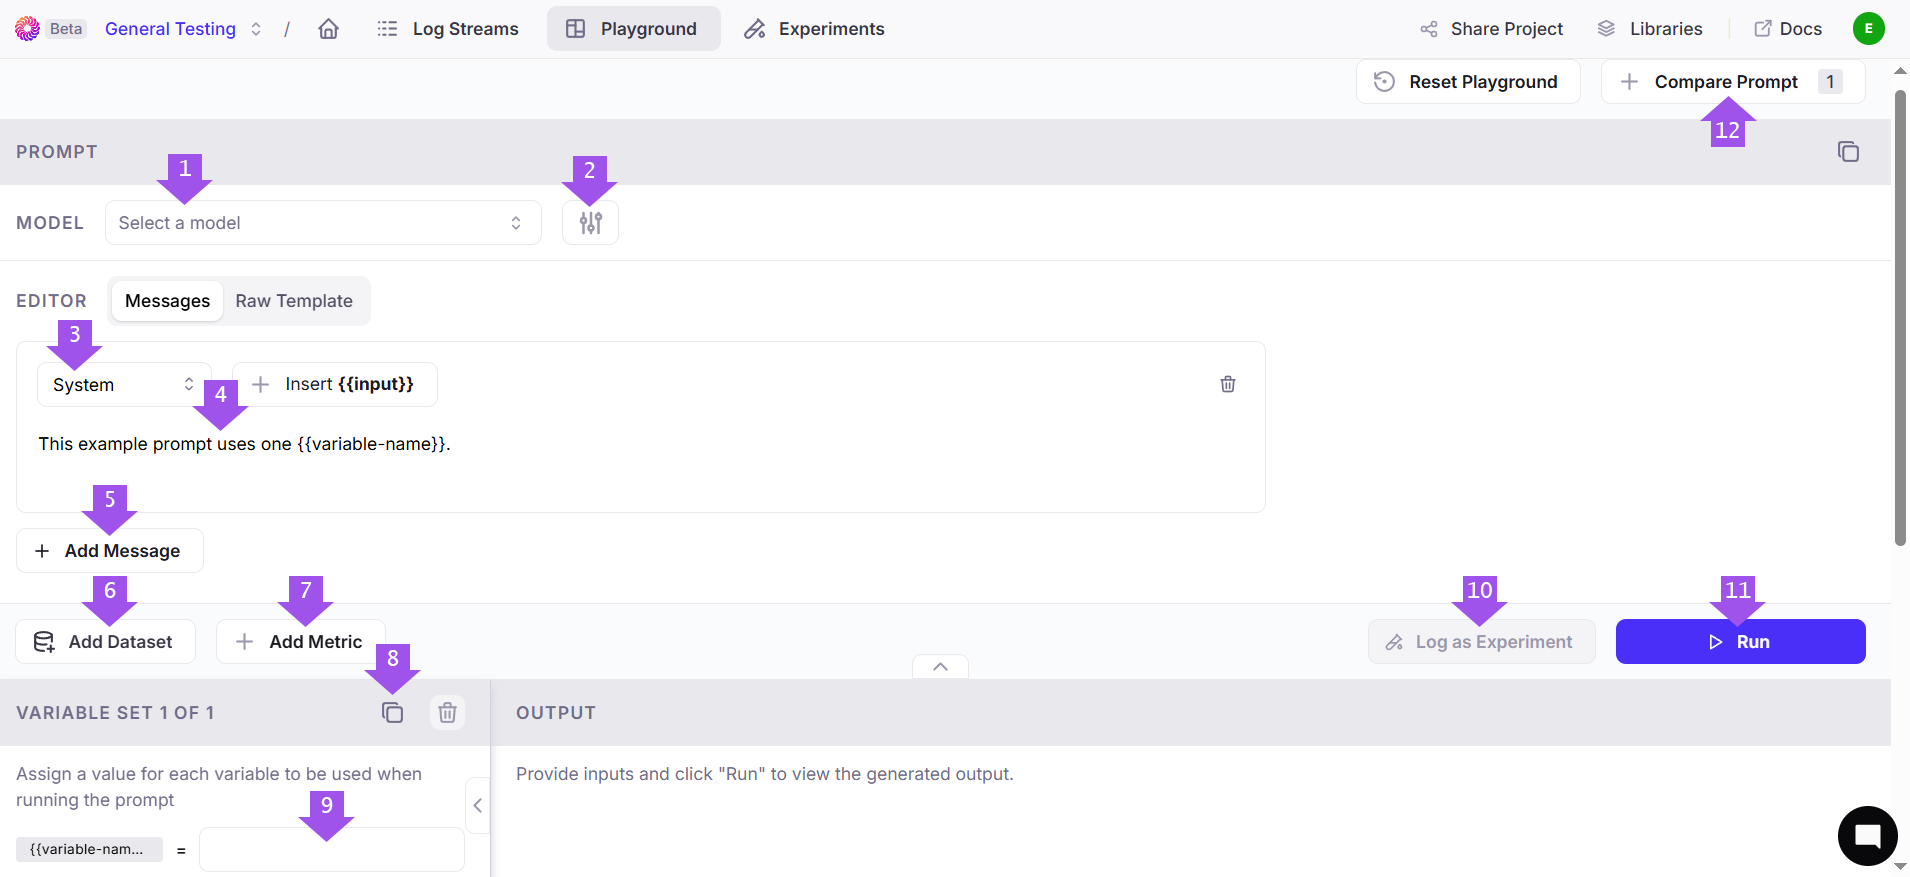 1. **Model Select** - choose model to be used with prompt/dataset (and enter API keys if necessary)
2. **Model Settings** - adjust model-specific settings.
3. **Message Originator** - select if the content of the prompt is from a user or from the model itself ("system").
4. **Prompt Entry** - add your prompt for the experiment. Use variables with curly brackets (e.g. `{{variable_name}}`) and add variable values in the variable entry field (#9). [Learn more about prompts and variables →](#add-prompt-and-variables)
5. **Add Message** - use a multi-prompt conversation in your experiment by adding new messages.
6. **Dataset Select** - instead of entering prompt(s), select a dataset of prompt data structures from a prior project, or add a new one. [Learn more about datasets →](/sdk-api/experiments/datasets)
7. **Metrics Select** - select metrics by which your experiment is evaluated. Select from Galileo's many presets, or create your own metrics. Scores are produced for each metric after running an experiment. [Learn more about metrics →](/concepts/metrics/overview)
8. **Add Variable Set** - add new groups of values for the variables used in your prompt. This adds a new "VARIABLE SET" section along the bottom of the screen.
9. **Variable Value Entry** - set the values of the variables used in your prompt.
10. **Log Experiment** - record your experiment's prompt data, settings, metric evaluations, and outputs. [Learn more about logging →](/sdk-api/logging/logging-basics)
11. **Run Individual Experiment** - run your experiment using its individual prompt data and settings. When using multiple prompts, a "Run All" button appears in the top-right to run all of your experiments.
12. **Add Prompt Section** - add a new prompt section. Each prompt section can be configured with different models and prompts to compare and contrast their outputs and metric evaluations. [Learn more about metrics →](/concepts/metrics/overview)
1. **Model Select** - choose model to be used with prompt/dataset (and enter API keys if necessary)
2. **Model Settings** - adjust model-specific settings.
3. **Message Originator** - select if the content of the prompt is from a user or from the model itself ("system").
4. **Prompt Entry** - add your prompt for the experiment. Use variables with curly brackets (e.g. `{{variable_name}}`) and add variable values in the variable entry field (#9). [Learn more about prompts and variables →](#add-prompt-and-variables)
5. **Add Message** - use a multi-prompt conversation in your experiment by adding new messages.
6. **Dataset Select** - instead of entering prompt(s), select a dataset of prompt data structures from a prior project, or add a new one. [Learn more about datasets →](/sdk-api/experiments/datasets)
7. **Metrics Select** - select metrics by which your experiment is evaluated. Select from Galileo's many presets, or create your own metrics. Scores are produced for each metric after running an experiment. [Learn more about metrics →](/concepts/metrics/overview)
8. **Add Variable Set** - add new groups of values for the variables used in your prompt. This adds a new "VARIABLE SET" section along the bottom of the screen.
9. **Variable Value Entry** - set the values of the variables used in your prompt.
10. **Log Experiment** - record your experiment's prompt data, settings, metric evaluations, and outputs. [Learn more about logging →](/sdk-api/logging/logging-basics)
11. **Run Individual Experiment** - run your experiment using its individual prompt data and settings. When using multiple prompts, a "Run All" button appears in the top-right to run all of your experiments.
12. **Add Prompt Section** - add a new prompt section. Each prompt section can be configured with different models and prompts to compare and contrast their outputs and metric evaluations. [Learn more about metrics →](/concepts/metrics/overview)