> ## Documentation Index
> Fetch the complete documentation index at: https://docs.galileo.ai/llms.txt
> Use this file to discover all available pages before exploring further.
# Add Evaluations to a Multi-Agent LangGraph Application
> Learn how to add evaluations to a multi-agent LangGraph chat bot using Galileo
{/**/}
## Overview
In this tutorial, you'll learn how to add evaluations with Galileo to an existing multi-agent [LangGraph](https://www.langchain.com/langgraph) app. This tutorial is intended for Python LangGraph developers who already have an app and are looking to add evaluation. It assumes you have basic knowledge of:
* Python
* LangGraph
* [Setting up a project and metrics in Galileo](/getting-started/quickstart)
By the end of this tutorial, you'll be able to:
* Add Galileo evaluations to a multi-agent LangGraph app
* View and understand session level metrics
You can also watch the video walkthrough [on the Galileo YouTube](https://youtu.be/FZFhLK2xIik).
## Background
This tutorial uses an existing banking chatbot app powered by Chainlit and LangGraph. This is a very simplistic example of a chatbot for a fictitious bank. It is a multi-agent app, with a supervisor agent, and a single additional agent that can be used to answer questions on the credit cards offered by the bank. This agent uses some dummy credit card documents stored in a Pinecone vector database.
For example, you can ask questions like "What credit cards do you offer?" or "Which card has the lowest annual fee?"
These are the 2 agents:
* Credit card information agent
This agent provides information on the available credit cards.
```mermaid theme={null}
---
config:
flowchart:
curve: linear
---
graph TD;
__start__([
Start
]):::first
agent(credit card information agent)
tools(tools)
pinecone_tool(pinecone retrieval tool)
__end__([
End
]):::last
__start__ --> agent;
agent -.-> __end__;
agent -.-> tools;
tools --> agent;
tools -.-> pinecone_tool;
pinecone_tool --> tools;
```
The credit card documentation that the agent uses is stored in a [Pinecone](https://www.pinecone.io) vector database.
* Supervisor agent
```mermaid theme={null}
---
config:
flowchart:
curve: linear
---
graph TD;
__start__([
Start
]):::first
supervisor(supervisor)
credit-card-agent(credit card information agent)
__end__([
End
]):::last
__start__ --> supervisor;
credit-card-agent --> supervisor;
supervisor -.-> __end__;
supervisor -.-> credit-card-agent;
```
Chainlit provides a web front end for a chatbot, managing user interaction and conversation history. The important files in this app are:
* `app.py` - This contains the main application logic for a Chainlit app. It has an `on_chat_start` function that is called whenever a new chat is started, and a `main` function that is called whenever a message is sent.
* `src/galileo_langgraph_fsi_agent/agents/supervisor_agent.py` - This is a LangGraph supervisor agent that manages the other agents, routing messages where needed. This is configured to use GPT-4.1-mini.
* `src/galileo_langgraph_fsi_agent/agents/credit_card_information_agent.py` - This is a LangGraph agent that uses a tool to extract information about the available credit cards from Pinecone. This is also configured to use GPT-4.1-mini.
* `src/galileo_langgraph_fsi_agent/tools/pinecone_retrieval_tool.py` - This is a LangGraph tool that interacts with the Pinecone vector database. It is called by the `credit_card_information_agent`.
## Before you start
Before you start the tutorial, you will need:
* **The starter project** - Clone the [Galileo SDK-Examples repo](https://github.com/rungalileo/sdk-examples). This repo contains both the starting LangGraph app that you will be adding Galileo evaluations to, as well as a final version for reference.
* **A Pinecone account and API key** - If you don't have an existing Pinecone account, head to [Pinecone.io](https://www.pinecone.io), sign up for a free account, and get an [API key](https://docs.pinecone.io/guides/get-started/quickstart#2-get-an-api-key).
* **An OpenAI API key** - This example uses OpenAI as the underlying LLM to run the agents.
* **A Galileo API key** - To access your Galileo API keys, open the [Galileo Console](https://app.galileo.ai/) and log in or create an account. From the **Settings and Users** page you can create a new API key.
## Set up the project
The starter project is in the `sdk-examples/python/agent/langgraph-fsi-agent/before` folder in the cloned repo.
Create a virtual environment, and install these dependencies using a tool such as [`uv`](https://docs.astral.sh/uv/):
```bash theme={null}
uv venv .venv
source .venv/bin/activate
uv sync --dev
```
Copy the `.env.example` file to `.env`, and set the values for your OpenAI and Pinecone API keys:
```ini theme={null}
# AI services
OPENAI_API_KEY=
PINECONE_API_KEY=
```
Replace `` with your OpenAI API key. Replace `` with your Pinecone API key.
```bash theme={null}
python ./scripts/setup_pinecone.py
```
This will take a few seconds and a successful run should look like:
```text theme={null}
Loading documents for credit-card-information folder...
...
✅ Document processing and upload complete!
```
```bash theme={null}
chainlit run app.py -w
```
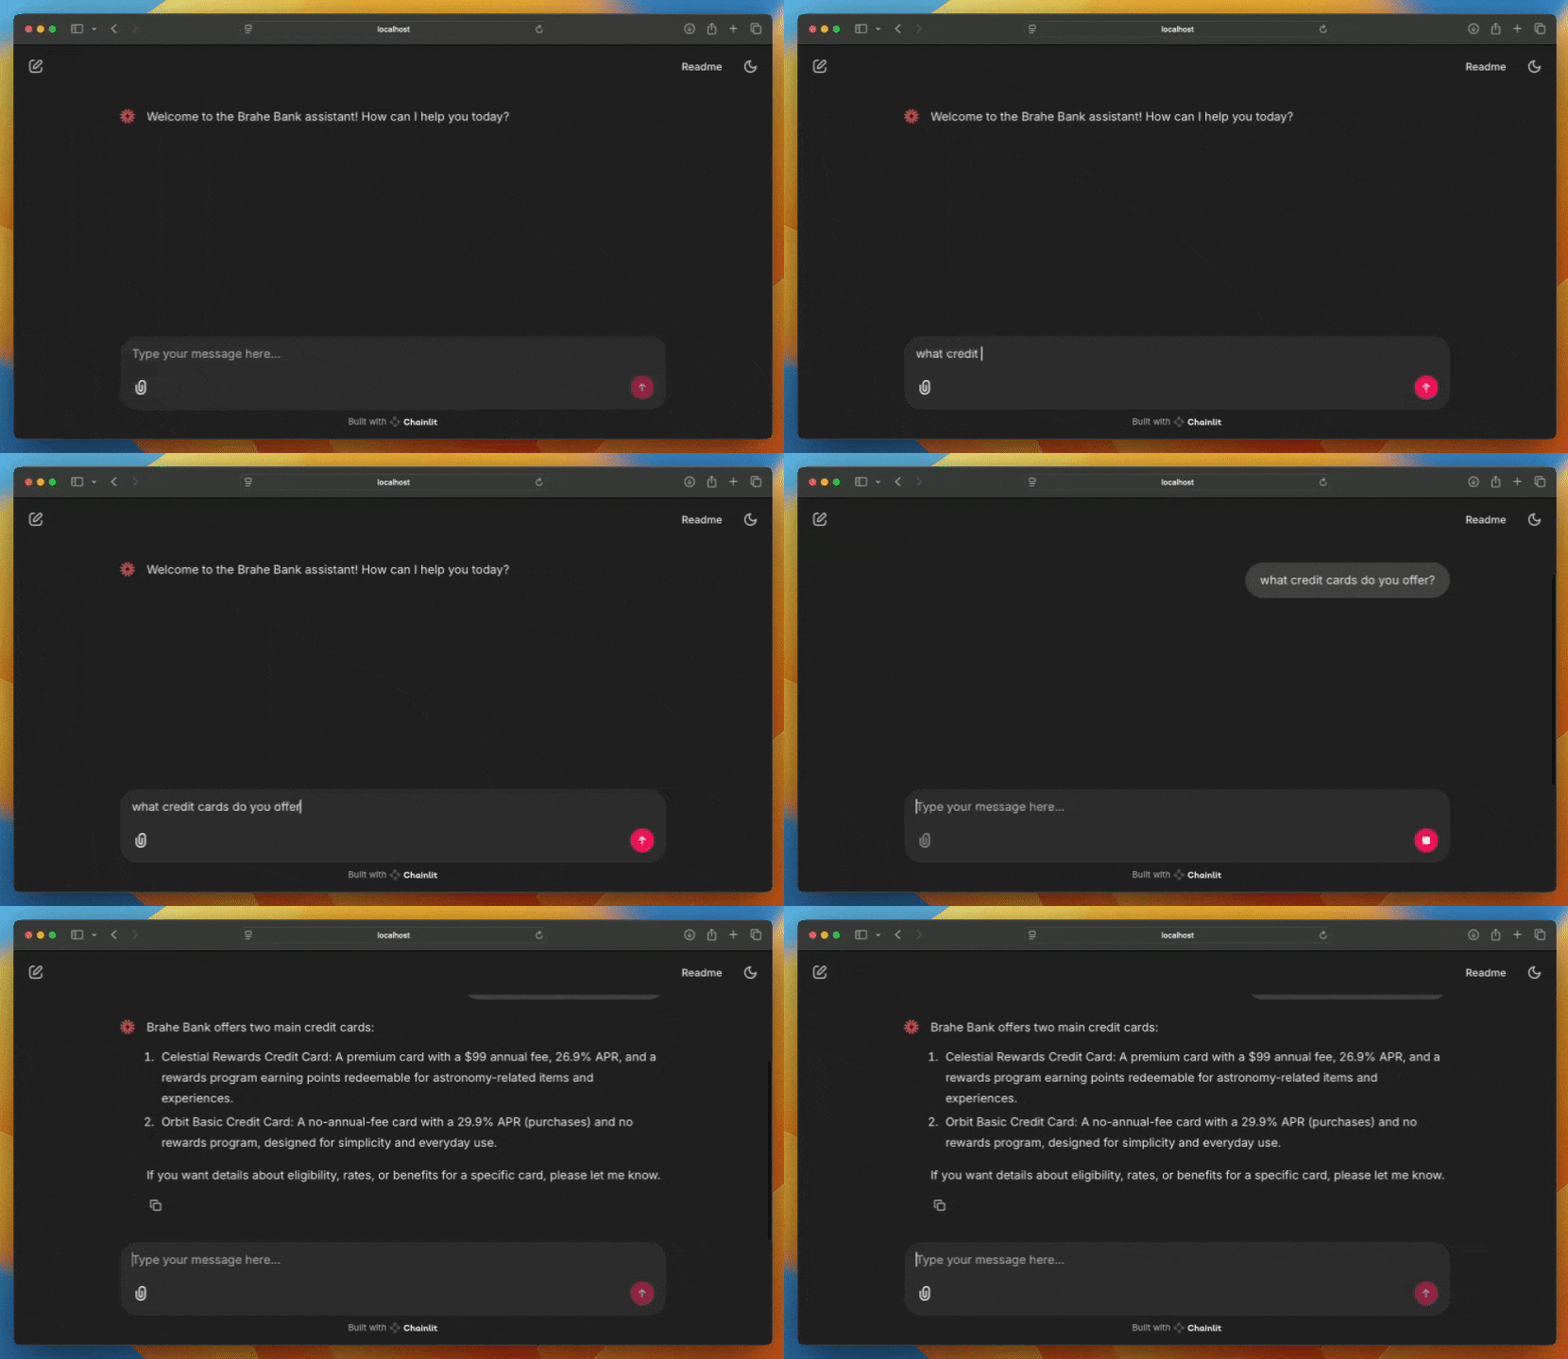
The app will be running at [localhost:8000](http://localhost:8000), so open it in your browser.
Ask the bot questions like "What credit cards do you offer?".
You are now ready to add Galileo evaluations to your app.
## Create a new Galileo project
First you need a new Galileo project to log evaluations to.
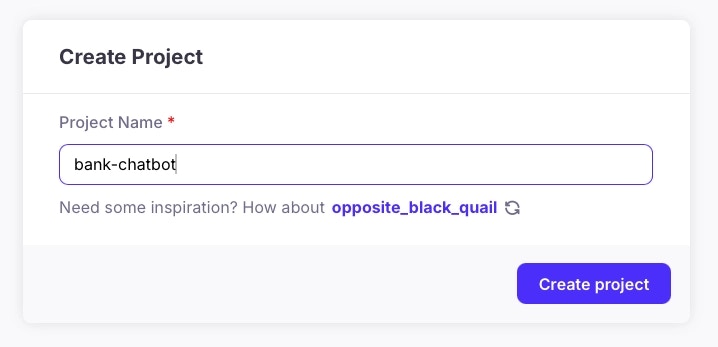
Name this project `bank-chatbot`.
## Install the Galileo Python package
To send data to Galileo, you need to use the Galileo Python package.
```bash theme={null}
uv add "galileo[openai]"
```
This installs the Galileo Python package with the optional OpenAI wrapper.
```ini .env theme={null}
# Your Galileo API key
GALILEO_API_KEY="your-galileo-api-key"
# Your Galileo project name
GALILEO_PROJECT="your-galileo-project-name"
# The name of the Log stream you want to use for logging
GALILEO_LOG_STREAM="your-galileo-log-stream "
# Provide the console url below if you are using a
# custom deployment, and not using the free tier, or app.galileo.ai.
# This will look something like “console.galileo.yourcompany.com”.
# GALILEO_CONSOLE_URL="your-galileo-console-url"
```
Replace `` with your Galileo API key. The project is set to the new project you just created, and the Log stream is set to `chatbot-logs`.
You don't need to create the Log stream in advance, a new Log stream will be created automatically.
## Add logging to Galileo
Next you need to add code to log to Galileo. Galileo has a LangGraph callback handler that can be passed into the agent to automatically log traces for every step in the chain, including agent calls, tool calls, and LLM calls.
You can find a complete version of this code with all the code added in the `sdk-examples/python/agent/langgraph-fsi-agent/after` folder in the cloned repo.
### Add the logging code
```python theme={null}
from galileo import galileo_context
from galileo.handlers.langchain import GalileoAsyncCallback
```
In the `on_chat_start` function in `app.py`, add the following code to create a new logging session:
```python theme={null}
# Start Galileo session with unique session name
current_time = datetime.now().strftime("%Y-%m-%d %H:%M:%S")
session_name = f"FSI Agent - {current_time}"
galileo_context.start_session(name=session_name,
external_id=cl.context.session.id)
```
This creates a new session named "FSI Agent - \{time}" with the current date and time. This also sets the `external_id` to the current Chainlit session ID. Each separate conversation in Chainlit is a separate session with a unique ID.
After the code you just added, add the following to create the callback handler, and save it in the Chainlit session:
```python theme={null}
# Create the callback. This needs to be created in the same
# thread as the session so that it uses the same session context.
galileo_callback = GalileoAsyncCallback()
cl.user_session.set("galileo_callback", galileo_callback)
```
This creates the callback handler, and saves it against the current user session.
The Galileo logging handlers use the current thread context to connect to the current Galileo context. This means to have a callback handler tied to a session, it needs to be created in the same thread as the session. It can then be access from any other thread.
In the `main` function, replace this line:
```python theme={null}
callbacks: Callbacks = []
```
With the following:
```python theme={null}
galileo_callback = cl.user_session.get("galileo_callback")
callbacks: Callbacks = [galileo_callback]
```
This will extract the Galileo callback from the user session, and adds it to a callbacks collection. This collection is passed to the LangGraph `RunnableConfig` that is passed when the supervisor agent is used.
### Run the app
```bash theme={null}
chainlit run app.py -w
```
Open the app in your browser at [localhost:8000](http://localhost:8000), and ask the bot a question. In your terminal you will see references to the Galileo Log stream being created, and traces being flushed:
```output theme={null}
🚀 Creating new Log stream... Log stream chatbot-logs created!
...
Flushing 1 traces...
Successfully flushed 1 traces.
```
Leave the app running whilst you view the traces.
### View the traces
Open the [Galileo Console](https://app.galileo.ai/) and select your project. In the **Sessions** tab you should see a single session created for the conversation.
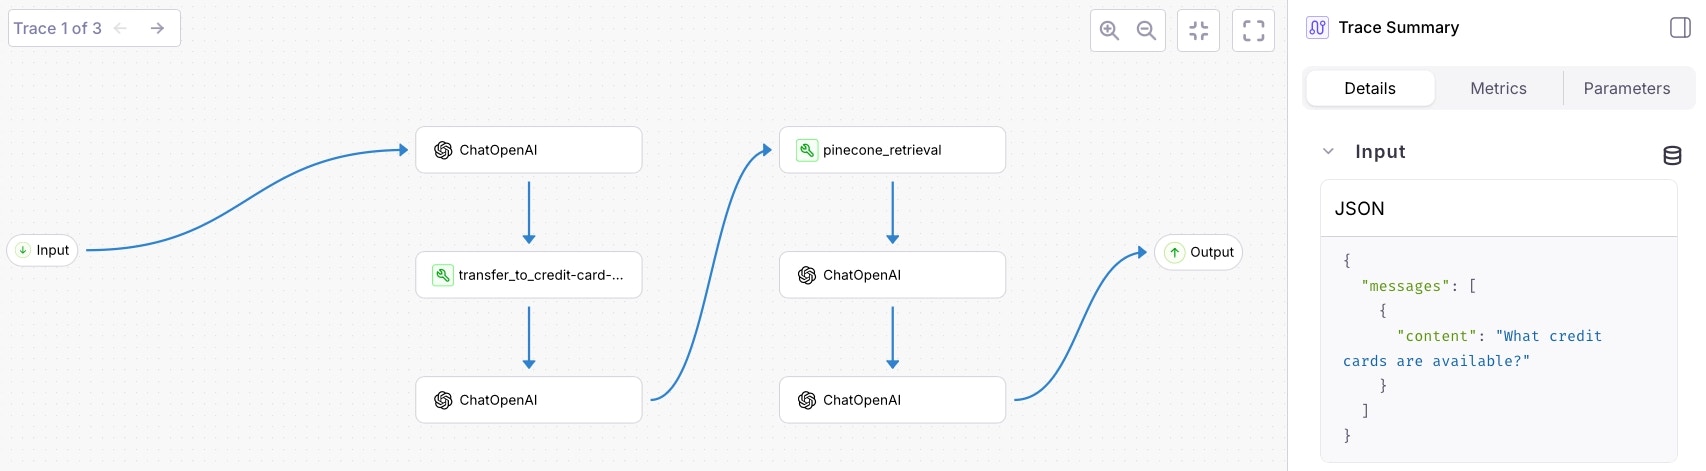
It will open in the sessions view showing a flowchart
Select the nodes in this chart to see the input and output.
### Add more traces to the session
Sessions can contain multiple traces. For example, a single user conversation with your bot would be a single session, containing multiple traces for the different questions you ask the bot.
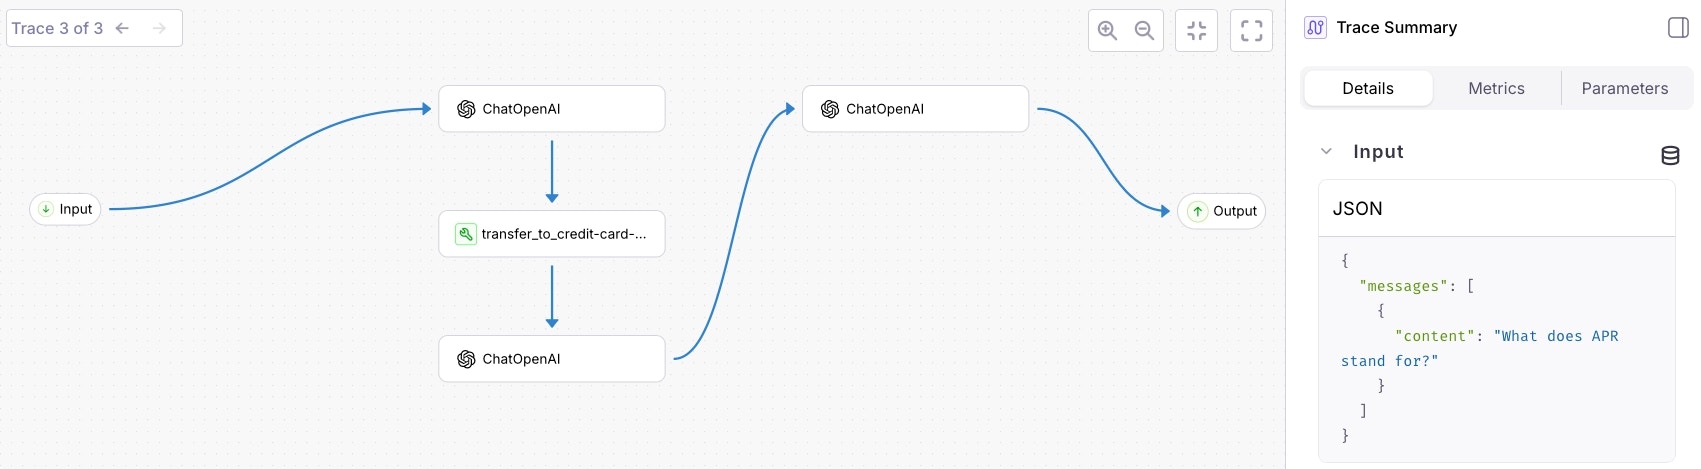
This session will have 3 traces. Use the Trace navigation to move between the traces. In the **Input** and **Output** you will see the relevant messages.
Where you asked "What does APR stand for?", the credit card agent would not need to be used, so the flowchart doesn't show this node.
## Summary
In this tutorial, you learned how to:
* Add Galileo evaluations to a multi-agent LangGraph app
* View and navigate session level traces
## Next steps
Some suggested next steps are:
* [Add metrics to your project to evaluate your app](/concepts/metrics/overview)
* [Watch the video tutorial](https://youtu.be/FZFhLK2xIik)

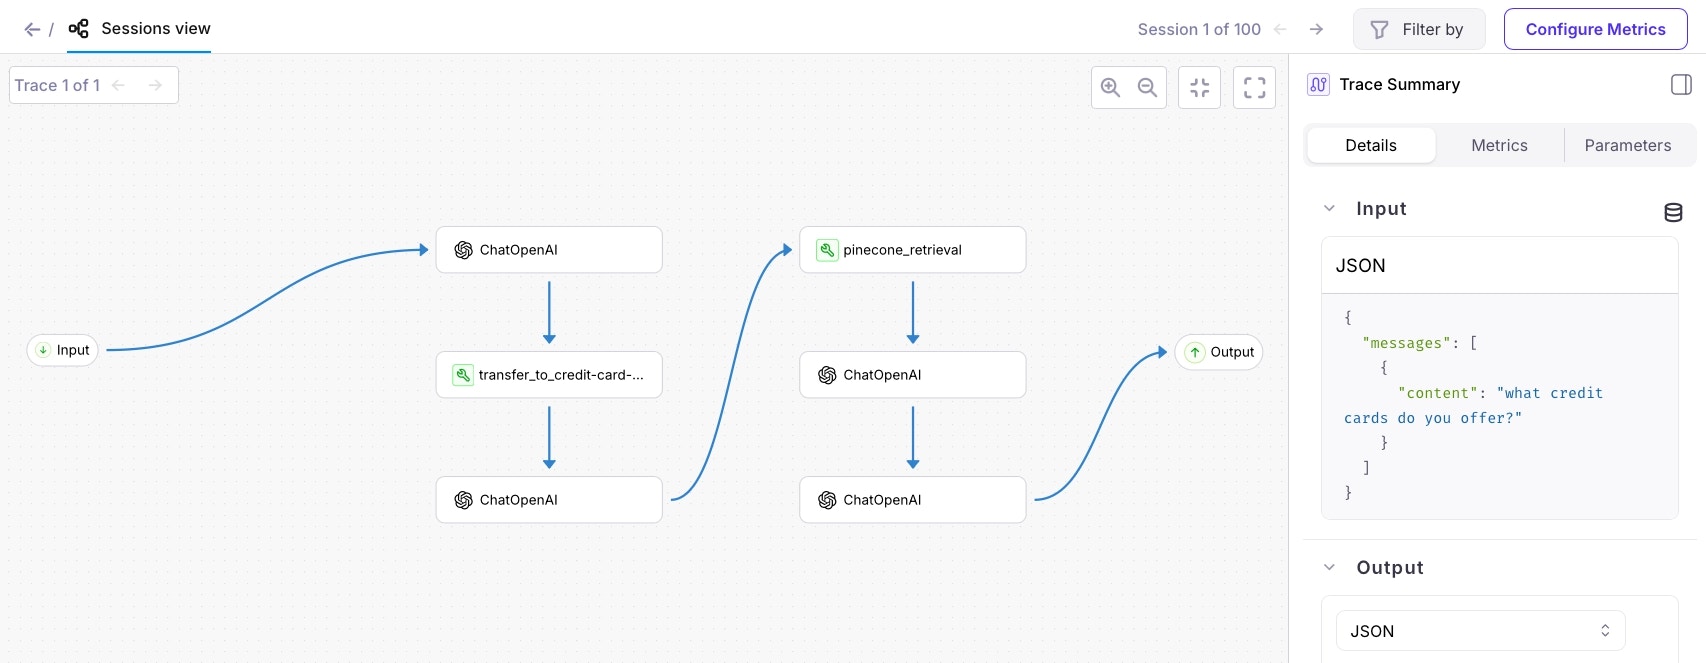 Select the nodes in this chart to see the input and output.
 This session will have 3 traces. Use the Trace navigation to move between the traces. In the **Input** and **Output** you will see the relevant messages.