> ## Documentation Index
> Fetch the complete documentation index at: https://docs.galileo.ai/llms.txt
> Use this file to discover all available pages before exploring further.
# Run an Experiment
> Learn how to run your first experiment using prompts and datasets
{/**/}
Experiments allow you to evaluate prompts, models, and your application code, using well-defined inputs, against metrics of your choice.
## Run an experiment with UI
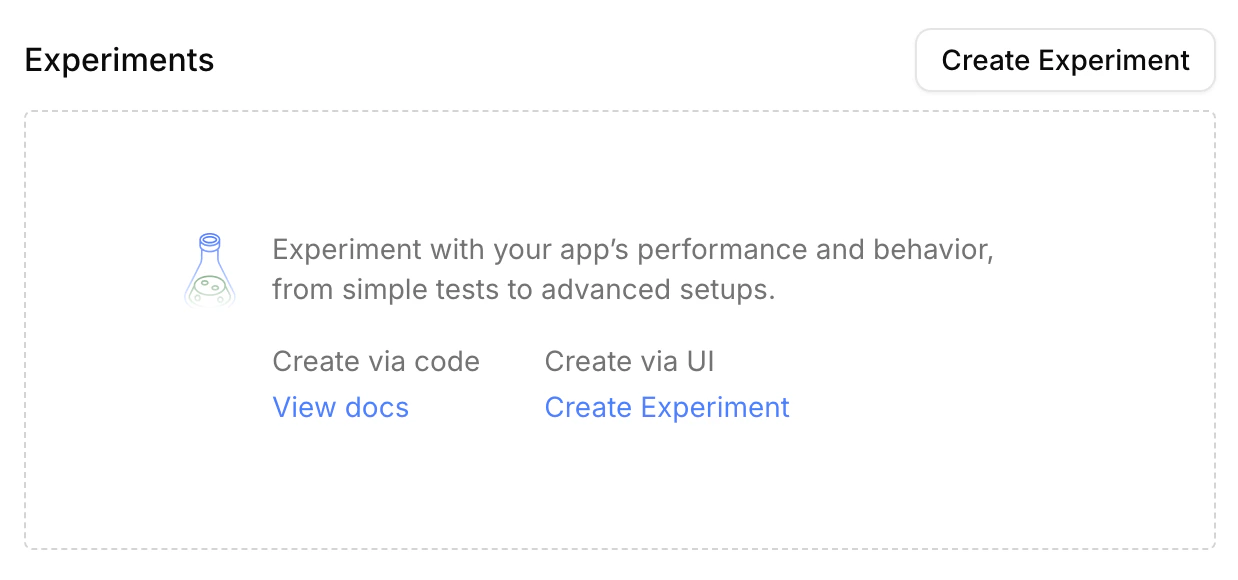
In the Galileo console UI, "Create Experiment" buttons allow you to easily add experiments to a project.
 You can use a sample dataset and sample prompt to create your first experiment.
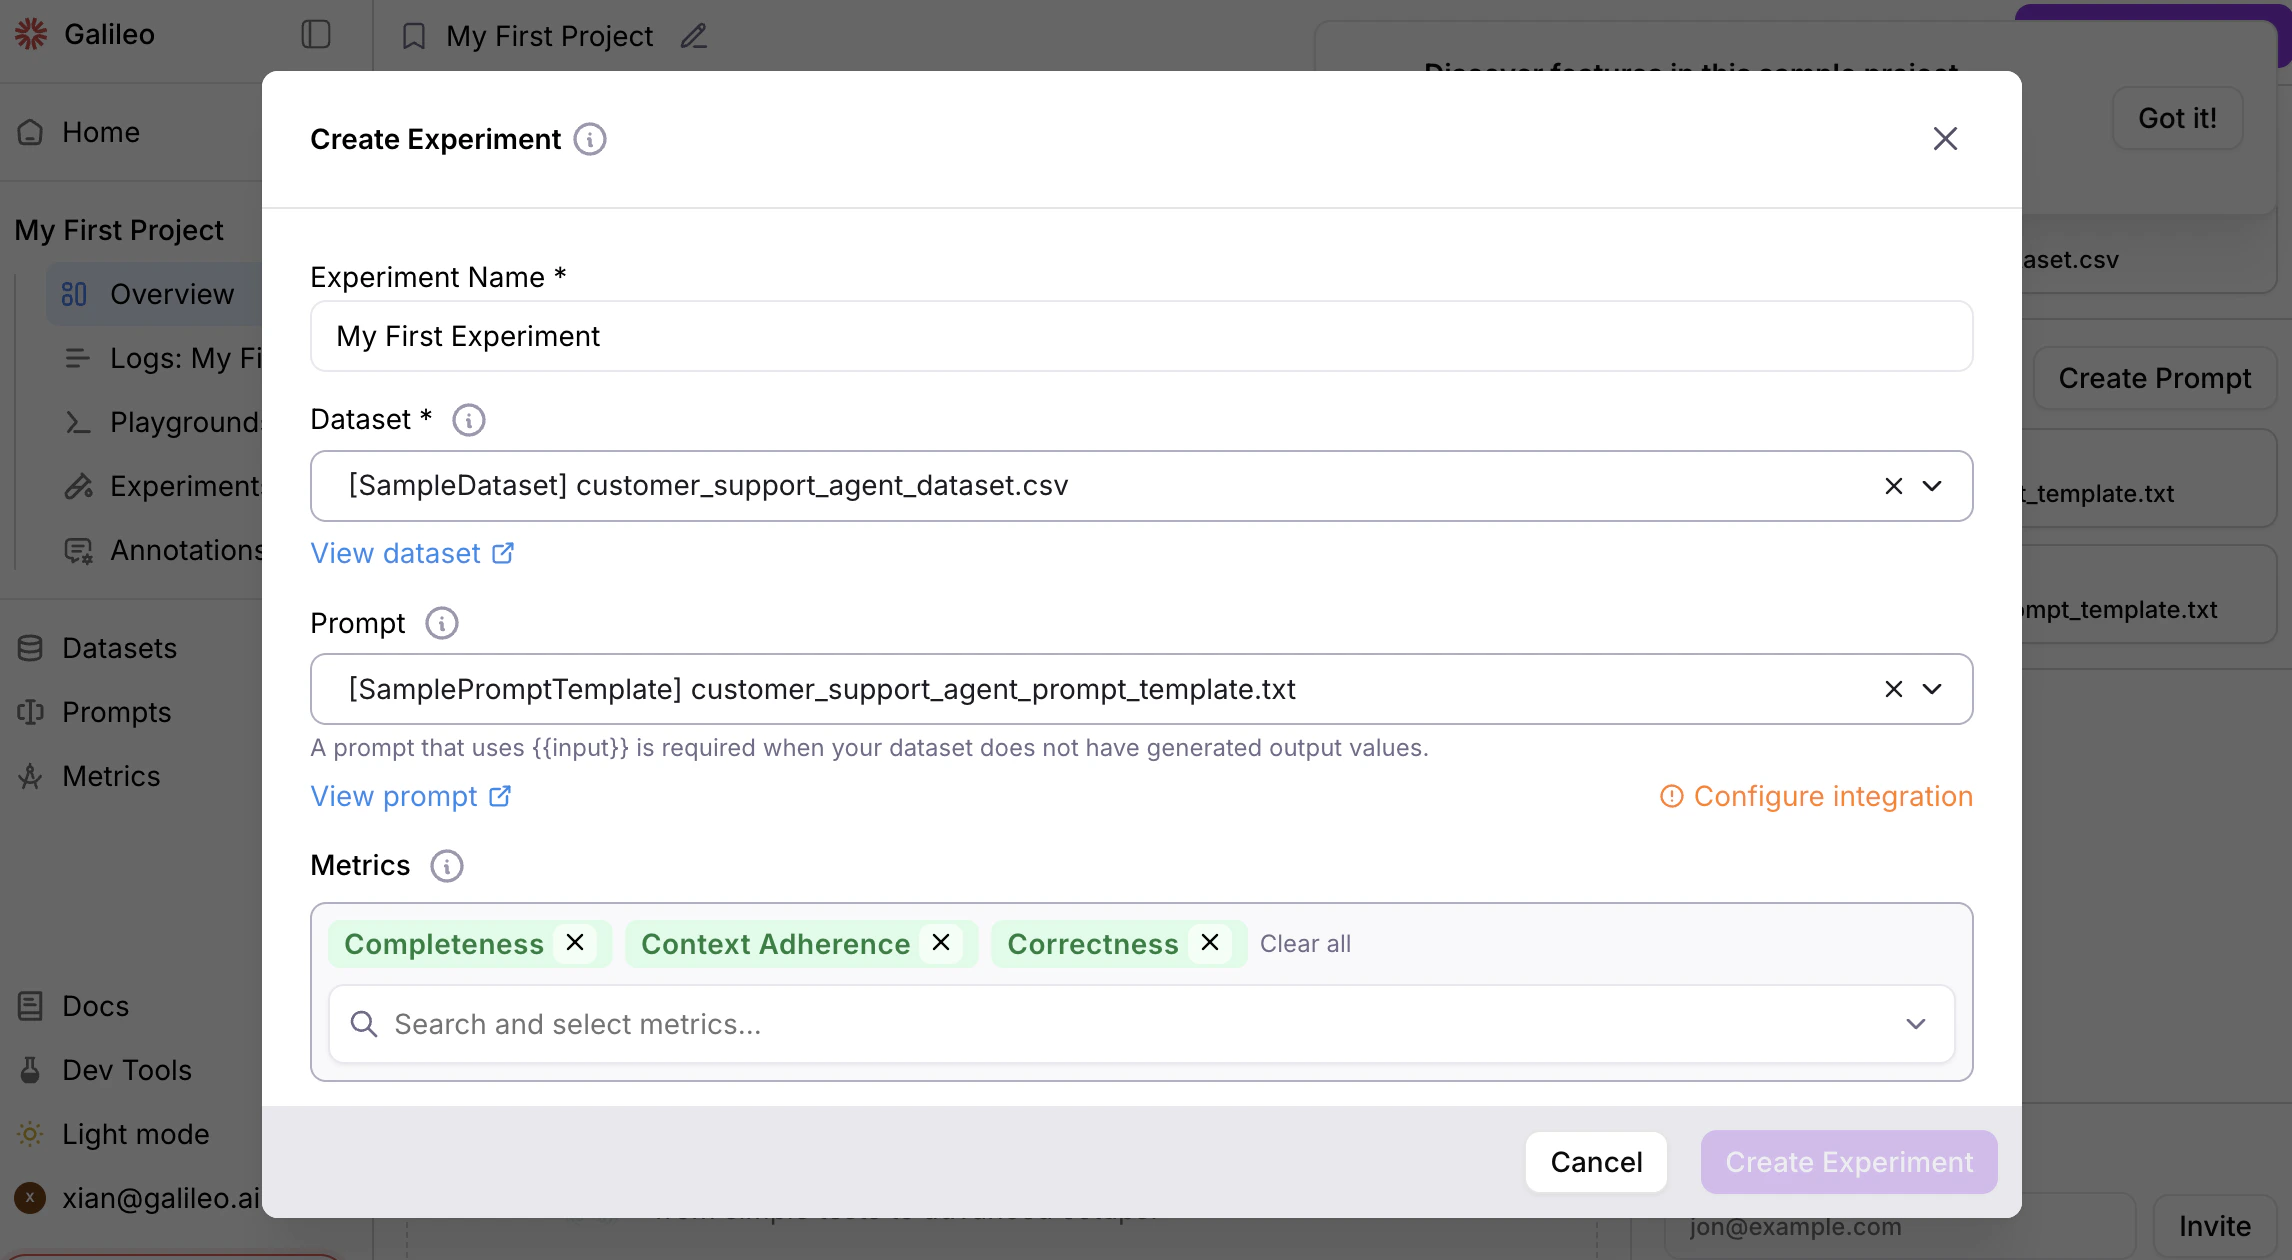 If you don't already have an integration (e.g. with OpenAI), a "Configure integration" link appears for you to add a valid integration for a prompt.
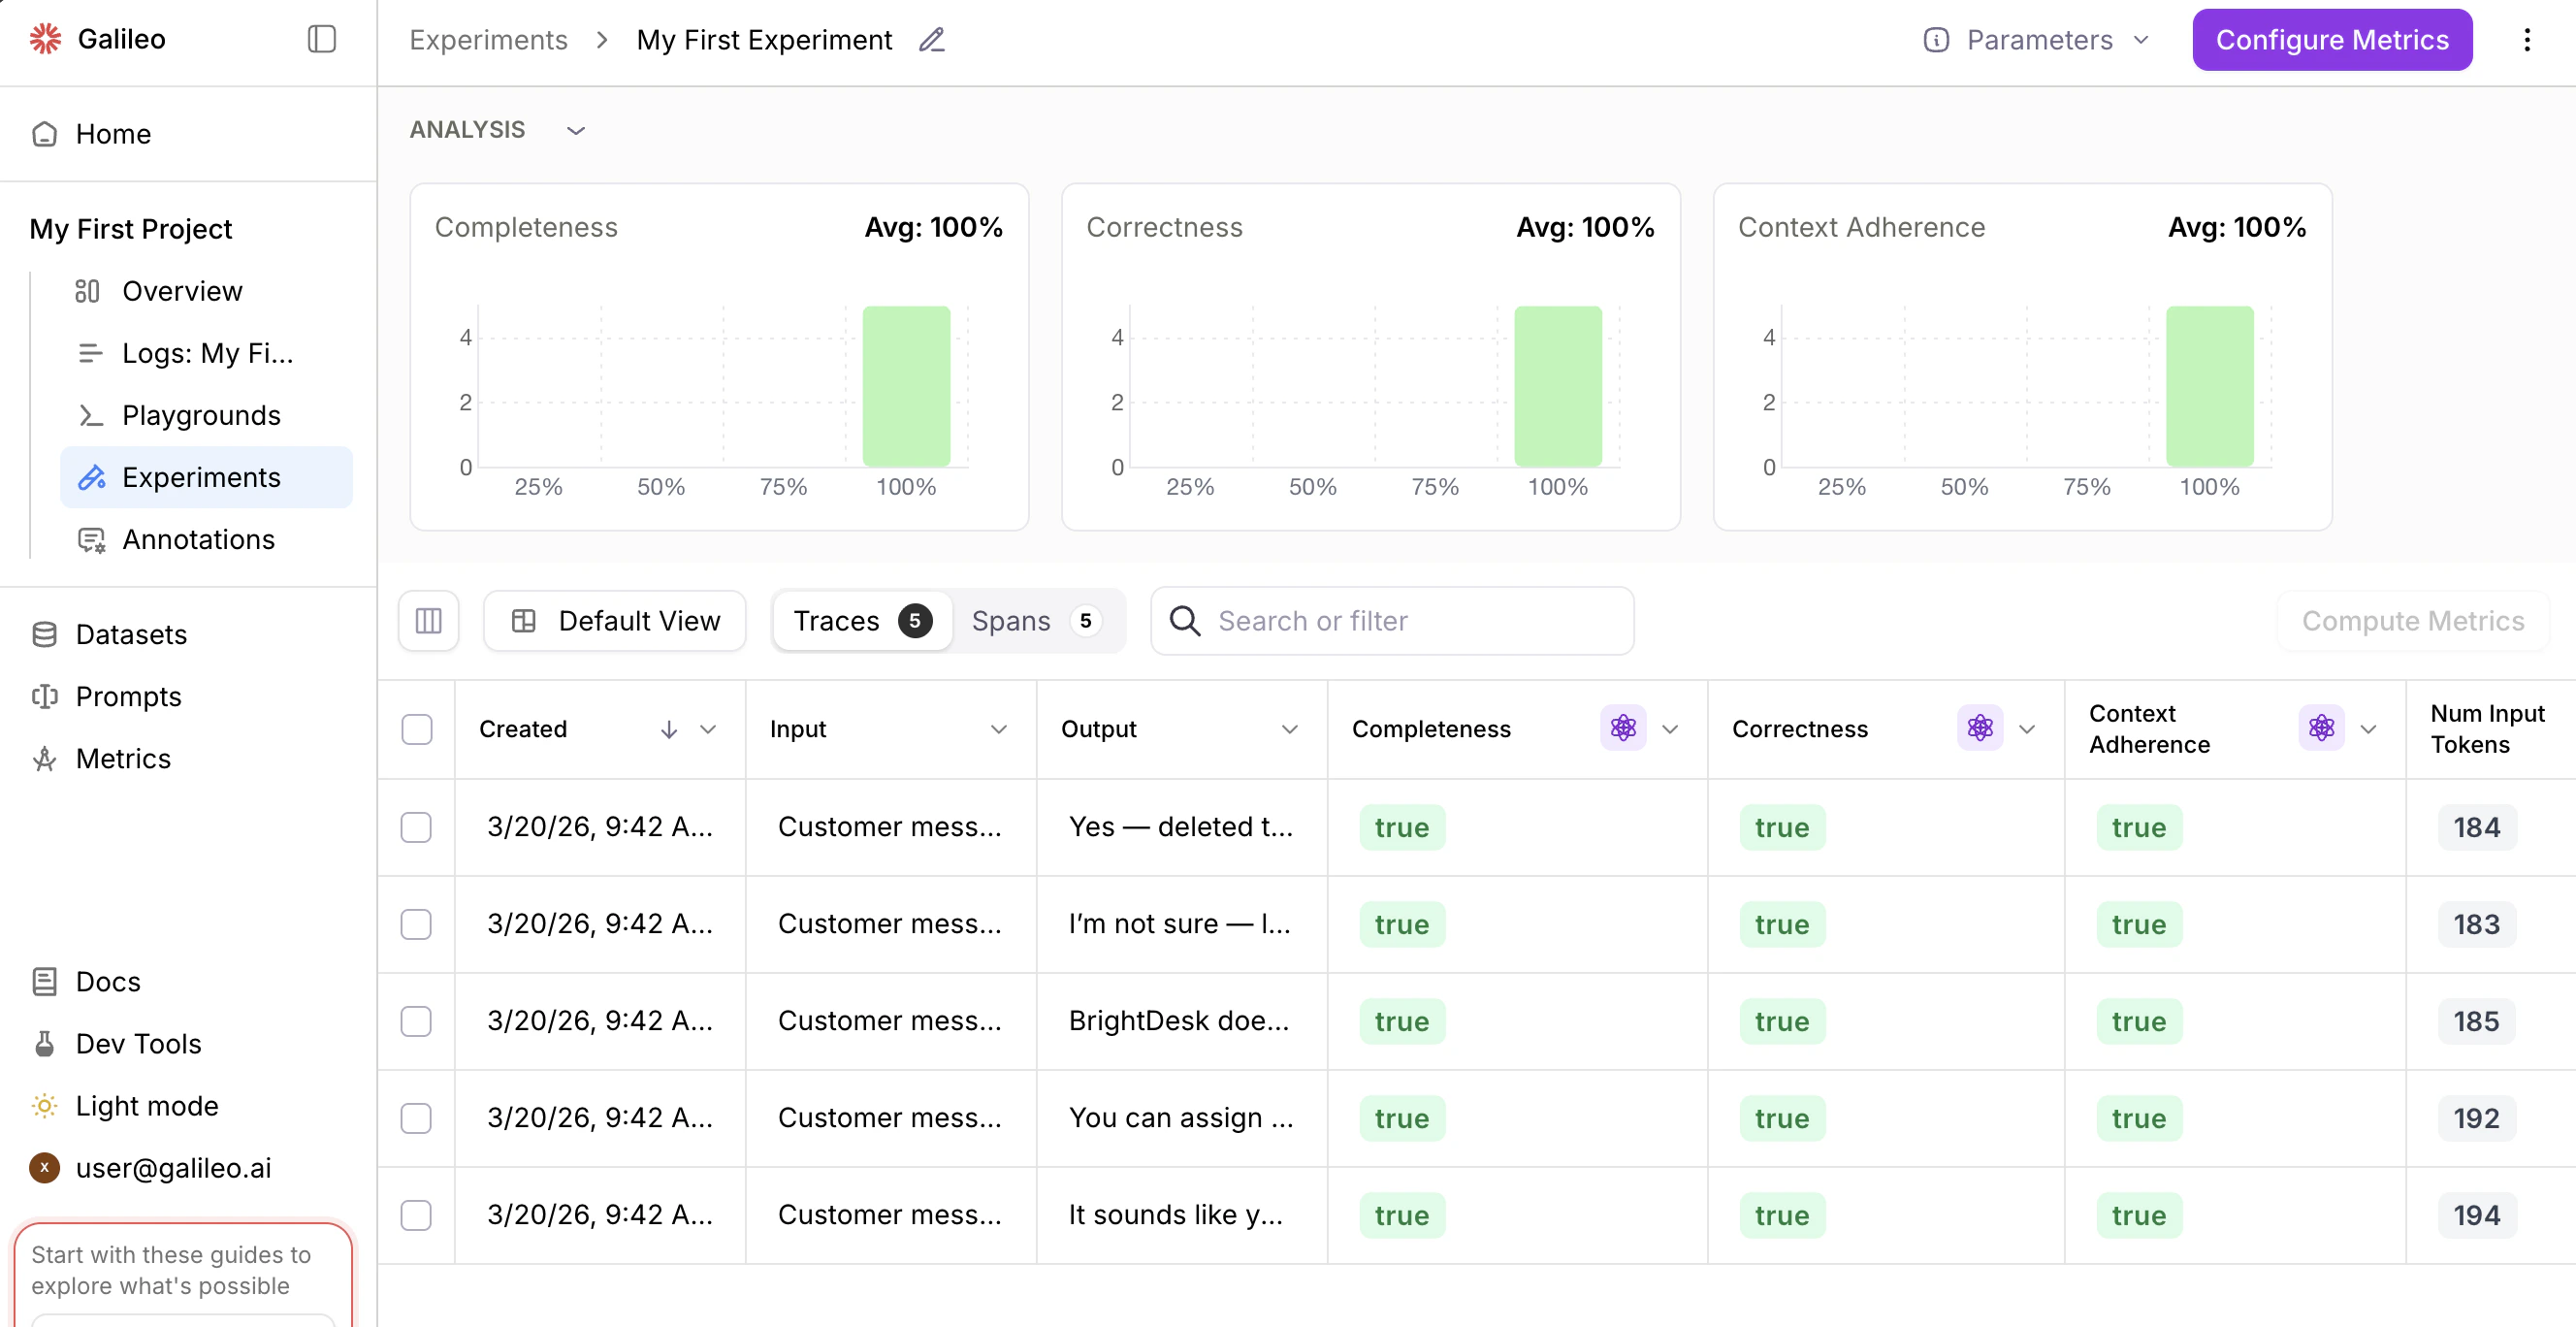 After successfully creating an experiment, you can view the results from the "Experiments" page of a Galileo project.
## Run an experiment with code
### Prerequisite: Configure an LLM integration
To run an experiment using a [prompt](/sdk-api/experiments/prompts) and a [dataset](/sdk-api/experiments/datasets), you need to set up an LLM integration. An integration is also required to evaluate LLM outputs with metrics.
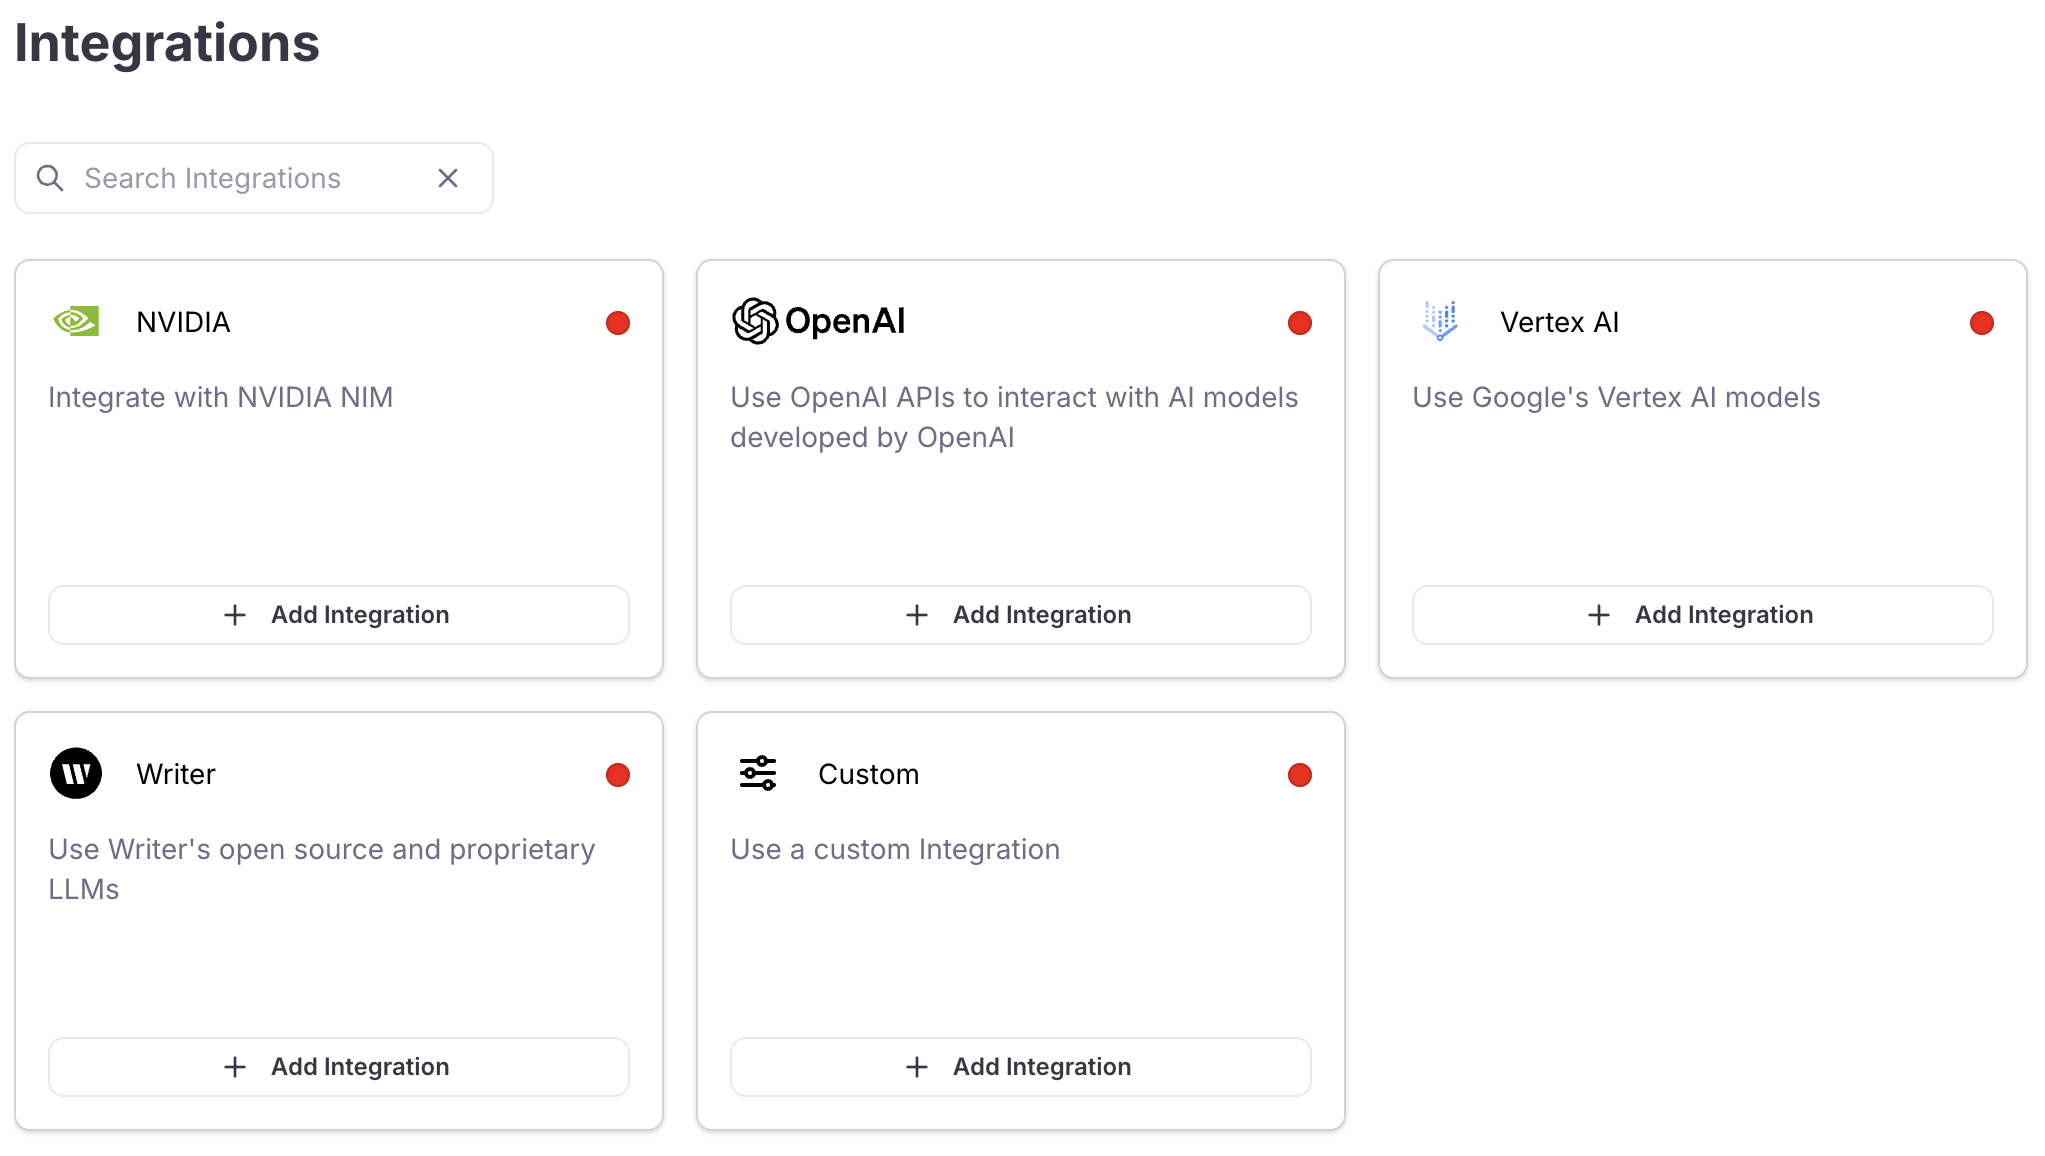
In the Galileo console UI, navigate to the [LLM integrations page](https://app.galileo.ai/settings/integrations) by opening the user menu on the bottom-left corner, and then selecting **Integrations**.
After successfully creating an experiment, you can view the results from the "Experiments" page of a Galileo project.
## Run an experiment with code
### Prerequisite: Configure an LLM integration
To run an experiment using a [prompt](/sdk-api/experiments/prompts) and a [dataset](/sdk-api/experiments/datasets), you need to set up an LLM integration. An integration is also required to evaluate LLM outputs with metrics.
In the Galileo console UI, navigate to the [LLM integrations page](https://app.galileo.ai/settings/integrations) by opening the user menu on the bottom-left corner, and then selecting **Integrations**.
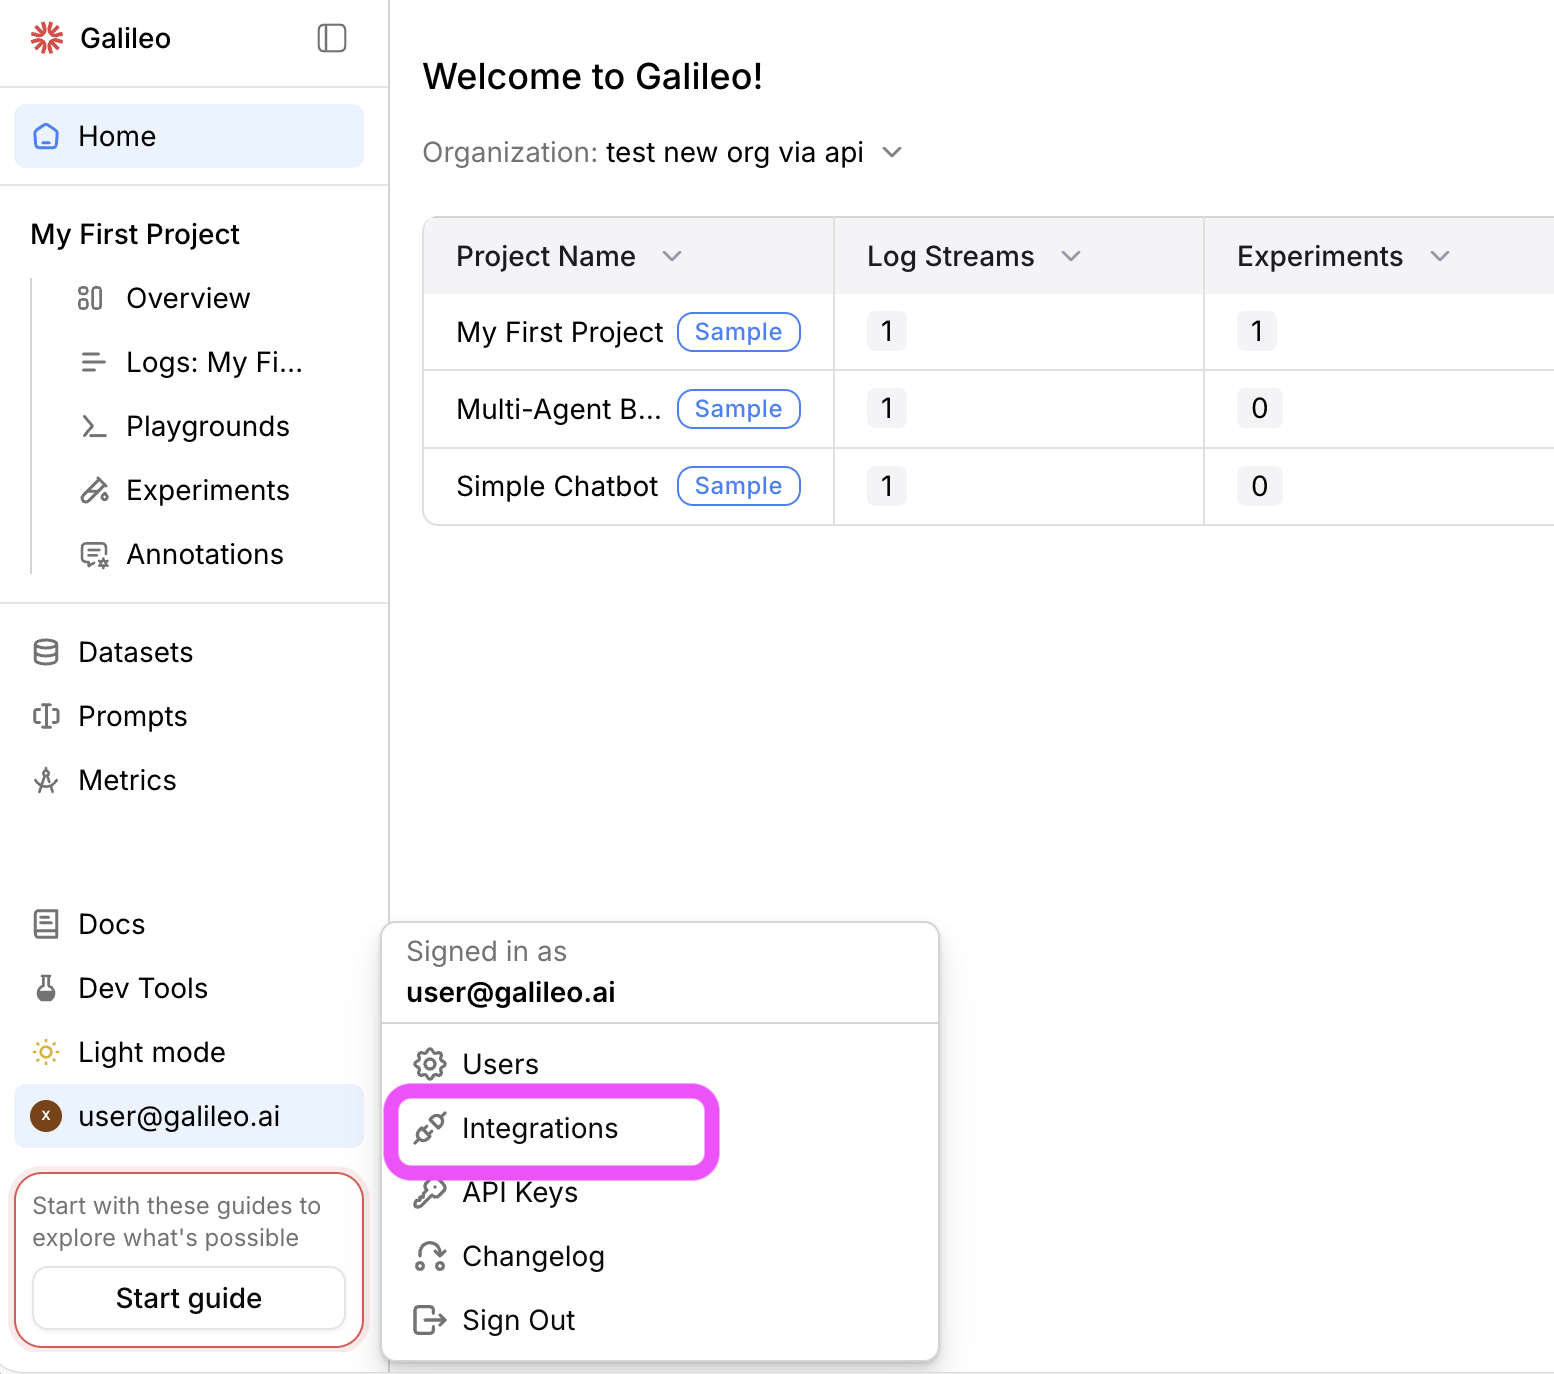 Locate the LLM provider you are using (or specify a [custom integration](/sdk-api/third-party-integrations/model-integrations/custom-model-integrations/custom-model-integrations)), then select the **+Add Integration** button.
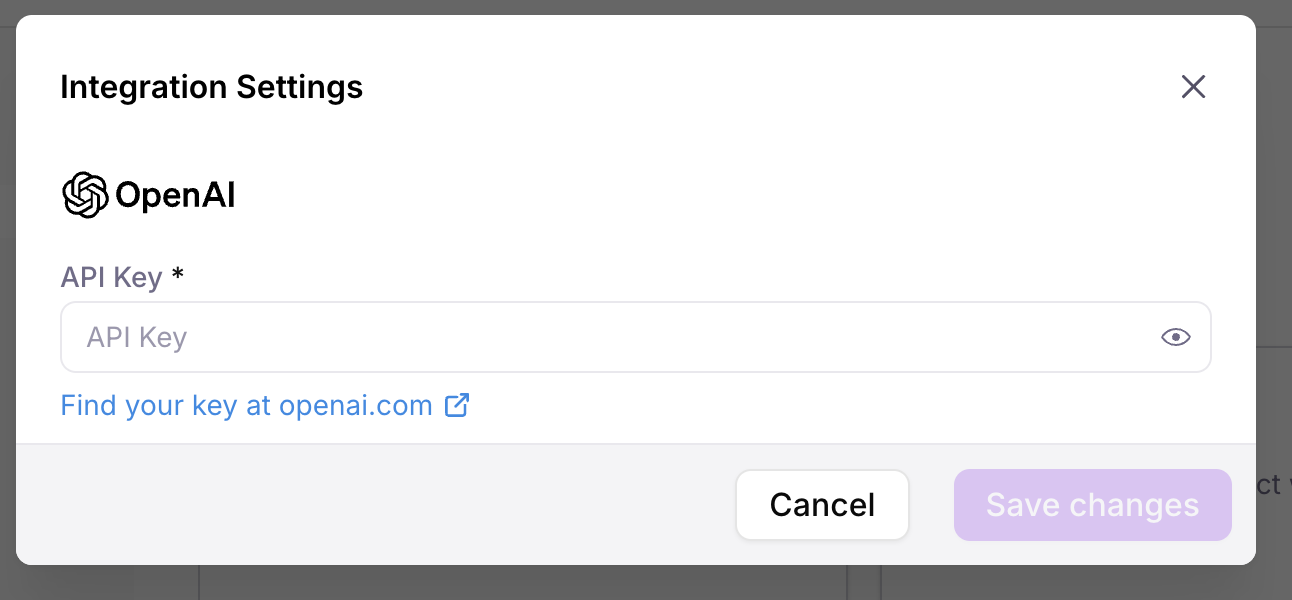
 Specify settings for your integration (such as an API key), then select **Save changes**.
 ### Example experiment with code
Below is a step-by-step guide. [Jump to the application code.](#step-create-your-app-code)
Install the **Galileo SDK**, and the dotenv package using the following command in your terminal:
```bash Python theme={null}
pip install galileo python-dotenv
```
```bash TypeScript theme={null}
npm install galileo tsx dotenv
```
Create an `.env` file in your project folder, and set:
* Your [Galileo API key](https://app.galileo.ai/settings/api-keys)
* Your Galileo project name
```ini .env theme={null}
GALILEO_API_KEY="your-galileo-api-key"
GALILEO_PROJECT="your-galileo-project-name"
# Provide the console url below if you are not using app.galileo.ai
# GALILEO_CONSOLE_URL="your-galileo-console-url"
```
Create a file called `app.py` (Python) or `app.ts` (TypeScript) and add the following code:
```python Python theme={null}
import os
from galileo import GalileoMetrics, Message, MessageRole
from galileo.config import GalileoPythonConfig
from galileo.datasets import create_dataset, get_dataset
from galileo.experiments import run_experiment
from galileo.prompts import create_prompt, get_prompt
from galileo.resources.models.prompt_run_settings import PromptRunSettings
# Load the environment variables
from dotenv import load_dotenv
load_dotenv()
# Create a prompt template, or load it if it already exists
prompt = get_prompt(name="My Prompt")
if not prompt:
prompt = create_prompt(
name="My Prompt",
template=[
Message(
role=MessageRole.system,
content="""
Galileo is the fastest way to ship reliable apps.
Galileo brings automation and insight to AI evaluations so you can
ship with confidence.
""",
),
Message(role=MessageRole.user, content="{{input}}"),
],
)
# Create a dataset, or load it if it already exists
dataset = get_dataset(name="My Dataset")
if not dataset:
dataset = create_dataset(
"My Dataset",
content=[
{"input": "What is Galileo?"},
{"input": "What is Copernicus?"}
],
)
# Run the experiment
experiment = run_experiment(
experiment_name="My Experiment",
prompt_template=prompt,
dataset=dataset,
metrics=[GalileoMetrics.context_adherence],
project=os.environ.get("GALILEO_PROJECT"),
prompt_settings=PromptRunSettings(model_alias="gpt-5-mini"),
)
# Show Galileo information
config = GalileoPythonConfig.get()
prompt_url = f"{config.console_url}prompts/{prompt.id}"
dataset_url = f"{config.console_url}datasets/{dataset.dataset.id}"
print()
print("🚀 GALILEO LOG INFORMATION:")
print(f"🔗 Prompt : {prompt_url}")
print(f"🔗 Dataset : {dataset_url}")
print(f"🔗 Experiment : {experiment['link']}")
```
```typescript TypeScript theme={null}
import {
createDataset,
createPrompt,
GalileoMetrics,
getDataset,
getPrompt,
runExperiment
} from "galileo";
import {
DatasetDBType,
MessageRole,
PromptTemplate,
PromptTemplateVersion
} from "galileo/types";
import dotenv from "dotenv";
// Load the environment variables
dotenv.config();
(async () => {
// Create a prompt template, or load it if it already exists
let prompt: PromptTemplate | PromptTemplateVersion;
try {
prompt = await getPrompt({ name: "My Prompt" });
} catch (e) {
prompt = await createPrompt({
name: "My Prompt",
template: [
{
role: MessageRole.system,
content: `
Galileo is the fastest way to ship reliable apps.
Galileo brings automation and insight to AI evaluations so you can
ship with confidence.
`
},
{
role: MessageRole.user,
content: "{{input}}"
},
]
});
}
// Create a dataset, or load it if it already exists
let dataset: DatasetDBType | undefined;
try {
dataset = await getDataset({ name: "My Dataset" });
}catch(e){
dataset = await createDataset(
[
{ "input": "What is Galileo?" },
{ "input": "What is Copernicus?" }
],
"My Dataset",
);
}
// Run the experiment
const experiment = await runExperiment({
name: "My Experiment",
promptTemplate: prompt,
dataset: dataset,
metrics: [GalileoMetrics.contextAdherence],
projectName: process.env.GALILEO_PROJECT,
promptSettings: { modelAlias: "gpt-4.1-mini" }
});
const galileoConsoleUrl = (
process.env.GALILEO_CONSOLE_URL ?? "https://app.galileo.ai")
.replace(/\/+$/, ""
);
const datasetUrl = `${galileoConsoleUrl}/datasets/${dataset.id}`;
console.log();
console.log("🚀 GALILEO LOG INFORMATION:");
console.log(`🔗 Dataset : ${datasetUrl}`);
console.log(`🔬 Experiment : ${experiment.link}`);
})();
```
This code defaults to using `gpt-5-mini`. If you want to use a different model, update the `model_alias` in the prompt settings passed to the call to run experiment.
This code creates a prompt containing a system prompt and user prompt, and the user prompt has a mustache template to inject rows from the dataset. It also creates a dataset.
It then uses these to run an experiment, measuring context adherence.
If the prompt or dataset already exist, they are loaded instead of being recreated.
Run your application using the following command in your terminal:
```bash Python theme={null}
python app.py
```
```bash TypeScript theme={null}
npx tsx app.ts
```
```output Terminal theme={null}
Experiment My Experiment has started and is currently processing.
Results will be available at https://app.galileo.ai/project/.../experiments/...
🚀 GALILEO LOG INFORMATION:
🔗 Prompt : https://app.galileo.ai/prompts/...
🔗 Dataset : https://app.galileo.ai/datasets/...
🔗 Experiment : https://app.galileo.ai/project/.../experiments/...
```
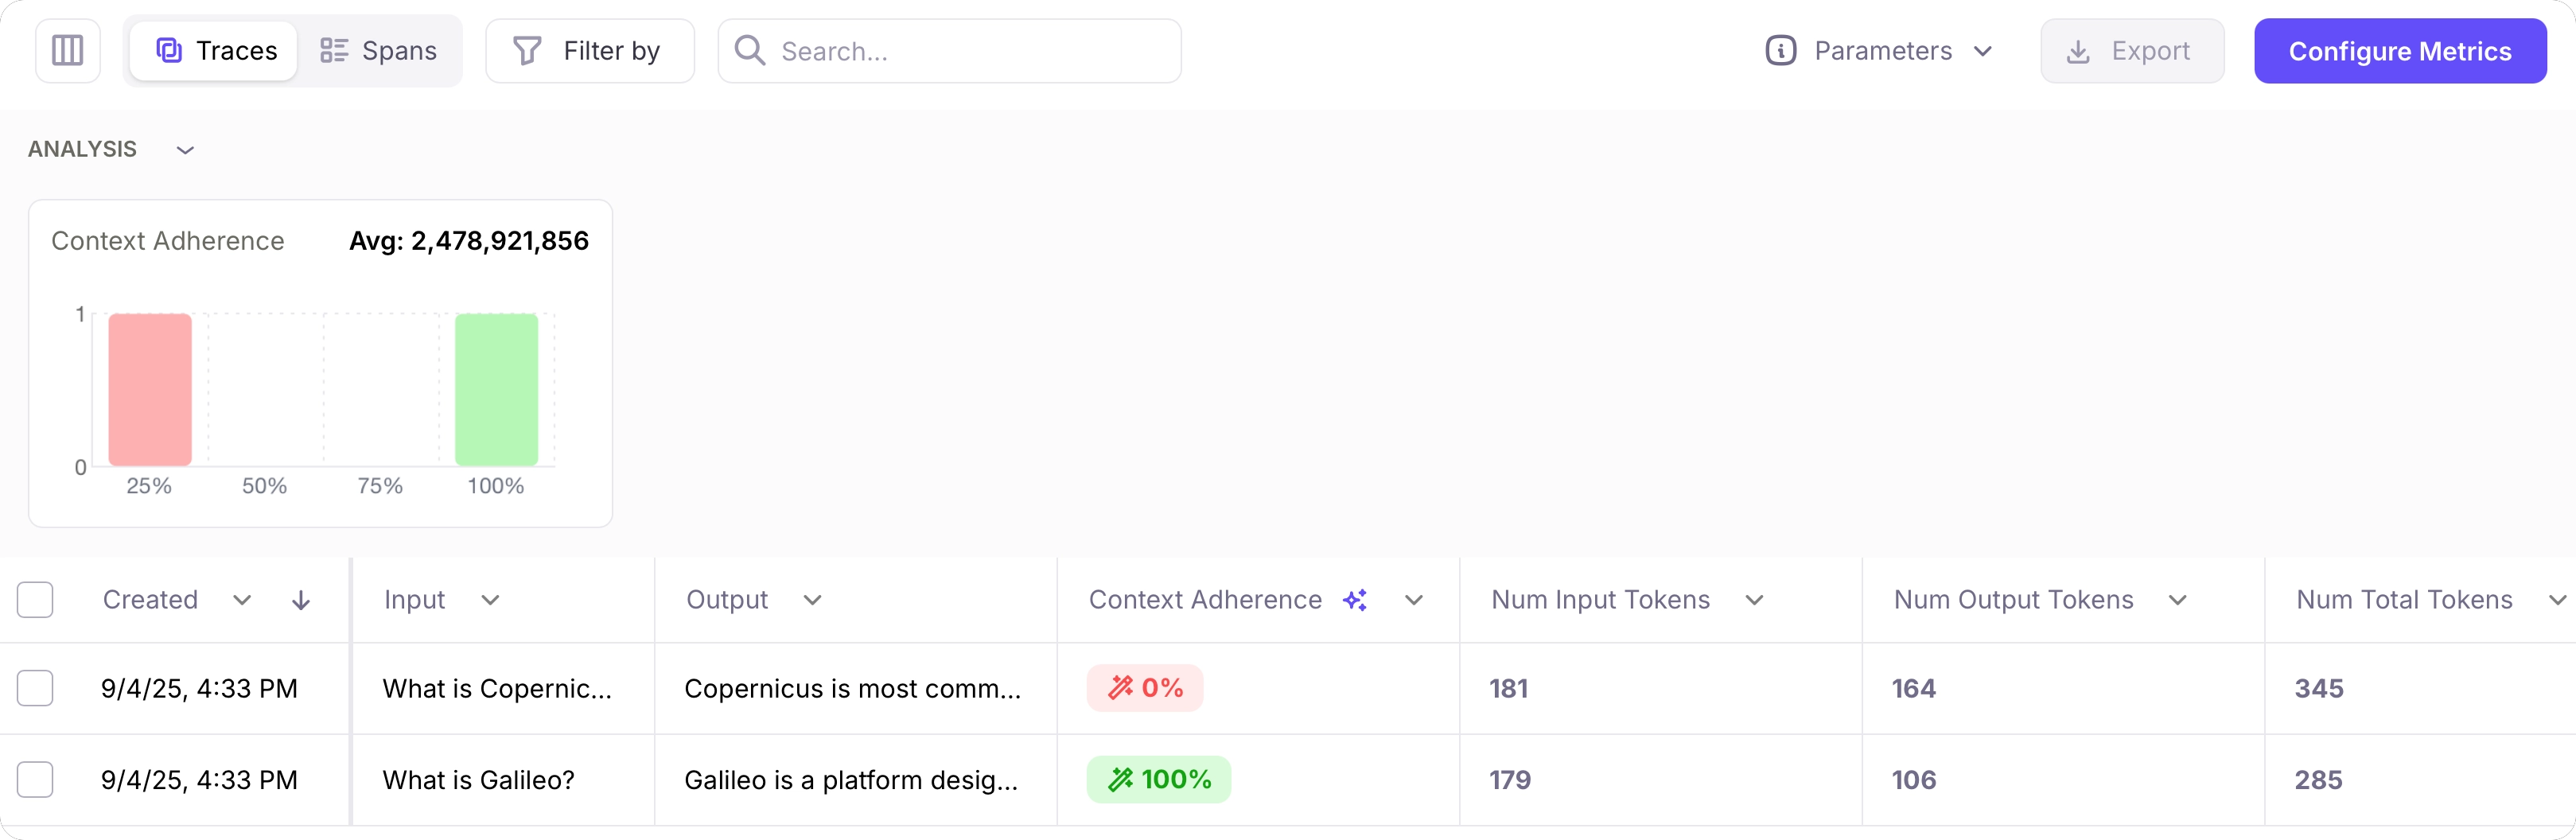
Open the experiment in the Galileo console using the URL output to your terminal. You will see the logged experiment with 2 rows, one for each entry in the dataset.
### Example experiment with code
Below is a step-by-step guide. [Jump to the application code.](#step-create-your-app-code)
Install the **Galileo SDK**, and the dotenv package using the following command in your terminal:
```bash Python theme={null}
pip install galileo python-dotenv
```
```bash TypeScript theme={null}
npm install galileo tsx dotenv
```
Create an `.env` file in your project folder, and set:
* Your [Galileo API key](https://app.galileo.ai/settings/api-keys)
* Your Galileo project name
```ini .env theme={null}
GALILEO_API_KEY="your-galileo-api-key"
GALILEO_PROJECT="your-galileo-project-name"
# Provide the console url below if you are not using app.galileo.ai
# GALILEO_CONSOLE_URL="your-galileo-console-url"
```
Create a file called `app.py` (Python) or `app.ts` (TypeScript) and add the following code:
```python Python theme={null}
import os
from galileo import GalileoMetrics, Message, MessageRole
from galileo.config import GalileoPythonConfig
from galileo.datasets import create_dataset, get_dataset
from galileo.experiments import run_experiment
from galileo.prompts import create_prompt, get_prompt
from galileo.resources.models.prompt_run_settings import PromptRunSettings
# Load the environment variables
from dotenv import load_dotenv
load_dotenv()
# Create a prompt template, or load it if it already exists
prompt = get_prompt(name="My Prompt")
if not prompt:
prompt = create_prompt(
name="My Prompt",
template=[
Message(
role=MessageRole.system,
content="""
Galileo is the fastest way to ship reliable apps.
Galileo brings automation and insight to AI evaluations so you can
ship with confidence.
""",
),
Message(role=MessageRole.user, content="{{input}}"),
],
)
# Create a dataset, or load it if it already exists
dataset = get_dataset(name="My Dataset")
if not dataset:
dataset = create_dataset(
"My Dataset",
content=[
{"input": "What is Galileo?"},
{"input": "What is Copernicus?"}
],
)
# Run the experiment
experiment = run_experiment(
experiment_name="My Experiment",
prompt_template=prompt,
dataset=dataset,
metrics=[GalileoMetrics.context_adherence],
project=os.environ.get("GALILEO_PROJECT"),
prompt_settings=PromptRunSettings(model_alias="gpt-5-mini"),
)
# Show Galileo information
config = GalileoPythonConfig.get()
prompt_url = f"{config.console_url}prompts/{prompt.id}"
dataset_url = f"{config.console_url}datasets/{dataset.dataset.id}"
print()
print("🚀 GALILEO LOG INFORMATION:")
print(f"🔗 Prompt : {prompt_url}")
print(f"🔗 Dataset : {dataset_url}")
print(f"🔗 Experiment : {experiment['link']}")
```
```typescript TypeScript theme={null}
import {
createDataset,
createPrompt,
GalileoMetrics,
getDataset,
getPrompt,
runExperiment
} from "galileo";
import {
DatasetDBType,
MessageRole,
PromptTemplate,
PromptTemplateVersion
} from "galileo/types";
import dotenv from "dotenv";
// Load the environment variables
dotenv.config();
(async () => {
// Create a prompt template, or load it if it already exists
let prompt: PromptTemplate | PromptTemplateVersion;
try {
prompt = await getPrompt({ name: "My Prompt" });
} catch (e) {
prompt = await createPrompt({
name: "My Prompt",
template: [
{
role: MessageRole.system,
content: `
Galileo is the fastest way to ship reliable apps.
Galileo brings automation and insight to AI evaluations so you can
ship with confidence.
`
},
{
role: MessageRole.user,
content: "{{input}}"
},
]
});
}
// Create a dataset, or load it if it already exists
let dataset: DatasetDBType | undefined;
try {
dataset = await getDataset({ name: "My Dataset" });
}catch(e){
dataset = await createDataset(
[
{ "input": "What is Galileo?" },
{ "input": "What is Copernicus?" }
],
"My Dataset",
);
}
// Run the experiment
const experiment = await runExperiment({
name: "My Experiment",
promptTemplate: prompt,
dataset: dataset,
metrics: [GalileoMetrics.contextAdherence],
projectName: process.env.GALILEO_PROJECT,
promptSettings: { modelAlias: "gpt-4.1-mini" }
});
const galileoConsoleUrl = (
process.env.GALILEO_CONSOLE_URL ?? "https://app.galileo.ai")
.replace(/\/+$/, ""
);
const datasetUrl = `${galileoConsoleUrl}/datasets/${dataset.id}`;
console.log();
console.log("🚀 GALILEO LOG INFORMATION:");
console.log(`🔗 Dataset : ${datasetUrl}`);
console.log(`🔬 Experiment : ${experiment.link}`);
})();
```
This code defaults to using `gpt-5-mini`. If you want to use a different model, update the `model_alias` in the prompt settings passed to the call to run experiment.
This code creates a prompt containing a system prompt and user prompt, and the user prompt has a mustache template to inject rows from the dataset. It also creates a dataset.
It then uses these to run an experiment, measuring context adherence.
If the prompt or dataset already exist, they are loaded instead of being recreated.
Run your application using the following command in your terminal:
```bash Python theme={null}
python app.py
```
```bash TypeScript theme={null}
npx tsx app.ts
```
```output Terminal theme={null}
Experiment My Experiment has started and is currently processing.
Results will be available at https://app.galileo.ai/project/.../experiments/...
🚀 GALILEO LOG INFORMATION:
🔗 Prompt : https://app.galileo.ai/prompts/...
🔗 Dataset : https://app.galileo.ai/datasets/...
🔗 Experiment : https://app.galileo.ai/project/.../experiments/...
```
Open the experiment in the Galileo console using the URL output to your terminal. You will see the logged experiment with 2 rows, one for each entry in the dataset.
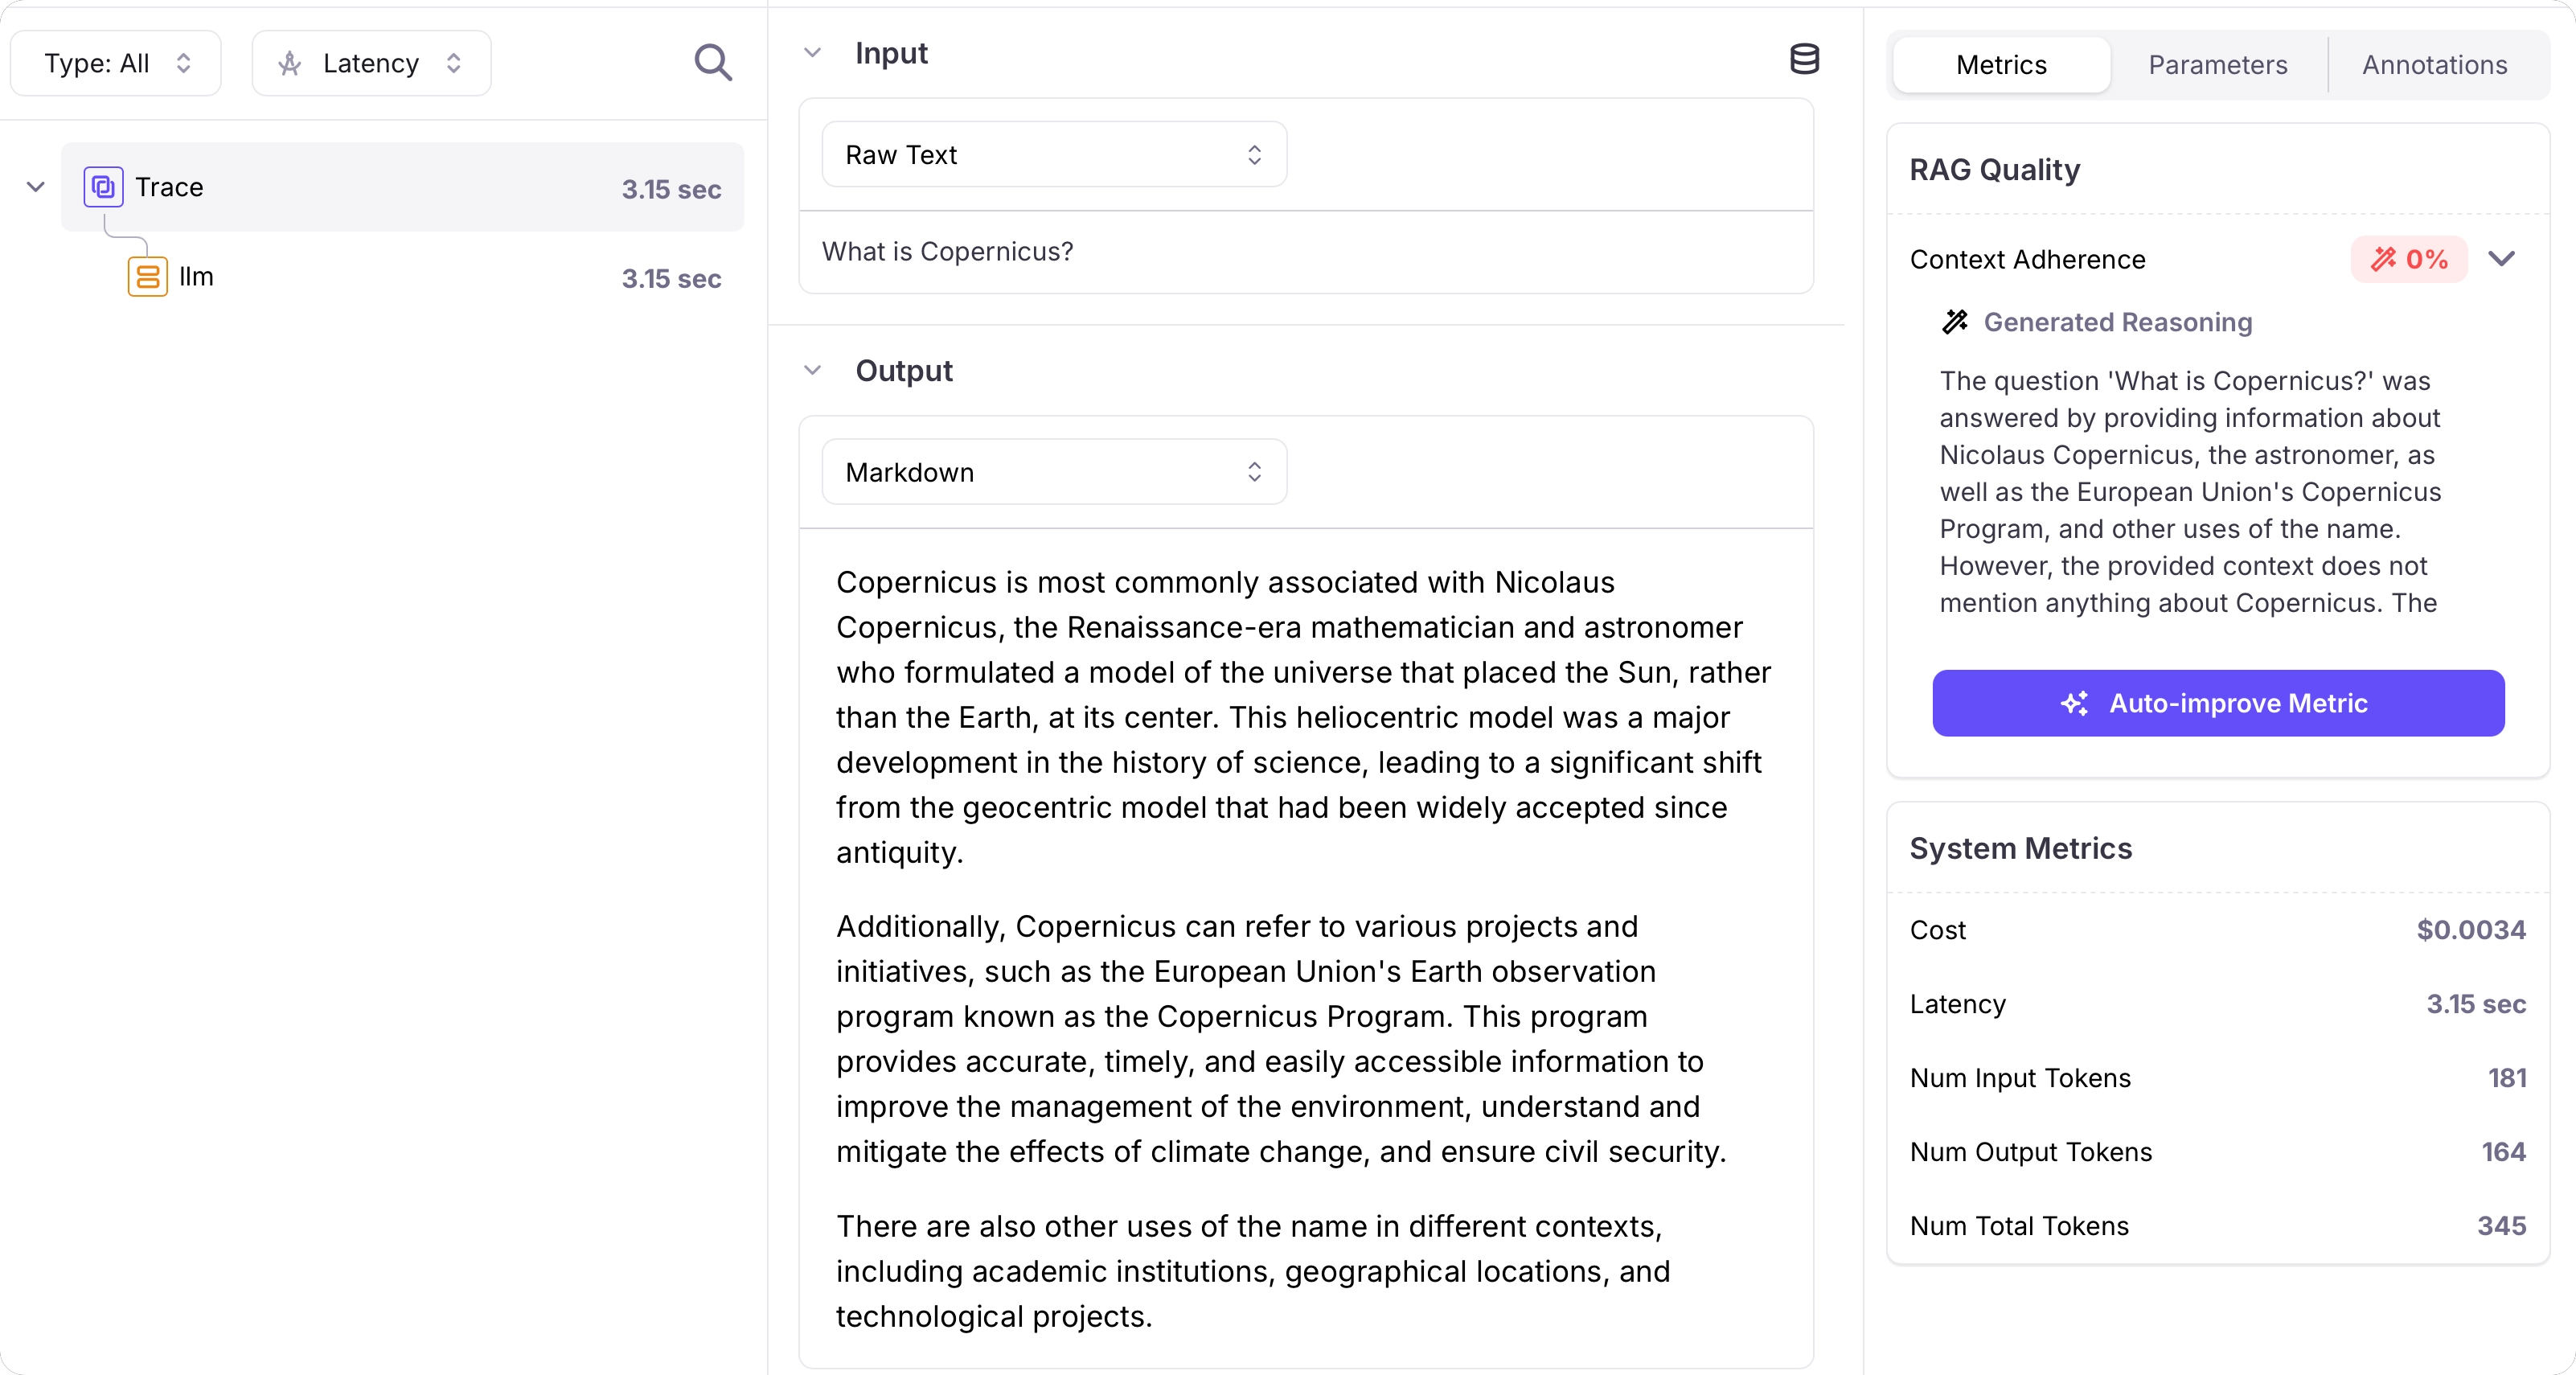
 Select a trace to see more details, including an explanation of the metric score.
 ## Troubleshooting
* **I need a Galileo API key**: Head to [app.galileo.ai](https://app.galileo.ai) and sign up. Then head to the [API keys](https://app.galileo.ai/settings/api-keys) page to get a new API key.
* **What's my project name ?**: The project name was set when you created a new project. If you haven't created a new project, head to Galileo and select the **New Project** button.
## Next steps
Learn how to create and manage datasets in Galileo.
Learn about running experiments in the Galileo console using playgrounds and datasets.
Learn how to run experiments in Galileo.
Learn how to compare experiments in Galileo.
## Troubleshooting
* **I need a Galileo API key**: Head to [app.galileo.ai](https://app.galileo.ai) and sign up. Then head to the [API keys](https://app.galileo.ai/settings/api-keys) page to get a new API key.
* **What's my project name ?**: The project name was set when you created a new project. If you haven't created a new project, head to Galileo and select the **New Project** button.
## Next steps
Learn how to create and manage datasets in Galileo.
Learn about running experiments in the Galileo console using playgrounds and datasets.
Learn how to run experiments in Galileo.
Learn how to compare experiments in Galileo.