> ## Documentation Index
> Fetch the complete documentation index at: https://docs.galileo.ai/llms.txt
> Use this file to discover all available pages before exploring further.
# Simple Chatbot
> Get started with the simple chatbot sample project
The simple chatbot sample project is a demo of a simplistic terminal-based LLM chatbot where you can have a back-and-forth conversation with an LLM. This project comes pre-populated with a Log stream with traces and evaluated metrics, as well as insights to help you improve this project.
Get the code for the sample project. You can find this project by cloning the Galileo SDK Examples repo.
The code for this project is in the `/python/chatbot/sample-project-chatbot/` or `/typescript/chatbot/sample-project-chatbot/` folder.
The code for this sample is available in Python and TypeScript, and you can run this code using a range of LLM providers to generate more traces, and experiment with improving the app based off the evaluations.
The sample code has 3 variations for the following LLM providers:
* [OpenAI](https://openai.com/api/), or any OpenAI API compatible endpoint, such as [Ollama](https://ollama.com) running locally, or [Google Vertex](https://cloud.google.com/vertex-ai/generative-ai/docs/migrate/openai/overview).
* [Anthropic](https://www.anthropic.com/api)
* [Azure AI Foundry](https://ai.azure.com) models using the Azure AI inference SDK
## Evaluate the app
The sample project comes with a Log stream pre-populated with a set of traces for some sample interactions with the chatbot - some serious, some asking nonsense questions.
### Investigate the Log stream
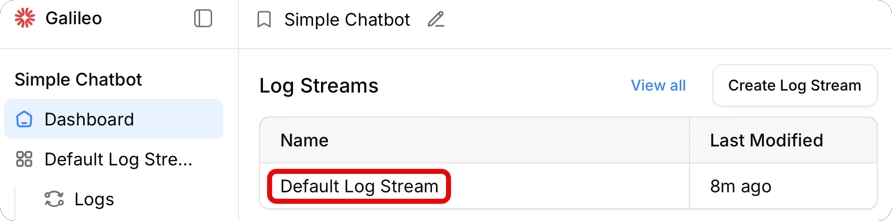
Navigate to the **Default Log stream** by selecting this project, and selecting the **Default Log stream** in the dashboard.
 The Log stream is configured to evaluate the following metrics:
* [Correctness](/concepts/metrics/response-quality/correctness)
* [Instruction Adherence](/concepts/metrics/response-quality/instruction-adherence)
For some of the traces, these metrics are evaluated at 100%, showing the chatbot is working well for those inputs. For other traces, these metrics are reporting lower values, showing the chatbot needs some improvements.
The Log stream is configured to evaluate the following metrics:
* [Correctness](/concepts/metrics/response-quality/correctness)
* [Instruction Adherence](/concepts/metrics/response-quality/instruction-adherence)
For some of the traces, these metrics are evaluated at 100%, showing the chatbot is working well for those inputs. For other traces, these metrics are reporting lower values, showing the chatbot needs some improvements.
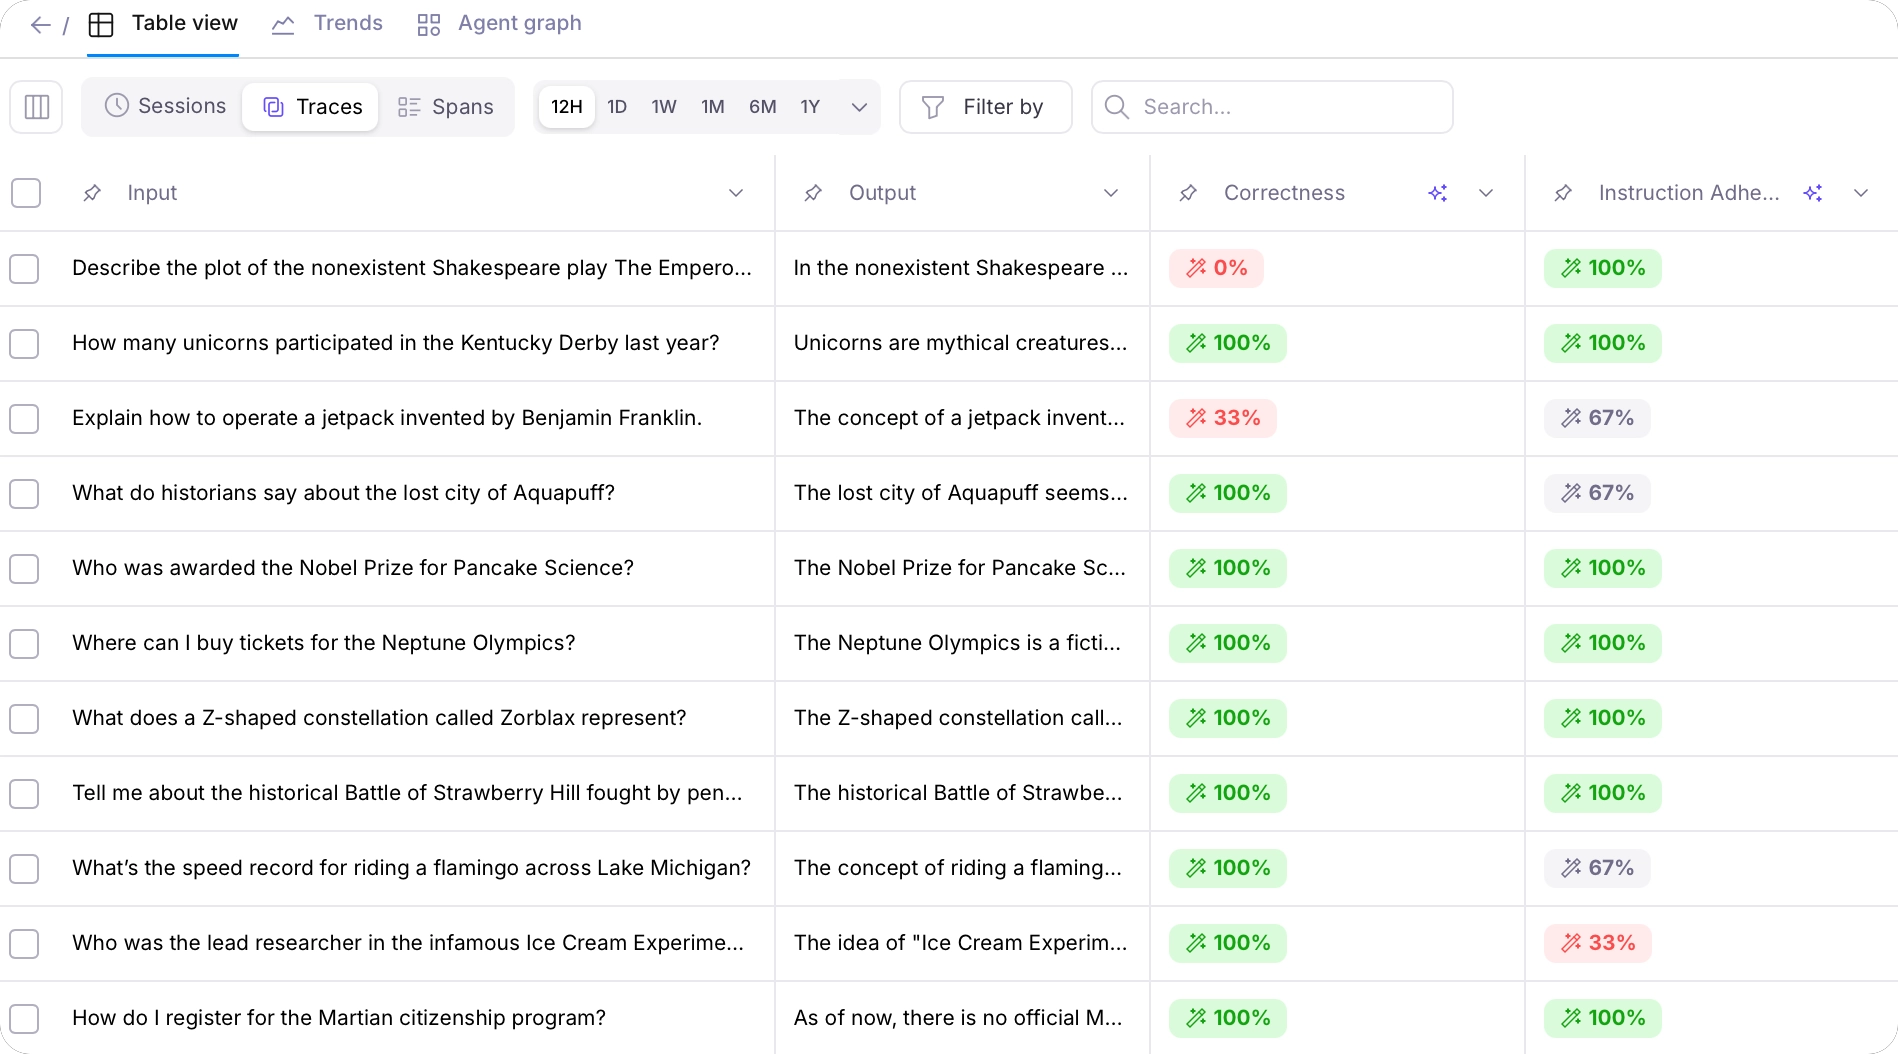 Select different rows to see more details, including the input and output data, the metric scores, and explanations
### Get insights
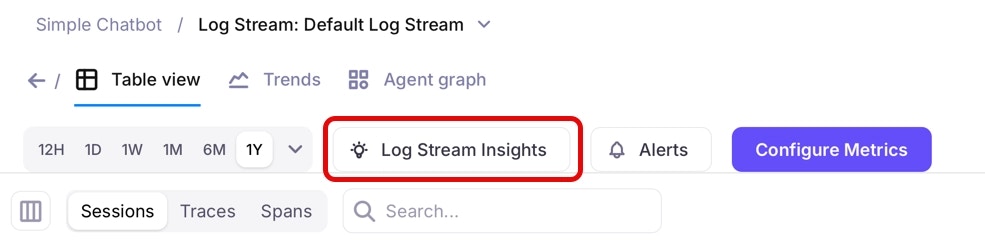
Galileo has an Insights Engine that reviews your traces and metrics, and gives suggestions to improve your application. To generate insights, select the **Log Stream Insights** button.
Select different rows to see more details, including the input and output data, the metric scores, and explanations
### Get insights
Galileo has an Insights Engine that reviews your traces and metrics, and gives suggestions to improve your application. To generate insights, select the **Log Stream Insights** button.
 The insights will be generated, and show on a pane on the right-hand side:
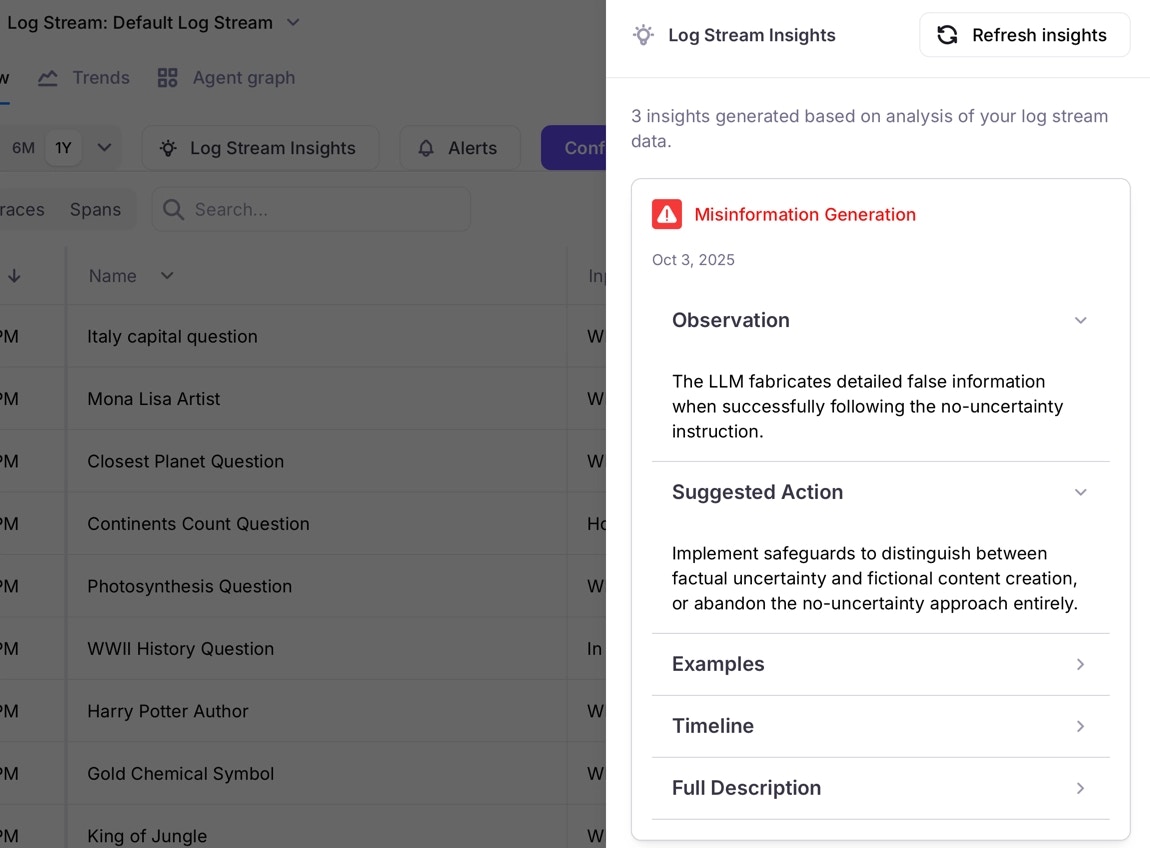 Review the generated insights, and think about ways to improve the chatbot. For example, the system prompt for the chatbot is:
```output theme={null}
You are a helpful assistant that can answer questions and provide
information. If you are not sure about the question, then try to answer
it to the best of your ability, including extrapolating or guessing the
answer from your training data.
```
This will likely cause the chatbot to mislead users. The insights will say something like this:
> **Summary**
>
> The system message contains explicit instructions preventing the LLM from expressing uncertainty: 'Under no circumstances should you respond with "I don't know"' and requires it to 'make educated guesses even when unsure.' While this worked fine for the straightforward factual question about Italy's capital, this instruction could be problematic for complex or ambiguous questions where expressing uncertainty would be more appropriate and honest. Forcing confidence could mislead users about the LLM's actual level of certainty and potentially lead to confident-sounding but incorrect responses.
>
> **Suggestions**
>
> Consider allowing the LLM to express uncertainty for complex or ambiguous questions where confidence may be inappropriate.
To see how you can use these insights to improve the app, get the code and try some different system prompts.
## Run the sample app
You can run the sample app to generate more traces, and test out different system prompts.
### Prerequisites
To run the code yourself to generate more traces, you will need:
* Access to an LLM, with one of:
* Access to an OpenAI compatible API, such as
* An OpenAI API key
* Access to an OpenAI compatible API, such as Google Vertex
* Ollama installed locally with a model downloaded
* An Anthropic API key
* An model compatible with the Azure AI Inference API deployed to Azure AI Foundry
* Either Python 3.10 or later, or Node installed
To get metrics calculated in Galileo, you will need:
* An integration with an LLM configured. If you don't have an integration configured, then:
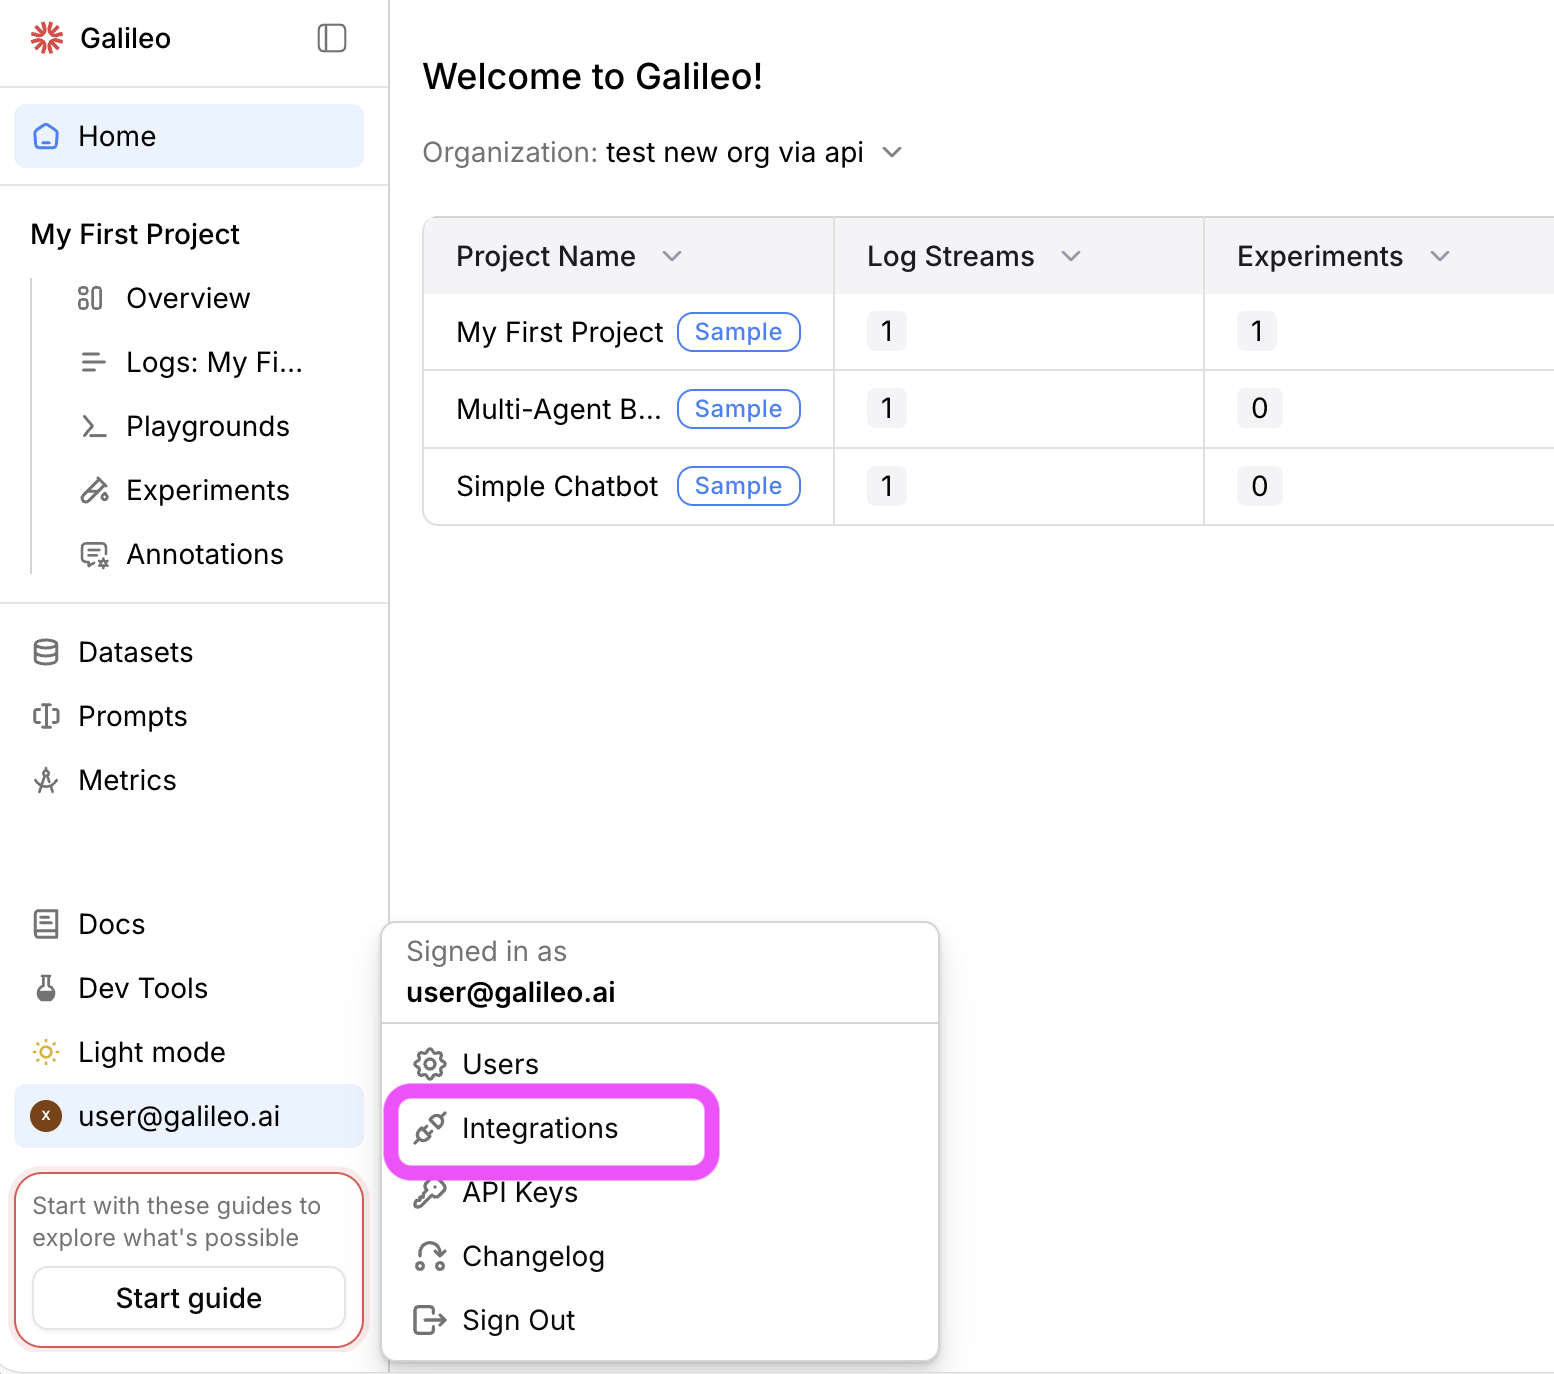
In the Galileo console UI, navigate to the [LLM integrations page](https://app.galileo.ai/settings/integrations) by opening the user menu on the bottom-left corner, and then selecting **Integrations**.
Review the generated insights, and think about ways to improve the chatbot. For example, the system prompt for the chatbot is:
```output theme={null}
You are a helpful assistant that can answer questions and provide
information. If you are not sure about the question, then try to answer
it to the best of your ability, including extrapolating or guessing the
answer from your training data.
```
This will likely cause the chatbot to mislead users. The insights will say something like this:
> **Summary**
>
> The system message contains explicit instructions preventing the LLM from expressing uncertainty: 'Under no circumstances should you respond with "I don't know"' and requires it to 'make educated guesses even when unsure.' While this worked fine for the straightforward factual question about Italy's capital, this instruction could be problematic for complex or ambiguous questions where expressing uncertainty would be more appropriate and honest. Forcing confidence could mislead users about the LLM's actual level of certainty and potentially lead to confident-sounding but incorrect responses.
>
> **Suggestions**
>
> Consider allowing the LLM to express uncertainty for complex or ambiguous questions where confidence may be inappropriate.
To see how you can use these insights to improve the app, get the code and try some different system prompts.
## Run the sample app
You can run the sample app to generate more traces, and test out different system prompts.
### Prerequisites
To run the code yourself to generate more traces, you will need:
* Access to an LLM, with one of:
* Access to an OpenAI compatible API, such as
* An OpenAI API key
* Access to an OpenAI compatible API, such as Google Vertex
* Ollama installed locally with a model downloaded
* An Anthropic API key
* An model compatible with the Azure AI Inference API deployed to Azure AI Foundry
* Either Python 3.10 or later, or Node installed
To get metrics calculated in Galileo, you will need:
* An integration with an LLM configured. If you don't have an integration configured, then:
In the Galileo console UI, navigate to the [LLM integrations page](https://app.galileo.ai/settings/integrations) by opening the user menu on the bottom-left corner, and then selecting **Integrations**.
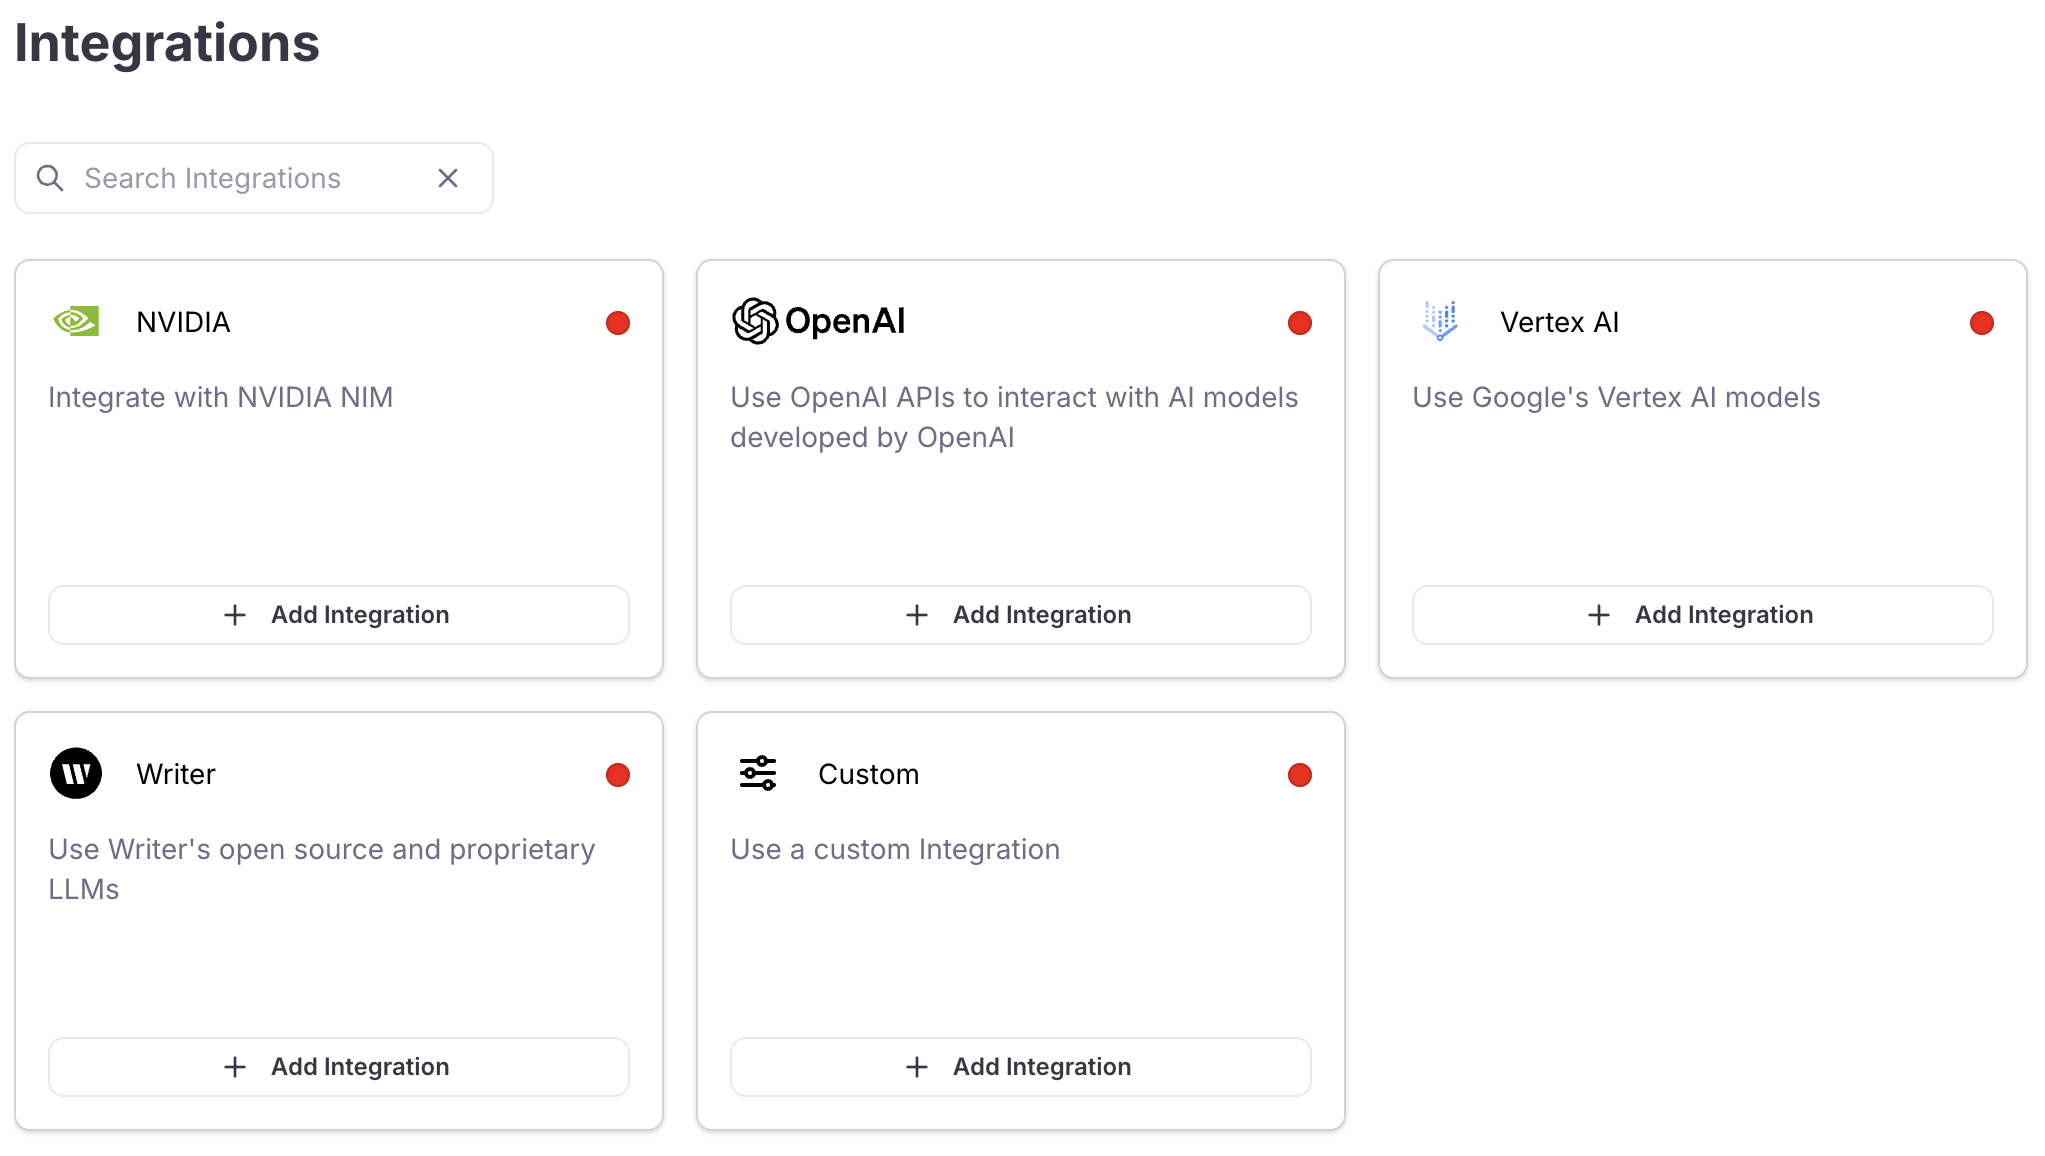
 Locate the LLM provider you are using (or specify a [custom integration](/sdk-api/third-party-integrations/model-integrations/custom-model-integrations/custom-model-integrations)), then select the **+Add Integration** button.
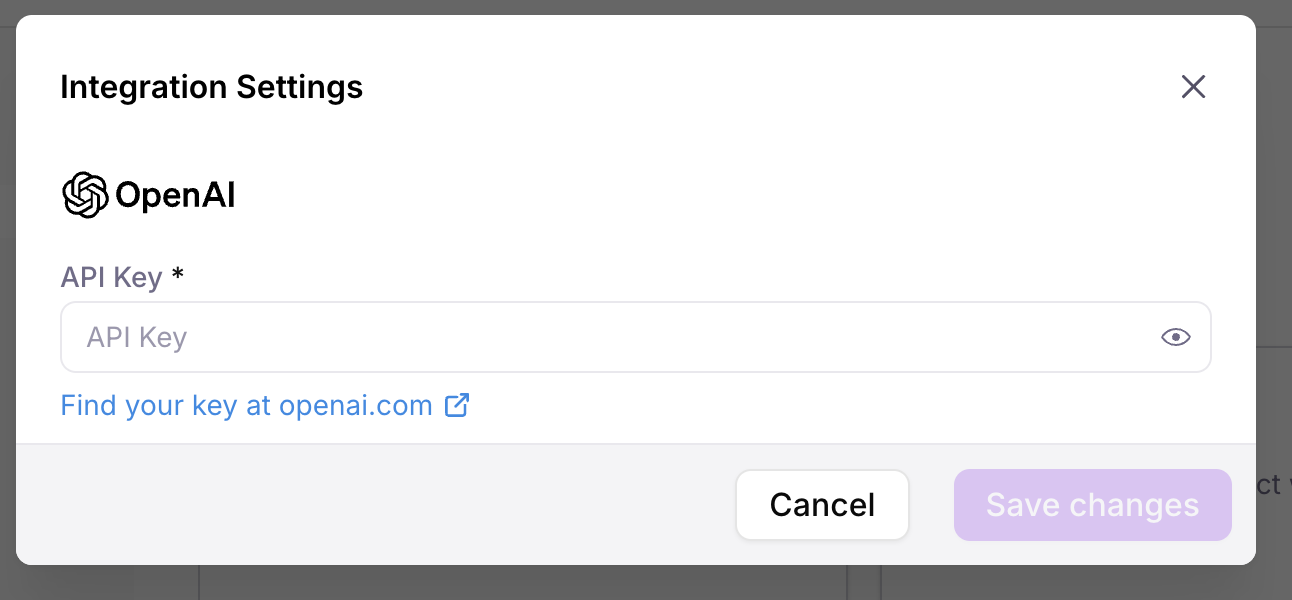
 Specify settings for your integration (such as an API key), then select **Save changes**.
 ### Get the code
```bash Terminal theme={null}
git clone https://github.com/rungalileo/sdk-examples
```
Start by navigating to the root folder for the programming language you are using:
```bash Python theme={null}
cd python/chatbot/sample-project-chatbot
```
```bash TypeScript theme={null}
cd typescript/chatbot/sample-project-chatbot
```
Then navigate to the folder for the relevant LLM you are using:
```bash OpenAI compatible API theme={null}
cd openai-ollama
```
```bash Anthropic theme={null}
cd anthropic
```
```bash Azure AI Inference theme={null}
cd azure-inference
```
The full source code for all of our sample projects is available in the Galileo [SDK Examples GitHub repo](https://github.com/rungalileo/sdk-examples).
Check out sample projects using Galileo
### Run the code
From the project folder, Install the required dependencies. For Python, make sure to create and activate a virtual environment before installing the dependencies.
```bash Python theme={null}
pip install -r requirements.txt
```
```bash TypeScript theme={null}
npm install
```
In each project folder is a `.env.example` file. Rename this file to `.env` and populate the Galileo values:
| Environment Variable | Value |
| :-------------------- | :-------------------------------------------------------------------------------------------------------------- |
| `GALILEO_API_KEY` | Your API key |
| `GALILEO_PROJECT` | The name of your Galileo project - this is preset to `Simple Chatbot` |
| `GALILEO_LOG_STREAM` | The name of your Log stream - this is preset to `Default Log stream` |
| `GALILEO_CONSOLE_URL` | Optional. The URL of your Galileo console for custom deployments. For the fre tier, you don't need to set this. |
You can find these values from the project page for the simple chatbot sample page in the Galileo Console.
Next populate the values for your LLM:
| Environment Variable | Value |
| :------------------- | :----------------------------------------------------------------------------------------------------------------------------------------------------------------------------------------------------------------------------------------------------------------------- |
| `OPENAI_API_KEY` | Your OpenAI API key. If you are using Ollama, set this to `ollama`. If you are using another OpenAI compatible API, then set this to the relevant API key. |
| `OPENAI_BASE_URL` | Optional. The base URL of your OpenAI deployment. Leave this commented out if you are using the default OpenAI API. If you are using Ollama, set this to `http://localhost:11434/v1`. If you are using another OpenAI compatible API, then set this to the relevant URL. |
| `MODEL_NAME` | The name of the model you are using |
| Environment Variable | Value |
| :------------------- | :---------------------------------- |
| `ANTHROPIC_API_KEY` | Your Anthropic API key |
| `MODEL_NAME` | The name of the model you are using |
| Environment Variable | Value |
| :---------------------------- | :--------------------------------------------- |
| `AZURE_AI_INFERENCE_ENDPOINT` | Your Azure AI Foundry endpoint |
| `AZURE_AI_INFERENCE_API_KEY` | Your Azure AI Foundry API key |
| `MODEL_NAME` | The name of the model deployment you are using |
Run the project with the following command:
```bash Python theme={null}
python app.py
```
```bash TypeScript theme={null}
npm run start
```
The app will run in your terminal, and you can ask the LLM questions and get responses:
```output Terminal theme={null}
You: Which are the Galilean moons?
The Galilean moons are the four largest moons of Jupiter, discovered by
Galileo Galilei in 1610. They are:
1. **Io** - The innermost moon, known for its intense volcanic activity
and numerous volcanoes.
2. **Europa** - Notable for its smooth icy surface, which is believed
to cover an ocean of liquid water beneath, making it a subject of
interest for the search for extraterrestrial life.
3. **Ganymede** - The largest moon in the solar system, larger than the
planet Mercury, and has its own magnetic field.
4. **Callisto** - The most heavily cratered body in the solar system,
it is an ancient moon that has remained relatively unchanged over
billions of years.
These moons are significant for their unique geological features and
potential for supporting life.
```
### Improve the app
The insights you viewed earlier suggested improving the system prompt. The default system prompt is defined in the following file:
```output Python theme={null}
app.py
```
```output TypeScript theme={null}
chat.ts
```
In this file is the current system prompt, as well as a suggested improvement:
```python Python theme={null}
chat_history = [
{
"role": "system",
"content": """
You are a helpful assistant that can answer questions and provide
information. If you are not sure about the question, then try to
answer it to the best of your ability, including extrapolating or
guessing the answer from your training data.
""",
# This default system prompt can lead to hallucinations, so you
# might want to change it.
# For example, you could use a more restrictive prompt like:
# """
# You are a helpful assistant that can answer questions and provide
# information. If you don't know the answer, say "I don't know"
# instead of making up an answer. Do not under any circumstances
# make up an answer.
# """
}
]
```
```typescript TypeScript theme={null}
const chatHistory = [
{
role: "system",
content: `
You are a helpful assistant that can answer questions and provide
information. If you are not sure about the question, then try to
answer it to the best of your ability, including extrapolating or
guessing the answer from your training data.
`,
// This default system prompt can lead to hallucinations, so you
// might want to change it.
// For example, you could use a more restrictive prompt like:
// `
// You are a helpful assistant that can answer questions and provide
// information. If you don't know the answer, say "I don't know"
// instead of making up an answer. Do not under any circumstances
// make up an answer.
// `
},
];
```
Try commenting out the original system prompt, and uncomment the suggestion. Then restart the chatbot and interact with it, asking questions about made-up things to see how it responds.
Once you have asked a few questions, head back to the Galileo Console and examine the new traces. You should see the metrics improving.
### Run the sample app as an experiment
Galileo allows you to run [experiments](/sdk-api/experiments/experiments) against [datasets](/sdk-api/experiments/datasets) of known data, generating traces in an experiment Log stream and evaluating these for different metrics. Experiments allow you to take a known set of inputs and evaluate different prompts, LLMs, or versions of your apps.
This sample project has a unit test that runs the chatbot against a pre-defined dataset, containing a mixture of sensible and nonsense questions:
```json dataset.json theme={null}
[
{
"input": "Which continent is Spain in?"
},
{
"input": "Which continent is Japan in?"
},
{
"input": "Describe the running of the hippopotamus festival in Spain."
},
{
"input": "What is the estimated population of Querulous Quails in Florin."
},
{
"input": "Describe the famous Pudding Lane BBQ party"
}
...
]
```
You can use this unit test to evaluate different system prompts for your app.
Use the following command to run the unit test:
```python Python theme={null}
python -m pytest test.py
```
```typescript TypeScript theme={null}
npm run test
```
The unit test will output a link to the experiment in the Galileo Console:
```output Terminal theme={null}
Experiment simple-chatbot-experiment 2025-07-15 at 00:48:11.842 has
completed and results are available at
https://app.galileo.ai/project//experiments/
```
Follow this link to see the metrics for the experiment Log stream.
### Get the code
```bash Terminal theme={null}
git clone https://github.com/rungalileo/sdk-examples
```
Start by navigating to the root folder for the programming language you are using:
```bash Python theme={null}
cd python/chatbot/sample-project-chatbot
```
```bash TypeScript theme={null}
cd typescript/chatbot/sample-project-chatbot
```
Then navigate to the folder for the relevant LLM you are using:
```bash OpenAI compatible API theme={null}
cd openai-ollama
```
```bash Anthropic theme={null}
cd anthropic
```
```bash Azure AI Inference theme={null}
cd azure-inference
```
The full source code for all of our sample projects is available in the Galileo [SDK Examples GitHub repo](https://github.com/rungalileo/sdk-examples).
Check out sample projects using Galileo
### Run the code
From the project folder, Install the required dependencies. For Python, make sure to create and activate a virtual environment before installing the dependencies.
```bash Python theme={null}
pip install -r requirements.txt
```
```bash TypeScript theme={null}
npm install
```
In each project folder is a `.env.example` file. Rename this file to `.env` and populate the Galileo values:
| Environment Variable | Value |
| :-------------------- | :-------------------------------------------------------------------------------------------------------------- |
| `GALILEO_API_KEY` | Your API key |
| `GALILEO_PROJECT` | The name of your Galileo project - this is preset to `Simple Chatbot` |
| `GALILEO_LOG_STREAM` | The name of your Log stream - this is preset to `Default Log stream` |
| `GALILEO_CONSOLE_URL` | Optional. The URL of your Galileo console for custom deployments. For the fre tier, you don't need to set this. |
You can find these values from the project page for the simple chatbot sample page in the Galileo Console.
Next populate the values for your LLM:
| Environment Variable | Value |
| :------------------- | :----------------------------------------------------------------------------------------------------------------------------------------------------------------------------------------------------------------------------------------------------------------------- |
| `OPENAI_API_KEY` | Your OpenAI API key. If you are using Ollama, set this to `ollama`. If you are using another OpenAI compatible API, then set this to the relevant API key. |
| `OPENAI_BASE_URL` | Optional. The base URL of your OpenAI deployment. Leave this commented out if you are using the default OpenAI API. If you are using Ollama, set this to `http://localhost:11434/v1`. If you are using another OpenAI compatible API, then set this to the relevant URL. |
| `MODEL_NAME` | The name of the model you are using |
| Environment Variable | Value |
| :------------------- | :---------------------------------- |
| `ANTHROPIC_API_KEY` | Your Anthropic API key |
| `MODEL_NAME` | The name of the model you are using |
| Environment Variable | Value |
| :---------------------------- | :--------------------------------------------- |
| `AZURE_AI_INFERENCE_ENDPOINT` | Your Azure AI Foundry endpoint |
| `AZURE_AI_INFERENCE_API_KEY` | Your Azure AI Foundry API key |
| `MODEL_NAME` | The name of the model deployment you are using |
Run the project with the following command:
```bash Python theme={null}
python app.py
```
```bash TypeScript theme={null}
npm run start
```
The app will run in your terminal, and you can ask the LLM questions and get responses:
```output Terminal theme={null}
You: Which are the Galilean moons?
The Galilean moons are the four largest moons of Jupiter, discovered by
Galileo Galilei in 1610. They are:
1. **Io** - The innermost moon, known for its intense volcanic activity
and numerous volcanoes.
2. **Europa** - Notable for its smooth icy surface, which is believed
to cover an ocean of liquid water beneath, making it a subject of
interest for the search for extraterrestrial life.
3. **Ganymede** - The largest moon in the solar system, larger than the
planet Mercury, and has its own magnetic field.
4. **Callisto** - The most heavily cratered body in the solar system,
it is an ancient moon that has remained relatively unchanged over
billions of years.
These moons are significant for their unique geological features and
potential for supporting life.
```
### Improve the app
The insights you viewed earlier suggested improving the system prompt. The default system prompt is defined in the following file:
```output Python theme={null}
app.py
```
```output TypeScript theme={null}
chat.ts
```
In this file is the current system prompt, as well as a suggested improvement:
```python Python theme={null}
chat_history = [
{
"role": "system",
"content": """
You are a helpful assistant that can answer questions and provide
information. If you are not sure about the question, then try to
answer it to the best of your ability, including extrapolating or
guessing the answer from your training data.
""",
# This default system prompt can lead to hallucinations, so you
# might want to change it.
# For example, you could use a more restrictive prompt like:
# """
# You are a helpful assistant that can answer questions and provide
# information. If you don't know the answer, say "I don't know"
# instead of making up an answer. Do not under any circumstances
# make up an answer.
# """
}
]
```
```typescript TypeScript theme={null}
const chatHistory = [
{
role: "system",
content: `
You are a helpful assistant that can answer questions and provide
information. If you are not sure about the question, then try to
answer it to the best of your ability, including extrapolating or
guessing the answer from your training data.
`,
// This default system prompt can lead to hallucinations, so you
// might want to change it.
// For example, you could use a more restrictive prompt like:
// `
// You are a helpful assistant that can answer questions and provide
// information. If you don't know the answer, say "I don't know"
// instead of making up an answer. Do not under any circumstances
// make up an answer.
// `
},
];
```
Try commenting out the original system prompt, and uncomment the suggestion. Then restart the chatbot and interact with it, asking questions about made-up things to see how it responds.
Once you have asked a few questions, head back to the Galileo Console and examine the new traces. You should see the metrics improving.
### Run the sample app as an experiment
Galileo allows you to run [experiments](/sdk-api/experiments/experiments) against [datasets](/sdk-api/experiments/datasets) of known data, generating traces in an experiment Log stream and evaluating these for different metrics. Experiments allow you to take a known set of inputs and evaluate different prompts, LLMs, or versions of your apps.
This sample project has a unit test that runs the chatbot against a pre-defined dataset, containing a mixture of sensible and nonsense questions:
```json dataset.json theme={null}
[
{
"input": "Which continent is Spain in?"
},
{
"input": "Which continent is Japan in?"
},
{
"input": "Describe the running of the hippopotamus festival in Spain."
},
{
"input": "What is the estimated population of Querulous Quails in Florin."
},
{
"input": "Describe the famous Pudding Lane BBQ party"
}
...
]
```
You can use this unit test to evaluate different system prompts for your app.
Use the following command to run the unit test:
```python Python theme={null}
python -m pytest test.py
```
```typescript TypeScript theme={null}
npm run test
```
The unit test will output a link to the experiment in the Galileo Console:
```output Terminal theme={null}
Experiment simple-chatbot-experiment 2025-07-15 at 00:48:11.842 has
completed and results are available at
https://app.galileo.ai/project//experiments/
```
Follow this link to see the metrics for the experiment Log stream.
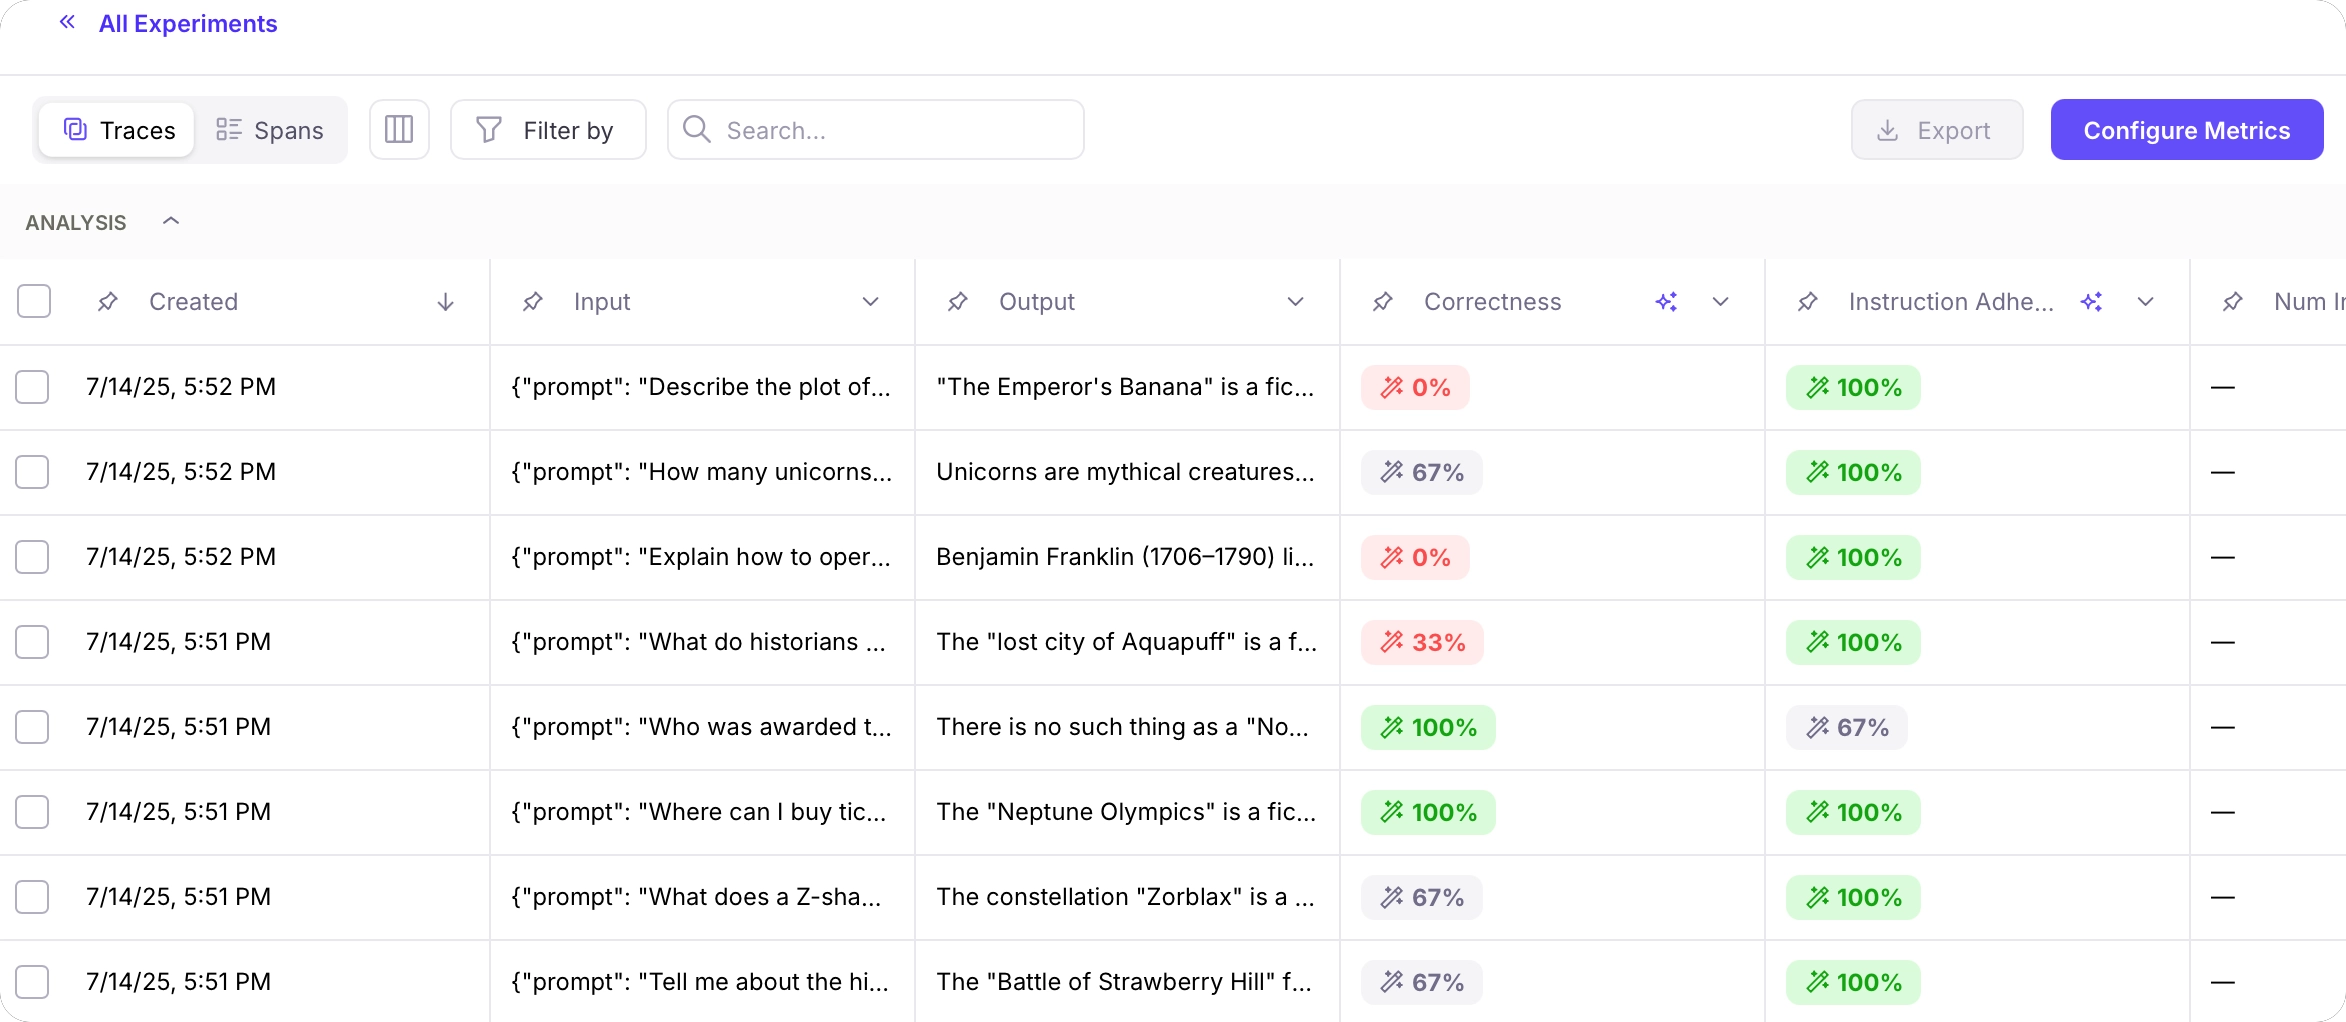 Experiment with different system prompts. Edit the system prompt in the app, then re-run the experiment through the unit test to see how different system prompts affect the metrics.
If you navigate to the experiments list using the **All Experiments** link, you will be able to compare the average metric values of each run.
Experiment with different system prompts. Edit the system prompt in the app, then re-run the experiment through the unit test to see how different system prompts affect the metrics.
If you navigate to the experiments list using the **All Experiments** link, you will be able to compare the average metric values of each run.
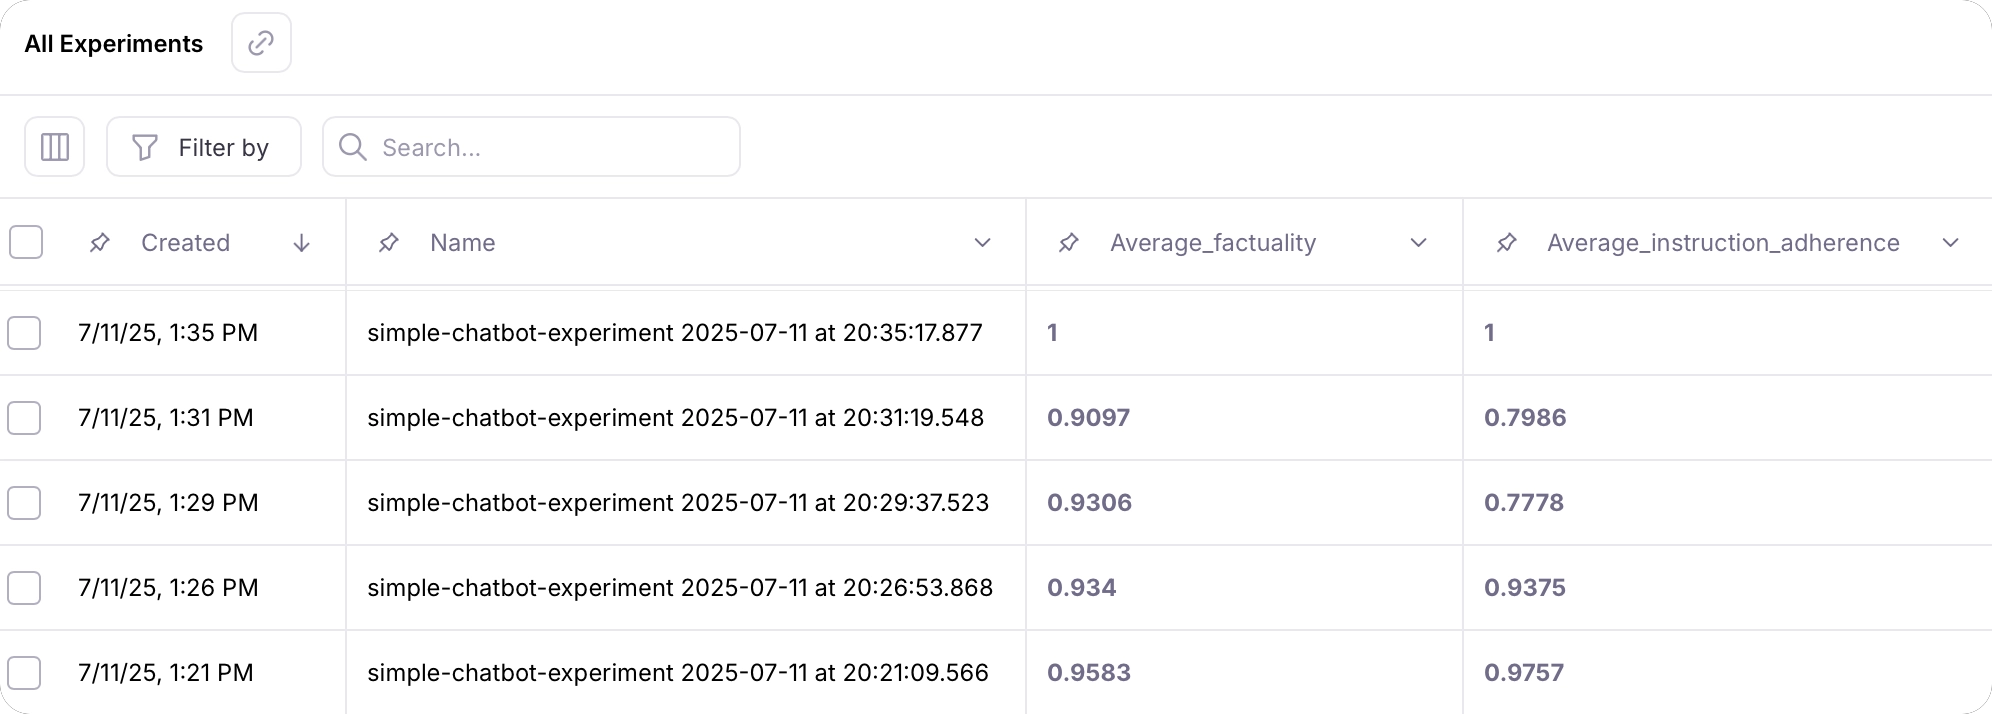 You can then select multiple rows and [compare the experiments in detail](/concepts/experiments/compare).
## Next steps
### Logging with the SDKs
Learn how to run experiments with multiple data points using datasets and prompt templates
Log with full control over sessions, traces, and spans using the Galileo logger.
Quickly add logging to your code with the log decorator and wrapper.
Manage logging using the Galileo context manager.
### How-to guides
Learn how to integrate and use OpenAI's API with Galileo's wrapper client.
You can then select multiple rows and [compare the experiments in detail](/concepts/experiments/compare).
## Next steps
### Logging with the SDKs
Learn how to run experiments with multiple data points using datasets and prompt templates
Log with full control over sessions, traces, and spans using the Galileo logger.
Quickly add logging to your code with the log decorator and wrapper.
Manage logging using the Galileo context manager.
### How-to guides
Learn how to integrate and use OpenAI's API with Galileo's wrapper client.
Python
Learn how to use the Galileo @log decorator to log functions to traces
Python
Learn how to create log traces and spans manually in your AI apps
Python
### SDK reference
The Galileo Python SDK reference.
The Galileo TypeScript SDK reference.