

- Set up your project with Galileo
- Create a basic RAG application
- Add logging with Galileo
- Run your app using an experiment
Get the code
You can find the code in this how-to guide in the Galileo SDK examples repo.
Before you start
To complete this how-to, you will need:- An OpenAI API key
- A Galileo project
- An LLM integration configured to calculate LLM-as-a-judge metrics
- Your Galileo API key
Install dependencies
To use Galileo, you need to install some package dependencies, and configure environment variables.Install Required Dependencies
Install the required dependencies for your app. If you are using Python, create a virtual environment using your preferred method, then install dependencies inside that environment:
Create a basic RAG application
In this section you will create a basic RAG application. This will use tool calling to call a function that simulates a RAG system by returning some pre-defined documents.Add a RAG function
Add a function that simulates RAG. This function takes a star sign, and returns some dummy documents with horoscopes.
Add a tool to get the horoscope
Add code for a tool that can get the horoscope. This consists of a function that uses the RAG code to get horoscope information, and a tool definition that the LLM can use.
Add a function to generate the horoscope using the LLM and tools
Add the following code to request the horoscope from OpenAI, calling tools as required:
Add logging with Galileo
You now have a basic AI application with a tool that uses RAG. Let’s add logging with Galileo.Create a session and trace
Change the main function to create a session and trace before generating the horoscope, then concluding and flushing it afterwards:
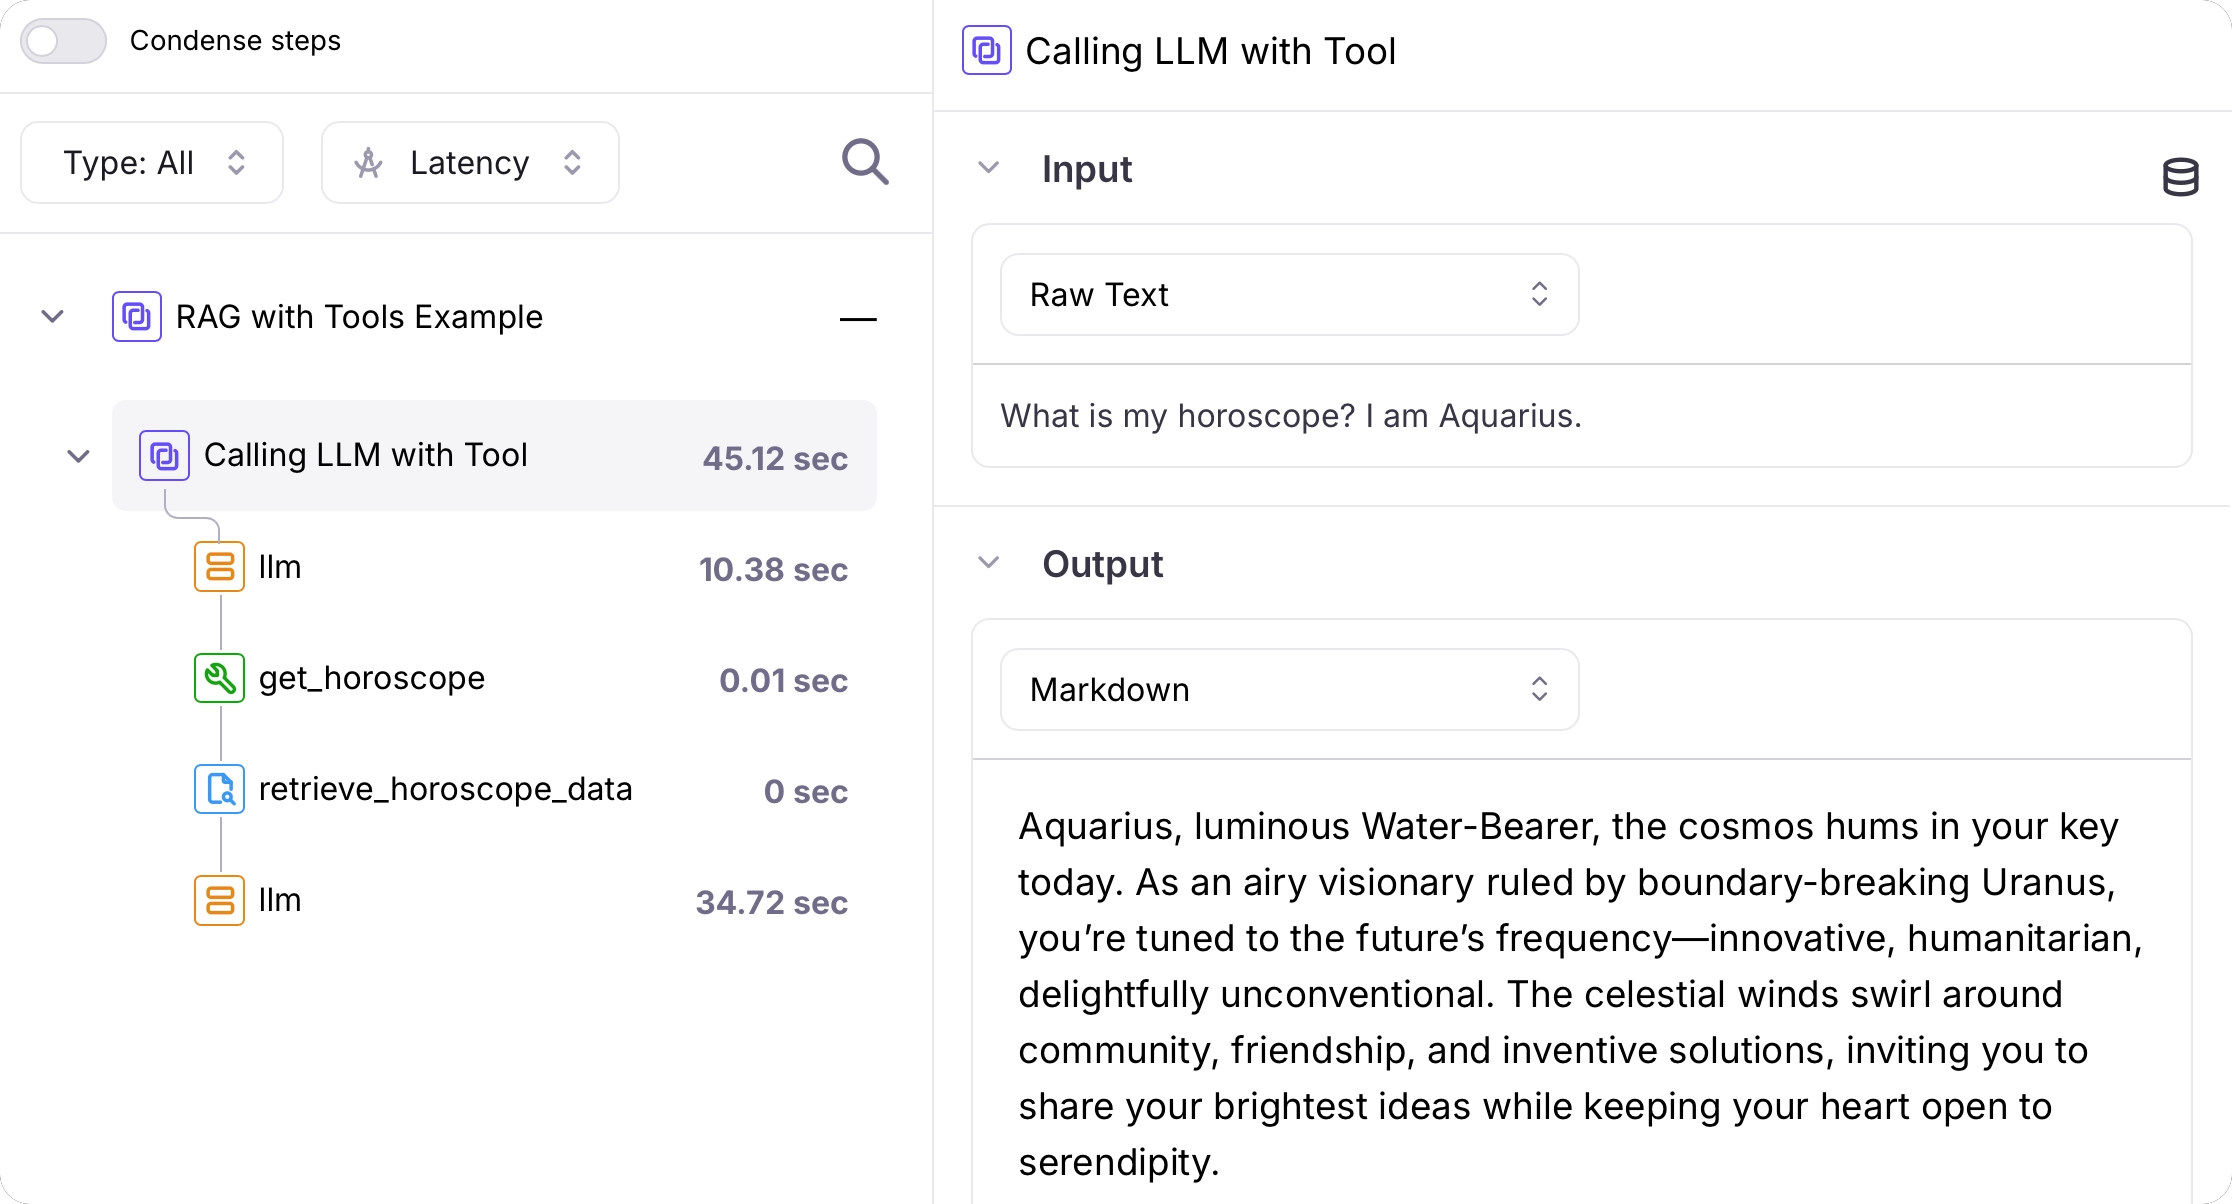
Use the Galileo OpenAI wrapper to log an LLM span
Galileo has a wrapper for the OpenAI SDK that logs all LLM interactions as LLM spans.If you are using Python, update the OpenAI import to the following. If you are using TypeScript, update the creation of the OpenAI client to the following.
Log the RAG call as a retriever span
Update the mock RAG function to log the call and result as a retriever span:
Log the tool call as a tool span
Update the get horoscope tool function to log the call and result as a tool span:
Run your app using an experiment
Now that your app is running, let’s create an experiment file to run the app as an experiment. In this code you’ll create a new file to run as a test, but in the real world you would probably create this as a unit test using your preferred framework of choice.Add code to run the experiment
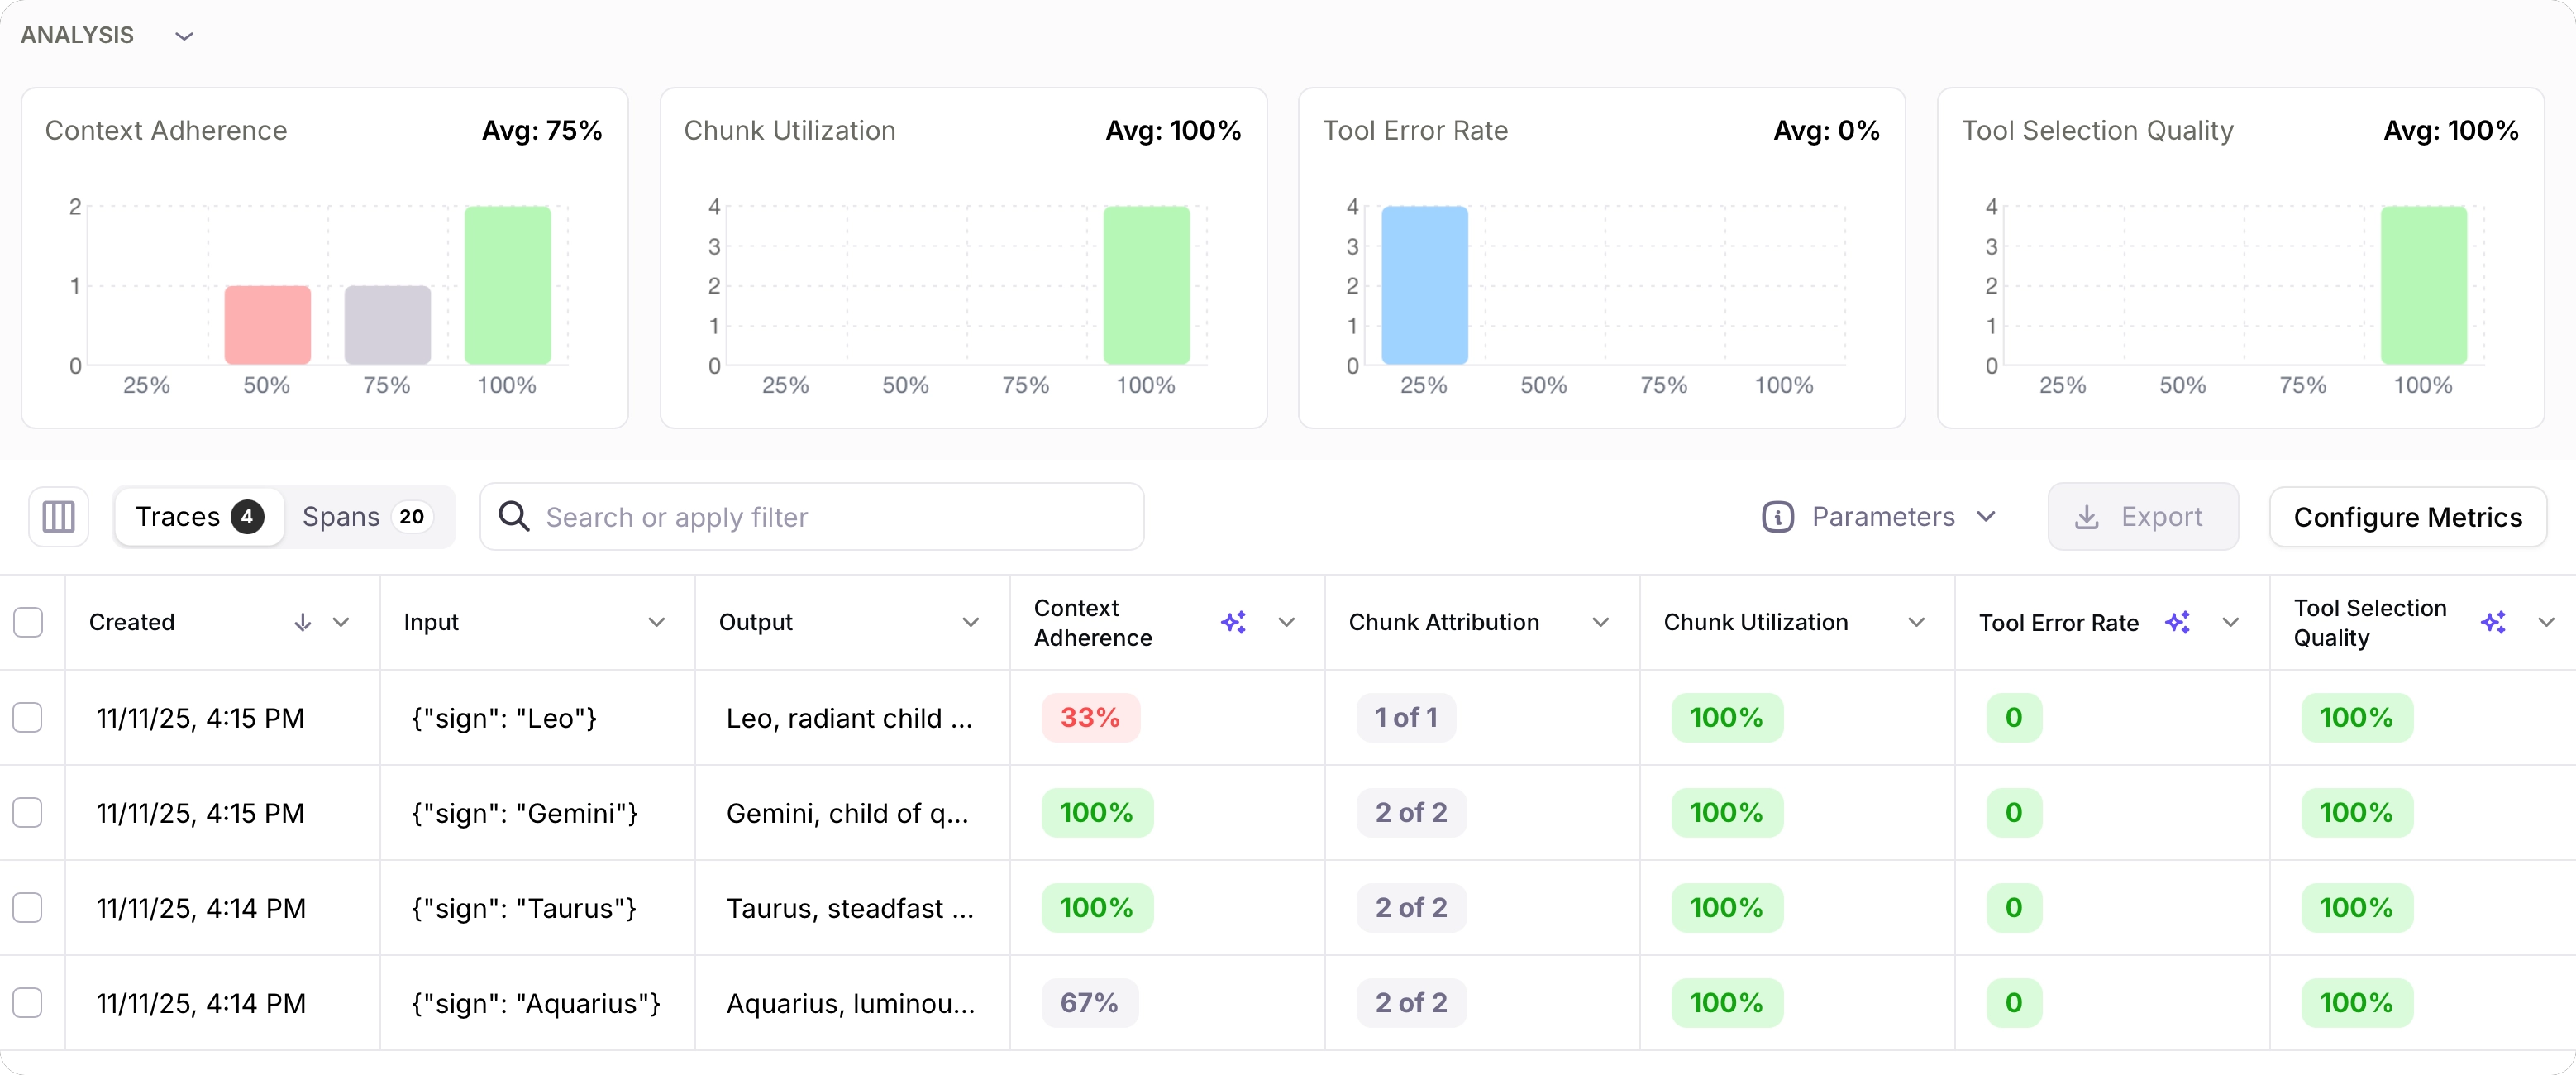
Add the following code to the experiment file to run the get horoscope function in an experiment using a dataset of star signs.This code runs the experiment, and calculates tool error rate, tool selection quality, chunk attribution and utilization, and context adherence.The run experiment function runs the get horoscope code in the experiment. This code has logging for the LLM call, tool call, and RAG retriever code, but does not create a trace or a session. These are created in the applications main function.This is the correct way to write code that you want to run in an experiment. For each row in the dataset used in the experiment, a new trace is created. If you try to create other traces inside the code that the experiment runs, then the experiment will raise an error.You should either create sessions and traces outside the code that is run in the experiment, or inside your code check to see if you are in an experiment, and if so, not create a session or trace. See our documentation on running experiments against custom functions for more details.
Next steps
Run experiments in code
Learn how to run experiments in unit tests that you can use during development, or in your CI/CD pipelines.
Run experiments in unit tests
Learn how to run experiments in unit tests that you can use during development, or in your CI/CD pipelines.